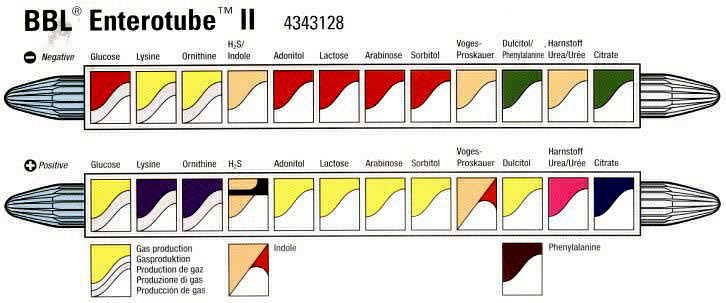
BISC209: Enterotube
Enterotube inoculation Protocol
1. Examine the ENTEROTUBE™ Note the following components: 1) caps on each end of the test system; 2) the different media and test compartments; 3) the inoculating needle within the system.
2. Label the ENTEROTUBE™ and select a fresh, isolated colony to test.
3. Remove both end caps of the system, and without flaming the Enterotube's protruding inoculating needle; pickup a colony* directly onto the tip of the Enterotube needle. Try not to touch the agar with this wire.
4. Next, with a turning motion twist and pull the needle through all compartments of the system. This action will serve to inoculate the ENTEROTUBE™.
5. Reinsert the needle (without flaming) into the system, again using a twisting motion. Stop when the needle's tip is seen in the citrate compartment.
6. A notch on the needle should be evident. Break off the needle at this point by bending it at the notch. (The portion of the needle remaining in some of the compartments will maintain the required anaerobic conditions).
7. Using the broken off piece of wire, punch holes in the covering of the other 8 compartments to provide aerobic conditions for these tests.
8. Incubate the ENTEROTUBE™ at 37˚C for 24 hours with the tube lying on a flat surface.
9. After incubation, examine the ENTEROTUBE™. Positive reactions for the different compartments are shown in the manucturer's brochure.
Links to Labs
Lab 1
Lab 2
Lab 3
Lab 4
Lab 5
Lab 6
Lab 7
Lab 8
Lab 9
Lab 10
Lab11
Lab 12
