BISC110/S13: Series 1 Lab 1 Boot Camp: Difference between revisions
New page: {{Template:BISC110/S13}} <div style="padding: 10px; width: 725px; border: 5px solid #00cc66;"> <BR> =='''Objectives: In this lab you will learn:'''== #Metric measurements and conversions... |
No edit summary |
||
| Line 101: | Line 101: | ||
#Transfer the solution into an empty 100mL graduated cylinder and bring the volume to exactly 50mL with deionized water. | #Transfer the solution into an empty 100mL graduated cylinder and bring the volume to exactly 50mL with deionized water. | ||
#Transfer the solution to an empty storage bottle. Label the bottle with the name and concentration of the solution, your initials, your lab section and date.<br> | #Transfer the solution to an empty storage bottle. Label the bottle with the name and concentration of the solution, your initials, your lab section and date.<br> | ||
<br> | |||
=='''PART IV: Dilutions'''== | |||
A helpful animation of [http://www.wellesley.edu/Biology/Concepts/Html/dilutions.html dilution making].<br> | |||
Many solutions will be provided to you this semester as stock solutions. A stock solution is a solution that has been prepared with a greater concentration of solute than is needed for a procedure, so it must be diluted to the proper concentration(s) before use. Consequently, it is very important that you master the concepts and techniques of preparing dilutions early in the semester. A dilution is made by taking an aliquot (a measured portion) of a stock solution, and adding to it an aliquot of a solvent (water or a buffer). This creates a new solution with a lower concentration of solute than was contained in the stock solution. Since the solute concentration of the stock solution is known as well as the volumes of stock and solvent, it is possible to calculate the concentration of solute in the dilute solution. The dilute solution is always less concentrated than the stock or starting solution. There are several ways to describe and prepare dilutions. Explanations are provided in this section as well as a laboratory exercise to introduce you to dilution preparation. | |||
'''A. VOLUME-TO-VOLUME DILUTIONS''' | |||
'''1. Ratio Method''' | |||
This type of dilution describes the ratio of the solute to the total volume of the dilute solution. For example, to make a 1:10 dilution of a 1M NaCl solution, you would mix one part of the 1M solution with 9 parts of solvent (probably water), for a total of ten parts. If you needed 10mL of the 1:10 dilution, then you would mix 1mL of the 1M NaCl with 9mL of water yielding a total volume of 10mL. If you needed 100mL of the 1:10 dilution, then you would mix 10mL of the 1M NaCl with 90mL of water yielding a total volume of 100mL. The new concentration of NaCl in both solutions is determined by multiplying the stock concentration by the dilution ratio: | |||
1M NaCl x 1/10 = 0.1M NaCl | |||
'''2. Direct Calculation Method''' | |||
Sometimes it is necessary to use an aliquot of one solution to make a specific volume of a more dilute solution. To calculate the volume of the more concentrated solution that will be needed to prepare the new solution, you can use the formula: | |||
V1 x C1 = V2 x C2 <br> | |||
V1= volume of more concentrated solution needed to make the new solution (usually the unknown) <br> | |||
C1= concentration of starting solution <br> | |||
V2= final volume of new solution <br> | |||
C2= final concentration of new solution (must be less than C1) <br> | |||
For example, if you have 2.5 ml of a 1M solution of NaCl and you want to make 3 ml of a 0.33M solution of NaCl, you can use the formula to calculate how much of the 1M solution you will need. | |||
V1 x C1 = V2 x C2 <br> | |||
(V1)(1M) = (3mL)(0.33M) <br> | |||
V1 = (3mL) (0.33M)/1M <br> | |||
V1 = 1mL <br> | |||
The calculations show that you will need to use 1mL of the 1M solution. Since the diluted solution is to have a final volume of 3mL, you can calculate the volume of solvent by subtracting V1 from V2 : 3mL – 1mL = 2mL. Therefore, adding 2mL of solvent to 1 ml of a 1M solution of NaCl will yield 3mL of a 0.33M NaCl solution. | |||
'''3. Serial Dilutions''' | |||
Serial dilutions involve the preparation of successive dilutions that vary the concentration of the solute by a constant factor, so that each successive dilution is a multiple of the previous dilution. For example, in ten-fold serial dilutions each successive dilution is one tenth of the previous dilution yielding dilution ratios of 1/10, 1/100, 1/1000, and so on. Serial dilutions may be used to prepare a series of standard concentrations for a biochemical assay, or to dilute a very dense culture of microorganisms to a concentration suitable for counting. It is very important to prepare serial dilutions carefully since each successive dilution will magnify the effect of any previous error. | |||
How would you prepare a dilution series? As shown in Figure 1, you could begin with a stock solution of 1 mg/ml and set up a series of dilutions in which the dilution ratio relative to the stock solution progressively changes by one-half. In this instance, the concentrations of the successively diluted solutions would be 1/2, 1/4, 1/8, and 1/16 of the original concentration. If you needed 1 ml of each dilution, you could set up a series of 5 test tubes, with the first one empty and the rest with 1mL of solvent. You would then pipette 2mL (twice the volume needed for your test) into tube 1. Then transfer 1mL of that volume to tube 2, making a 1/2 dilution since there was 1mL of water in tube 2. After mixing the contents of tube 2, half that sample (1mL) would be transferred to tube 3, making a 1/4 dilution since the 1 ml of water that was already in tube 3 will dilute the incoming 1/2 dilution by 1/2 (1/2 x 1/2 = 1/4). This procedure is repeated until the last tube is reached, which will contain 2 ml of a 1/16 dilution of the stock solution. | |||
[[Image:BISC110.1.10.jpg]] | |||
'''B. Prepare Serial Dilutions of Cobalt Chloride and Cupric Chloride Stock Solutions''' | |||
<br> | |||
Each pair will use the stock solution you just prepared to create a series of 4 dilutions. Each dilution in the series will differ from the previous dilution by 1/2, so the dilution ratio for each tube is 1/2, 1/4, 1/8 and 1/16. Calculate the concentrations of cupric chloride or cobalt chloride that the tubes will contain after the dilutions have been prepared, and record them in your lab notebook. | |||
#Label four microcentrifuge tubes with the dilution ratios: 1/2, 1/4, 1/8 and 1/16. | |||
#With a 200 μL micropipette and clean tip add 100 μL deionized water to each tube. Discard the tip as instructed by your instructor. | |||
#Using a clean pipette tip, add 100 μL of stock solution to the tube labeled 1/2, close the lid, and mix by inversion (not vortexing). | |||
#Use a clean pipette tip to add 100 μL of the 1/2 dilution to the tube labeled 1/4; mix. | |||
#Use a clean pipette tip to add 100 μL of 1/4 dilution to the tube labeled 1/8; mix. | |||
#Use a clean pipette tip to add 100 μL of 1/8 dilution to the tube labeled 1/16; mix. | |||
#Using a clean pipette tip, remove 100 μL of solution from the 1/16 tube, and discard it in the sink. You now have four tubes containing 100 μL of four different working concentrations of your reagent. Observe the color intensity of the four solutions and record in your lab notebook. Also, observe the relative volumes of the four solutions. If they are different from each other, then inaccurate pipetting has occurred. Save these dilutions for use next week.<BR> | |||
Revision as of 02:21, 20 December 2012

Objectives: In this lab you will learn:
- Metric measurements and conversions
- Use of basic laboratory equipment
- Preparation of solutions
- Dilution from a stock
- Calculating effective concentration
Series 1 Lab 1 Scientific Investigation Boot Camp
In this laboratory, we will review the metric system as it applies to laboratory science, and learn how to use some basic laboratory measuring equipment by preparing a cupric chloride or cobalt chloride solution. You will also become familiar with the compound microscope by using it to examine the ciliated protozoan Tetrahymena pyriformis.
PART I: Metric Measurements
Measurements in pounds, miles and gallons are still commonly used in the United States, but the metric system, which was developed in France in the 1790’s, has several advantages over the English system and is more convenient for scientific use. The metric system uses decimals and a system of prefixes to define the measurements of a variety of parameters. Since it is based on powers of ten, calculations using the metric system are simpler than the English system.
The metric units you will commonly use in the lab are:

To describe objects that are larger or smaller than the base units, a system of prefixes is used. The prefixes and corresponding exponential values you will commonly use to change the size of the base units are:

The power of 10 in the exponent column in the table above indicates the placement of the decimal point for that measurement. For example, 103 is equivalent to 1.0 x 10³ and can be converted to 1000 by moving the decimal point 3 places to the right corresponding to the exponent value equal to 3. Similarly, 2.5 x 10³ is converted to 2500 by once again moving the decimal point 3 places to the right. If the exponent is negative, the decimal point must be moved to the left the correct number of places. For example, we can convert 2.5 x 10⁻² to 0.025 by moving the decimal point 2 places to the left. The use of exponents of 10 to place the decimal point is called scientific notation. Scientific notation is used to represent very large or very small numbers in calculations and scientific writing.
It is important to become familiar with measurements expressed in metric units and to be able to convert between these units (from grams to milligrams, for example). Conversions are straightforward since the power of ten between each unit is known. Since there are 1000 milligrams in each gram, a sample that weighs 1 gram also weighs 1000 milligrams. To keep track of the decimal point, 1000 milligrams is best written in scientific notation as 1.0 x 10³, mg.
PART II: Basic Laboratory Equipment
In the first section of today’s lab, you reviewed the metric system as it is used to describe lengths, weights, volumes and temperatures. This section contains descriptions of some of the laboratory equipment available to make these measurements. With these tools, it is possible to make solutions of known concentrations and to accurately measure portions of these solutions. In Part III of this lab, you will use some of the equipment to prepare a solution needed for Parts IV and V of the lab. You will be using several types of containers and measurement devices in the laboratory this semester. The following pages describe some of the basic tools needed in the first series of laboratories. As the semester progresses, you will be introduced to more complex equipment. Please review the following descriptions before you use the equipment today, and direct any questions to your instructor.
A. Descriptions of Laboratory Equipment
Beakers are used to prepare solutions and can range in size from 10mL to 4L. Any volume markings present on a beaker are only approximate and are not an accurate indication of volume. Beakers are not used to store solutions.
Erlenmeyer Flasks are used to prepare solutions and microbiological media. They range in size from 25mL to 6L. Volume markings on an Erlenmeyer flask are only approximate and are not an accurate measure of volume.
Test tubes will be provided to you throughout the semester for experimentation. Round bottom glass test tubes will be used for making dilutions and biochemical assays. These tubes are identified by the diameter of the tube, so a 13mm test tube has a diameter of 13mm. A 16mm tube has a diameter of 16mm and can hold a greater volume of liquid than the 13mm. Centrifuge tubes can be glass or plastic, are often pointed at the bottom, and identified by the maximum volume they can contain. They are used in a centrifuge to separate biologic materials.
Graduated Cylinders are used to measure volumes from 10mL to 2L. The gradations on the cylinder are an accurate measure of the volume of liquid contained in the cylinder. The liquid in the cylinder will form a meniscus as shown in the diagram below. To measure the proper volume, the bottom of the meniscus must rest on the desired volume mark on the cylinder.

Serological Pipettes accurately measure volumes from about 1.0mL to 10mL using the gradations on the pipettes. They may be made of glass or plastic. Glass pipettes are washed and reused, while plastic pipettes are disposable. The markings on these pipettes are often in descending order, so to deliver 6mL using a 10mL pipette, the liquid must be drawn to the 4 mark on the pipette. To use the serological pipettes a green or blue pipette pump is attached to the top of the pipette. The blue one is used for smaller pipets (1ml or 2ml) and the green one is used for 5ml and 10 ml serologic pipettes. Never pipette by mouth. The pointed end of the pipette is then submerged in the liquid, and the liquid drawn into the pipette by turning the wheel on the pump until the correct volume is measured. To dispense the liquid from the pipette, simply depress the plunger of the pump. Some serological pipettes will dispense all liquid from the pipette tip; others are designed to retain a small amount of liquid in the tip. Remember the glass pipettes are not disposable. They should be placed tips down in the plastic pipette canisters at each bench after use.
Micropipettes are used to measure volumes less than 1.0mL. They may be fixed volume or adjustable volume pipettes. You are provided with 3 adjustable volume pipettes: one for 200-1000 microliters (μL), one for 20-200 μL, and one for 1-20 μL. To use a micropipette, attach a plastic tip to the end, depress the plunger on the micropipette to the first stop, and insert the tip into the liquid you wish to measure. Slowly release the plunger taking care not to trap any air bubbles in the tip or splatter any liquid onto the pipette base. Withdraw the tip from the liquid and dispense the volume into the desired receptacle by depressing the plunger as far as you can. Be sure to keep the plunger depressed until it is removed from the liquid, or you will remove some of the material you have just measured. Used tips are discarded in the trash or in the orange biohazard bag on your bench depending on what you have been pipetting.
Pasteur Pipettes are named after Louis Pasteur. They are glass dropper pipettes that require the addition of a separate bulb at the top to create the suction. Pasteur pipettes are not used to measure volume but are used to transfer liquid from one place to another. For example, Pasteur pipettes are often used to remove all the liquid from a tube after centrifugation.
Top Load Balances are used to weigh solid materials greater than 1.0 gram accurately. Either a plastic weigh boat or weighing paper is placed on the balance, and the balance is set to zero (tared). The solid material is then placed in the weigh boat or on the weighing paper for measurement. When the proper amount of solid material has been added, it is transferred to a beaker or Erlenmeyer flask, solvent added, and mixed until the solid material is dissolved.
Magnetic Mixers are used in the laboratory to facilitate the mixing of materials. They are particularly useful when making solutions. The mixer has a magnetic core that can rotate at various speeds. If a beaker filled with materials to be mixed is placed on the mixer and a magnetic stir bar added into the beaker, the mixer can be adjusted to mix the material at the proper rate. The mixing will continue until the mixer is turned off. A magnetic wand is then used to remove the stir bar from the solution before it is brought to final volume.
Vortex Mixers are used in the laboratory to mix materials contained in test tubes. The force of the mixing is adjustable, and the mixer can be set to run only when a tube is inserted into the mixer receptacle. The force of the mixer should be set so that the liquid in the tube forms a vortex as it mixes, and the tube containing the liquid should always be pointed away from you or your lab partner. If a tube is more than 2/3 full, a vortex mixer should not be used because the liquid will splatter out of the tube.
Centrifuges are instruments that use centrifugal force to separate biological materials. You will be using several types of centrifuges this semester. Clinical centrifuges are bench top models that accommodate various sizes of centrifuge tubes depending upon the type of holder installed. Refrigerated centrifuges are used when it is necessary to maintain the biological material at a constant cool temperature and can also accommodate several sizes of tubes. Microcentrifuges are used for very small plastic centrifuge tubes called microfuge tubes. All centrifuges require that the centrifuge tube containing the biological material be placed across from a tube of the same weight. We call this “balancing the centrifuge.” Tubes cannot be balanced by filling them to equal volumes, as these may not have the same weight. They must be balanced by weight, using a scale.
B. Practice Exercises with Pipettes
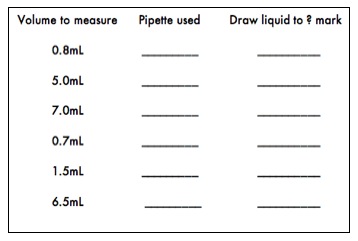
- Practice using the 10, 5, 2 or 1 milliliter pipettes by transferring the following volumes of deionized water into 13mm test tubes. Observe the volume differences. To insure the best accuracy, it is important that the pipette chosen to measure a specific volume has a total volume close to the volume to be measured. For example, the best pipette available to measure a volume of 1.7mL is a 2.0mL pipette. Remember that many serological pipettes have the volume markings in descending order, so be sure to draw the liquid to the appropriate mark on the pipette so the correct volume is dispensed.
- Adjustable micropipettes are very expensive, so please take great care in using them. To use a micropipette, attach a plastic tip to the end, depress the plunger on the micropipette to the first stop, and insert the tip into the liquid you wish to measure. Slowly release the plunger taking care not to trap any air bubbles in the tip or splatter any liquid onto the pipette base. Withdraw the tip from the liquid and dispense the volume into the desired receptacle by depressing the plunger as far as you can. Be sure to keep the plunger depressed until it is removed from the liquid, or you will remove some of the material you have just measured. Be sure never to hold a pipette upside down or sideways when liquid is in the tip. Also, if you feel resistance when changing the volume setting, stop immediately and ask your instructor for help. The following website Using a Micropipette has more detailed information about micropipette use.

Practice using the micropipettes by completing the following exercise. Keep in mind that this is an exercise designed to allow you to practice and test your pipetting technique. When carrying out experiments, it is always important to choose the best pipette for the volume desired.
- To test your micropipetting prowess and/or to calibrate your P1000, P200, and P20 micropipettes, first label 6 microfuge tubes (1-6) and weigh them on the top loading balance. Remember to zero the balance before weighing the tubes. Record the weights in the table below.
- Following the table below, pipet the specified volumes into the pre-weighed microfuge tubes prepared above using either your P20, P200 or P1000, as specified, then reweigh them. Record all weights.
- Calculate the weight of the water in each tube in grams. (1000 microliters of water should weigh 1 gram at room temperature.)
- If the water in any tube weighs more or less than 1 gram, your pipetting technique may need revision. Repeat steps 1-3 for the tube that is off the expected weight. If your water weight is significantly off after several repeated attempts, your pipette (or your technique) may need adjustment. Ask your instructor to watch your technique and/or to recalibrate your pipette.

PART III: Solutions
When doing biological experiments, it is essential that the exact concentration of every solution be known. It is also important to know the pH of a solution since pH is often critical in biological reactions. Buffered solutions, which can absorb minor challenges to pH, are often used to maintain the pH of a solution. Different ways of describing the concentration of a solution as well as pH and buffers are reviewed below.
A. Classifications of Solutions
1. Percentage by weight (w/v) Solutions The number of grams in 100mL of solution is indicated by the percentage. For example, a 1% solution has one gram of solid in a final volume of 100mL solution. To make this type of solution properly, you should weigh 1.0g of the solid material and dissolve it in slightly less than 100mL of solvent. Once the solids have dissolved, you can bring the volume up to 100mL. If one liter of a 1% solution is needed, then 10g of solid would be dissolved in 1000mL of solution to maintain the 1% ratio of solid weight to solution volume.
2. Percentage by volume (v/v) Solutions In this case the percentage indicates the volume of the full strength solution in 100mL of dilute solution. For example, a 60% ethanol solution is made by mixing 60mL of 100% ethanol with 40mL of water. If only 10mL of a 60% ethanol solution is needed, then 6mL of 100% ethanol should be mixed with 4mL of water.
3. Molar Solutions A 1 molar (1M) solution is a solution in which 1 mole of a compound is dissolved in a final volume of 1 liter (1L). For example, the molecular weight of sodium chloride (NaCl) is 58.44, so one gram molecular weight (1 mole) is 58.44g. If you dissolve 58.44g of NaCl in a final volume of 1 liter, you have made a 1M NaCl solution. To make a 0.1M NaCl solution, you could weigh 5.844g of NaCl and dissolve it in a final volume of 1L water.
Sample Problem: Convert a 0.2M solution of NaCl into %(w/v) units. 0.2M = 0.2mol/L = (58.44g/mol)(0.2mol)/L = 11.7g/1000mL = 1.17g/100mL = 1.17%(w/v)
4. Buffered Solutions A buffered solution resists changes in pH. The pH of a solution is a measure of its acidity, and is defined as the negative log of the hydrogen ion concentration. The pH scale ranges from 0 to 14 where 0 is the most acidic, 14 is the most basic, and 7 is neutral. Since pH is a log scale, the difference between pH 5 and pH 6, for example, is a factor of 10. Buffers are used when biological samples need to be kept within a narrow range of pH to maintain activity. The enzymes involved in biochemical reactions often require a narrow pH range. This range is usually 7.2–7.4 for human and animal tissues. A phosphate buffer is commonly used in the biology laboratory, because it exhibits excellent buffering capacity in the neutral pH range. It is made up of a mixture of sodium monobasic phosphate (NaH2PO4) and sodium dibasic phosphate (Na2HPO4) dissolved in water.
B. Solution Preparation
To prepare the solutions needed in later exercises, the 4 students at one lab table will prepare two different solutions. One pair of students will prepare 50mL of a 0.11M solution of copper (II) chloride dihydrate (MW=170.5) and the other pair of students will prepare 50mL of a 0.26M solution of cobalt chloride hexahydrate (MW=237.9).
- Calculate the correct weight of the material to yield 50mL of the proper molarity for the cupric or cobalt chloride solutions and record all calculations in your lab notebook. What would be the millimolar concentration of your solution? Have your lab instructor check your calculations before you weigh the material.
- Put on gloves before handling chemicals in the solid state. Nitrile gloves are available on the bench at the front of the laboratory. Please advise your lab instructor if you have a nitrile allergy.
- Using one of the top loading balances, weigh the correct amount of solid material and transfer it to a 250mL beaker.
- Using a graduated cylinder, add 35mL of deionized water to the beaker. Add a magnetic stir bar and mix on a magnetic mixer until all the solid material has dissolved. Remove the magnetic stir bar.
- Transfer the solution into an empty 100mL graduated cylinder and bring the volume to exactly 50mL with deionized water.
- Transfer the solution to an empty storage bottle. Label the bottle with the name and concentration of the solution, your initials, your lab section and date.
PART IV: Dilutions
A helpful animation of dilution making.
Many solutions will be provided to you this semester as stock solutions. A stock solution is a solution that has been prepared with a greater concentration of solute than is needed for a procedure, so it must be diluted to the proper concentration(s) before use. Consequently, it is very important that you master the concepts and techniques of preparing dilutions early in the semester. A dilution is made by taking an aliquot (a measured portion) of a stock solution, and adding to it an aliquot of a solvent (water or a buffer). This creates a new solution with a lower concentration of solute than was contained in the stock solution. Since the solute concentration of the stock solution is known as well as the volumes of stock and solvent, it is possible to calculate the concentration of solute in the dilute solution. The dilute solution is always less concentrated than the stock or starting solution. There are several ways to describe and prepare dilutions. Explanations are provided in this section as well as a laboratory exercise to introduce you to dilution preparation.
A. VOLUME-TO-VOLUME DILUTIONS
1. Ratio Method
This type of dilution describes the ratio of the solute to the total volume of the dilute solution. For example, to make a 1:10 dilution of a 1M NaCl solution, you would mix one part of the 1M solution with 9 parts of solvent (probably water), for a total of ten parts. If you needed 10mL of the 1:10 dilution, then you would mix 1mL of the 1M NaCl with 9mL of water yielding a total volume of 10mL. If you needed 100mL of the 1:10 dilution, then you would mix 10mL of the 1M NaCl with 90mL of water yielding a total volume of 100mL. The new concentration of NaCl in both solutions is determined by multiplying the stock concentration by the dilution ratio:
1M NaCl x 1/10 = 0.1M NaCl
2. Direct Calculation Method
Sometimes it is necessary to use an aliquot of one solution to make a specific volume of a more dilute solution. To calculate the volume of the more concentrated solution that will be needed to prepare the new solution, you can use the formula:
V1 x C1 = V2 x C2
V1= volume of more concentrated solution needed to make the new solution (usually the unknown)
C1= concentration of starting solution
V2= final volume of new solution
C2= final concentration of new solution (must be less than C1)
For example, if you have 2.5 ml of a 1M solution of NaCl and you want to make 3 ml of a 0.33M solution of NaCl, you can use the formula to calculate how much of the 1M solution you will need.
V1 x C1 = V2 x C2
(V1)(1M) = (3mL)(0.33M)
V1 = (3mL) (0.33M)/1M
V1 = 1mL
The calculations show that you will need to use 1mL of the 1M solution. Since the diluted solution is to have a final volume of 3mL, you can calculate the volume of solvent by subtracting V1 from V2 : 3mL – 1mL = 2mL. Therefore, adding 2mL of solvent to 1 ml of a 1M solution of NaCl will yield 3mL of a 0.33M NaCl solution.
3. Serial Dilutions
Serial dilutions involve the preparation of successive dilutions that vary the concentration of the solute by a constant factor, so that each successive dilution is a multiple of the previous dilution. For example, in ten-fold serial dilutions each successive dilution is one tenth of the previous dilution yielding dilution ratios of 1/10, 1/100, 1/1000, and so on. Serial dilutions may be used to prepare a series of standard concentrations for a biochemical assay, or to dilute a very dense culture of microorganisms to a concentration suitable for counting. It is very important to prepare serial dilutions carefully since each successive dilution will magnify the effect of any previous error.
How would you prepare a dilution series? As shown in Figure 1, you could begin with a stock solution of 1 mg/ml and set up a series of dilutions in which the dilution ratio relative to the stock solution progressively changes by one-half. In this instance, the concentrations of the successively diluted solutions would be 1/2, 1/4, 1/8, and 1/16 of the original concentration. If you needed 1 ml of each dilution, you could set up a series of 5 test tubes, with the first one empty and the rest with 1mL of solvent. You would then pipette 2mL (twice the volume needed for your test) into tube 1. Then transfer 1mL of that volume to tube 2, making a 1/2 dilution since there was 1mL of water in tube 2. After mixing the contents of tube 2, half that sample (1mL) would be transferred to tube 3, making a 1/4 dilution since the 1 ml of water that was already in tube 3 will dilute the incoming 1/2 dilution by 1/2 (1/2 x 1/2 = 1/4). This procedure is repeated until the last tube is reached, which will contain 2 ml of a 1/16 dilution of the stock solution.

B. Prepare Serial Dilutions of Cobalt Chloride and Cupric Chloride Stock Solutions
Each pair will use the stock solution you just prepared to create a series of 4 dilutions. Each dilution in the series will differ from the previous dilution by 1/2, so the dilution ratio for each tube is 1/2, 1/4, 1/8 and 1/16. Calculate the concentrations of cupric chloride or cobalt chloride that the tubes will contain after the dilutions have been prepared, and record them in your lab notebook.
- Label four microcentrifuge tubes with the dilution ratios: 1/2, 1/4, 1/8 and 1/16.
- With a 200 μL micropipette and clean tip add 100 μL deionized water to each tube. Discard the tip as instructed by your instructor.
- Using a clean pipette tip, add 100 μL of stock solution to the tube labeled 1/2, close the lid, and mix by inversion (not vortexing).
- Use a clean pipette tip to add 100 μL of the 1/2 dilution to the tube labeled 1/4; mix.
- Use a clean pipette tip to add 100 μL of 1/4 dilution to the tube labeled 1/8; mix.
- Use a clean pipette tip to add 100 μL of 1/8 dilution to the tube labeled 1/16; mix.
- Using a clean pipette tip, remove 100 μL of solution from the 1/16 tube, and discard it in the sink. You now have four tubes containing 100 μL of four different working concentrations of your reagent. Observe the color intensity of the four solutions and record in your lab notebook. Also, observe the relative volumes of the four solutions. If they are different from each other, then inaccurate pipetting has occurred. Save these dilutions for use next week.
