BME100 s2017:Group7 W1030AM L6
| Home People Lab Write-Up 1 | Lab Write-Up 2 | Lab Write-Up 3 Lab Write-Up 4 | Lab Write-Up 5 | Lab Write-Up 6 Course Logistics For Instructors Photos Wiki Editing Help | |||||
OUR COMPANY
Fluo-2.0 LAB 6 WRITE-UPBayesian StatisticsOverview of the Original Diagnosis System Our BME100 Lab tested 34 patients. These patients were divided into 17 teams, with 6 students each to test patients for the disease-associated SNP. Things that were done to prevent any source of error, was having multiple positive and negative controls of the patients DNA when running the PCR. In addition with these positive and negative controls, there were 3 replicates of the DNA for each droplet, or ImageJ. Then after the PCR there 3 images of replicate DNA for the different concentrations to prevent errors from occurring. With a total of 78 PCRs, there were 23 positives, 47 positives, and 8 blank data slots. Out of 26 recorded conclusions, 3 positive conclusions were successful, and 13 negative conclusions were successful. This yielded 10 blank data slots and no inconclusive data slots were recorded. One complication that could had arisen from the PCR experiment was taking the pictures of the droplets, as one student had to move the drop around in order to get a good photo. Another complication could have been how inconsistent getting the droplets the same size as the ones previous. One student found it difficult when getting the same dimensions of the droplets to remain consistent. Complications that could have arisen in this lab, is when doing the ImageJ calculations. It was difficult to be exact on the images that were analyzed, as the drop in the PCR wasn't an exact oval, so the results could have been skewed.
In calculation 1 and 2 which tested whether a person had the disease SNP or not. Calculation 1 had a reliability that was weak, with a Bayes value close to 50%. In calculation 2 the reliability was very strong, with a Bayes value close to 100%.
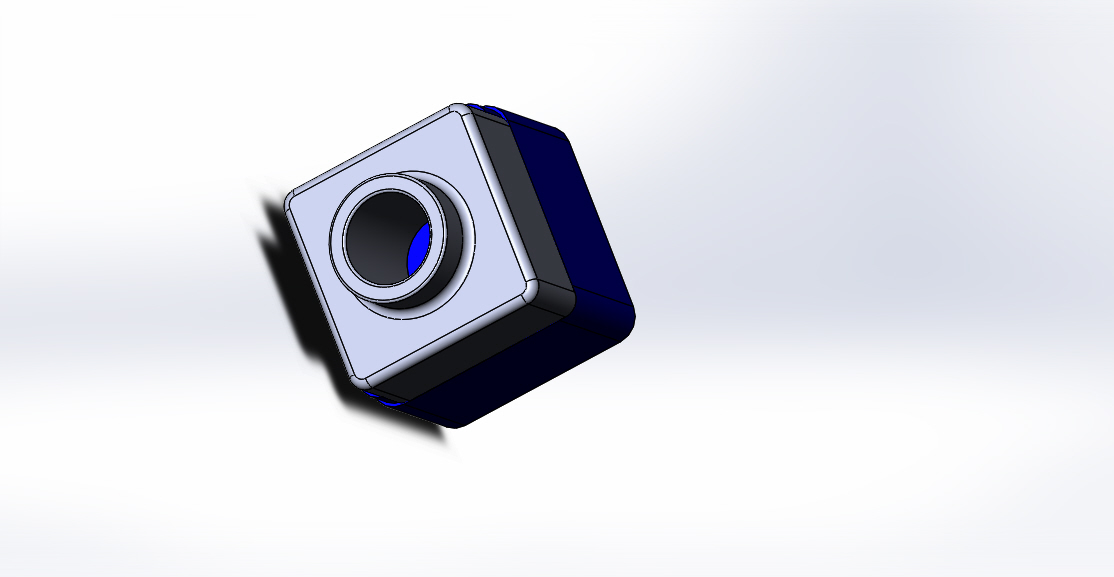
Intro to Computer-Aided Design3D Modeling The software that was used to create our design was Solidworks. It was pretty easy to create the camera, which we would attach to the fluorimeter in order to record the images that were needed. The design represents the size of the camera, which is relatively small to the size of the fluorimeter. Overall the experience of building the model was not that difficult to create, because of its simplicity. Our Design
In this edit to the original fluorimeter machine, an inexpensive bluetooth camera system is permanently attached to the fluorimeter, giving experimenters the ability to remotely control the capturing of images without constantly needing to touch the camera. This eliminates any discrepancies in imaging that arise from constantly removing the smartphone camera from the device to adjust samples and pressing the timer button on smartphone cameras to capture the images.
Feature 1: ConsumablesWhen speaking of consumables, few very important consumables are always added. When thinking about what is considered important to be included in consumables, the biggest detail is that the consumable is made for the device specifically. We are not adding anything new to our consumables though. Our new design will be able to use the standard consumable that come with kits. The standard consumable would be polymerase, deoxynucleotides, buffer, control template and primers, magnesium chloride and DMSO. Feature 2: Hardware - PCR Machine & FluorimeterThe Open PCR machine will be kept the same and used the same way as before in the system, since there were no major complications with its design. The Fluorimeter in the system will be modified by the addition of a go-pro style camera attached to the fluorimeter at a fixed position to ensure that images captured are consistent and therefore accurately indicate any minute differences among the various samples being tested and thus ensure more consistently accurate results.
| |||||


