BME100 f2017:Group6 W1030 L4

From OpenWetWare
Jump to navigationJump to search
BME 100 Fall 2017 Home
People
Lab Write-Up 1 | Lab Write-Up 2 | Lab Write-Up 3
Lab Write-Up 4 | Lab Write-Up 5 | Lab Write-Up 6
Course Logistics For Instructors
Photos
Wiki Editing Help


OUR TEAM

Name: Amy Cumiford
Role: Protocol Section
Name: Ray Regorgo
Role:Research and Development Section
Name: Jason Buis
Role:SNP Information & Primer Design Section


LAB 4 WRITE-UP

Protocol

Materials

  • Lab coat and disposable gloves
  • PCR reaction mix, 8 test tubes, 50 μL of each: Mix contains Taq DNA polymerase, MgCl2, and dNTP’s
  • DNA/ primer mix, 8 tubes, 50 μL each: Each mix contains a different template DNA, all tubes with same forward and reverse primer
  • A strip of empty PCR tubes
  • Disposable pipettes
  • Cup for discarded tips
  • Micropipettor
  • OpenPCR machine:

PCR Reaction Sample List

Tube Label PCR Reaction Sample Patient ID
G6 + Positive control
G6 1-1 Patient 1, replicate 1 72973
G6 1-2 Patient 1, replicate 2 72973
G6 1-3 Patient 1, replicate 3 72973
G6 - Negative control
G6 2-1 Patient 2, replicate 1 98625
G6 2-2 Patient 2, replicate 2 98625
G6 2-3 Patient 2, replicate 3 98625


DNA Sample Set-up Procedure
Step 1. Collect all the materials listed above.
Step 2. Separate the eight linked pack of PCR tubes by cutting the tube’s connection strip in middle, so there are two sets of four connected tubes
Step 3. Label ONLY the sides of each tube with the positive control tubes labeled as G6 +, G6 1-1, G6 1-2, G6 1-3, and the negative control tubes as G6 -, G6 2-1, G6 2-2, G6 2-3. Then place all of the tubes into a rack.
Step 4. Using disposable pipettor tips, insert 50 μL of the matching PCR reaction mix of each tube’s label and be sure to depose of the pipettes after each sample.
Step 5. Using a new disposable pipettor, insert 50 μL of DNA/primer mix into all the tubes.
Step 6. Tightly secure the lids on all the PCR reaction tubes
Step 7. Place the tubes into assigned PCR machine and only start the machine if all 16 slots are filled.

OpenPCR program
The PCR machine is programed to heat and cool the temperature of the DNA to force it to replicate. The PCR machine starts this by having it’s lid heated to 100°C and setting it’s initial step to heat up to 95°C for 2 minutes to pull apart the DNA’s double helix. Then for total of 25 cycles, the machine is to denature at 95°C for 30 seconds, anneal at 57°C for 30 seconds, then extend at 72°C for 30 seconds. During this process, when the temperature changes to 50°C is causing the primers to attach to the single strand DNA at the desired locations. Then, when the DNA is heated to 72°C the DNA polymerase adds a complementary nucleotides where the primer is. Lastly, the PCR is set to 72°C for 2 minutes to combine all the DNA strands back together, and for hold at 4°C.
HEATED LID: 100°C
INITIAL STEP: 95°C for 2 minutes
NUMBER OF CYCLES: 25
Denature at 95°C for 30 seconds
Anneal at 57°C for 30 seconds
Extend at 72°C for 30 seconds
FINAL STEP: 72°C for 2 minutes
FINAL HOLD: 4°C

Research and Development

PCR - The Underlying Technology


Components of PCR

When performing a PCR, a Template DNA is needed. The DNA template contains the targeted DNA that is to be sequenced and can be found in saliva, blood, or a piece of hair, it only requires a very small amount1. During the reaction, primers locate the target DNA by attaching one primer to both ends of the targeted DNA1. DNA Polymerase is added to grab nucleotides from its surroundings and attach them to the proper sites to create DNA copies1. In PCR though, taq polymerase is used because it is found in an organism that can whithstand high temperatures, which is useful since PCR undergoes extremely hot temperatures1. Deoxyribonucleotides are the A’s C’s T’s G’s that make up the genetic code1.

Steps of PCR

PCR undergoes three major steps, denaturation, annealing and extension. In the first step, the temperature is set to 95 degrees celsius, the extreme heat causes the DNA to denature and separating the double helicase into two single stranded DNA1. In annealing, the temperature cools to 50 degrees celsius, the primers then come in and attach to the ends targeted DNA1. The third step, the temperature is set to 70 degrees celsius, the DNA polymerase comes in and locates the primers1. It then starts attaching complementary nucleotides, A codes to T and T codes to A and C codes to G and G codes to C, and when it gets to the end of the targeted DNA it falls off1. The DNA is stored and cooled in a 4 degree celsius environment. Steps two and three are repeated, where base pairing occurs, until millions of copies of the targeted DNA are produced1.

1. http://learn.genetics.utah.edu/content/labs/pcr/

SNP Information & Primer Design

Background: About the Disease SNP

A single nucleotide polymorphism also known as a SNP is the most common form of genetic mutation. It occurs when a single nucleotide is changed. When these SNP’s are the cause of a disease they are called disease SNP’s. Disease SNP’s most commonly occur in the DNA between genes and can act as markers for a disease. This is helpful because it more easily allows researchers to determine where a disease is in DNA.

Primer Design and Testing

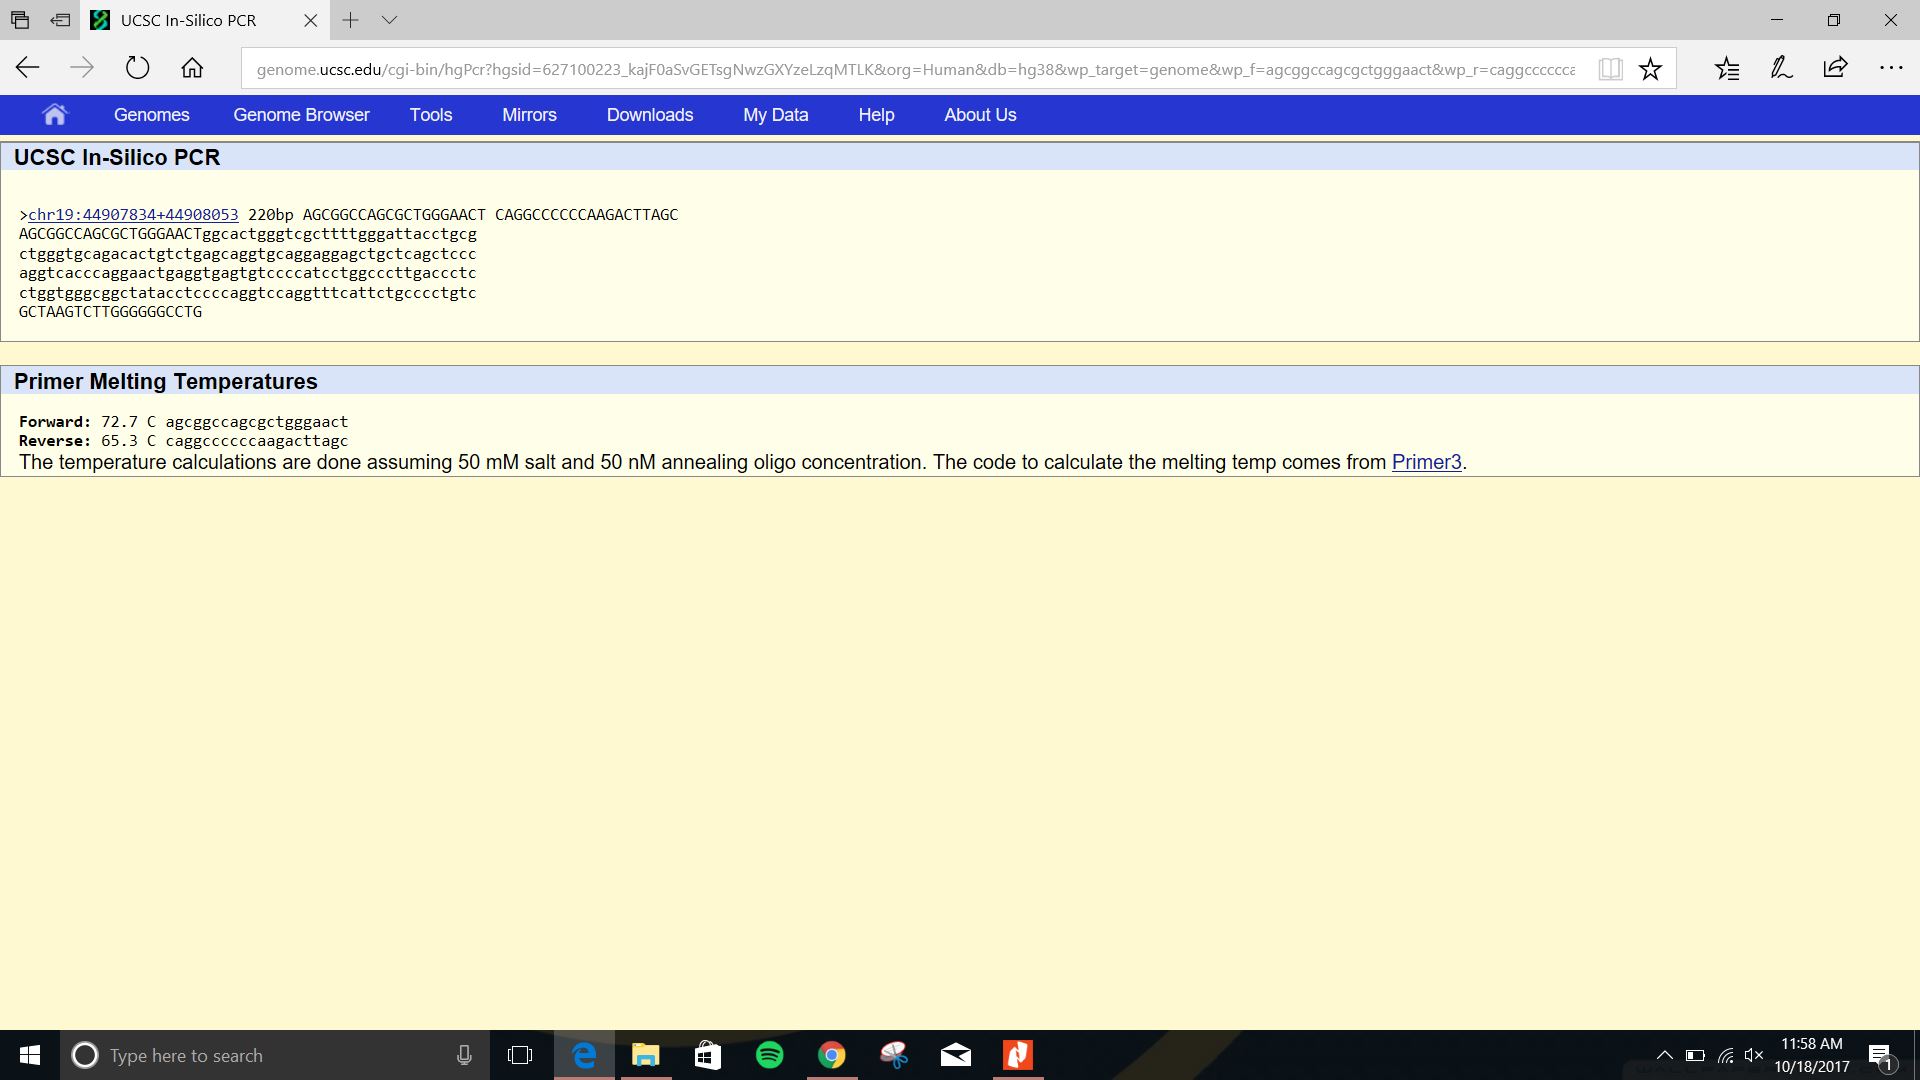
The Results of our summary test came back positive. This means that we correctly identified the location of the desired gene and we correctly identified the disease SNP.