McClean: Colony PCR (Yeast)
Overview
Our lab's version of yeast colony PCR, adapted from the Botstein Lab's protocol. Generally, we use this protocol for checking transformations (ie, to check that a drug marker or fluorescent protein has inserted into the genome correctly) or for PCRing up a piece of DNA from the genome to send for sequencing.
Materials
- HotMaster Taq Polymerase
- 10x HotMaster Buffer with Mg2+
- The polymerase and buffer come in the 5 Prime kit FP220320 ordered from Fisher
- 10mM dNTPs
- Forward primer (10μM)
- Reverse primer (10μM)
- Sterile H2O
Protocol
Add approximately 0.6μL of cells (tiny amount) with the tip of a sterile toothpick into the bottom of PCR tubes or plate. Once you've put cells into the PCR vessel, put the end of the toothpick into ~100μL sterile YPD in either an eppendorf or the well of a culture plate. You will use this to inoculate an overnight culture if your colony PCR works. Keep the eppendorfs or culture plate at either room temperature or 30°C while you run the PCR, either is fine.
Microwave cells in the PCR tube/plate for 1min (2X). Put microwaved cells on ice.
Add the reaction mix (described below) to the PCR tube/plate. It is recommended to make up a master mix if you are doing multiple colonies. Put the PCR tubes/plate into the thermocycler and run the Colony PCR program described below.
PCR Reaction Mix
| Reagent | Volume |
| 10x HotMaster Taq Buffer with Mg2+ | 5μL |
| 10mM dNTP mix | 1μL |
| 10μM Primer 1 | 1μL |
| 10μM Primer 2 | 1μL |
| HotMaster Taq DNA polymerase | 0.5μL |
| Sterile Water | 41.5μL |
| Total Volume | 50μL |
PCR Program
Run PCR on Colony PCR program :
- 95°C 4min
- For the following steps, reduce the temperature ‐0.5°C each cycle and cycle 30x's
- 94°C 1min
- 65°C 1min
- 68°C 2min
- For the following steps, cycle 30x's
- 94°C 30sec
- 50°C 30sec
- 72°C 1min
- 72°C 5min
- 4°C 5 min
- Please don't leave the thermocycler running at 4°C for longer than an hour or so, it wears out the machine. If you need to leave your PCR for longer, please change the last step of the program so that instead of holding at 4°C the program just ends (letting the samples come to room temperature). Letting the sample come to room temperature, even overnight, does not seem to cause any problems for the DNA.
- Taylor D. Scott 20:32, 19 March 2016 (EDT): I had success with the following program adapted from the touchdown protocol and the HotMaster manual (see references below). The amplification is lower (as is expected with fewer cycles), but it might work if you just need to quickly verify a colony.
- 95°C 4 min
- Repeat the following 30X
- 94°C 30 sec
- 52°C 30 sec (use the Applied Biosystems calculator [see references below] to find the right annealing temperature)
- 65°C 1 min 30 sec (approximately 1 min/kb)
- 72°C 5 min
- 4°C hold
'Colony PCR with the cheap Taq'
Add approximately 1/4 of a colony to a PCR tube and microwave for 30 sec. Immediately put the tubes on ice after microwaving. To each tube add the following:
| Reagent | Volume |
| 10X buffer | 10 μL |
| 10mM dNTP mix | 2 μL |
| 10μM Primer 1 | 1 μL |
| 10μM Primer 2 | 1 μL |
| Taq DNA polymerase | 2 μL |
| Autoclaved milliQ water | 84 μL |
| Total Volume | 100 μL |
Mix by pipetting up and down.
Run PCR with the following program:
- 94°C 5 min
- Repeat the following 25X
- 94°C 30 sec
- Ta 30 sec
- 72°C 1 min/kb
- 72°C 5 min
- 4°C hold
Where Ta is the appropriate annealing temperature for your primers. Gradient PCR can be used if the calculated Ta is not working.
'Agarose Gel Electrophoresis'
- Find stock gel or prepare the agarose +ethidium bromide gel according to these instructions: McClean: Agarose for gels
- Ethidium bromide is a known carcinogen. Use gloves, don't inhale fume, follow good lab practice.
- Melt the gel in the microwave and let it cool until it is warm but not painfully hot to the touch.
- Fill the gel container with the agarose gel until it just begins to overflow out of the small clear plastic chamber into the large container.
- Let the gel dry
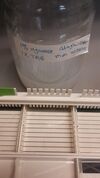
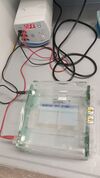
- Place your gel in the electrophoresis container and ensure that the TAE solution is filled to the marked line. If not, find TAE solution in the stock room and dilute it to 1x solution and fill the container.
- Insert 10 microL of DNA ladder (your reference points) into a well. For reference, 1kb ladder mix has 0.5kb, 1kb, 1.5kb, 2kb 3kb (double bright), 4kb, 5kb, 6kb, 8kb, 10kb fragments of DNA.
- On parafilm, pour ~1 microL drops of "10x blue juice" found in the "Gel Supplies Wisc Mini Fridge."
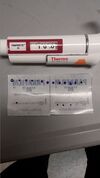
- Press "Set" on the device so that the two LEDs next to "Volt" are lit, and then press the "Run" button. (You may need to set a maximum amount of time too)
- A ~500bp fragment of DNA will require ~45min to be properly separated. A 7kb fragment of DNA will require ~1 1/2 hrs to be distinguishable.
- Place your gel slabs in the UV chamber, turn the UV chamber on, take a picture, turn on the connection to the printer, turn on the printer, then print the image by selecting Set> Print on the camera.
- Save the picture in you lab notebook and document the significance of each column.
'Freezing Down Positive Transformants'
Once you have run the colony PCR and confirmed which colonies are correct and which are not, take the 100μL of YPD that you set aside before, inoculate it into 4mls of fresh YPD in a test tube, and grow it to saturation overnight. Use this to freeze down glycerol stocks of the strain the following morning.
Notes
Please feel free to post comments, questions, or improvements to this protocol. Please sign your name to your note by adding '''*~~~~''': to the beginning of your tip.
*Megan N McClean The lengthy touchdown PCR program protocol was devised by Megan in the early days of the McClean lab when we were struggling with getting colony PCR to work reproducibly. The program is probably WAY longer and more complicated than it needs to be (and ties up the thermocycler for 4 hours at a time) so it would be worth someone's time to figure out a shorter program. Once you do that, please add it as another colony PCR protocol on openwetware and add a note here.
*Megan N McClean We probaby don't need to be using the Hotmaster Taq nor do we need to be doing 50μL reactions. If someone has some spare time, please try optimizing the protocol to use our super-cheapy Taq (ask Megan for where the stock is) and doing smaller reaction volumes.
*Megan N McClean 15:36, 25 March 2013 (EDT) See Sequencing Colony PCR Product for how I prep my colony PCR products for sequencing
- Taylor D. Scott 13:51, 15 April 2016 (EDT):The cheap Taq protocol can probably be scaled back to 50 μL per reaction, but I haven't tried it.
References
Botstein Lab protocols: http://www.princeton.edu/genomics/botstein/protocols/colony_PCR.htm
HotMaster manual: https://www.5prime.com/media/3388/hotmaster%20taq%20dna%20polymerase%20manual_5prime_1044359_032007.pdf
Applied Biosystems Tm calculator: http://www6.appliedbiosystems.com/support/techtools/calc/
Contact
or instead, discuss this protocol.


