BME100 f2013:W900 Group16 L6
| Home People Lab Write-Up 1 | Lab Write-Up 2 | Lab Write-Up 3 Lab Write-Up 4 | Lab Write-Up 5 | Lab Write-Up 6 Course Logistics For Instructors Photos Wiki Editing Help | ||||||
OUR COMPANY
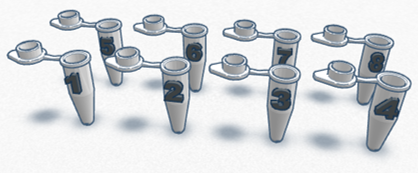
LAB 6 WRITE-UPComputer-Aided DesignTinkerCAD In this lab, TinkerCAD was used to make changes to the micropipette tubes. In the original design, it was difficult to determine which tube went to which material, and in order to fix this, numbers were added on the side of the tubes. To complete this, the main tool used was the change of workplane. The workplane was changed to be flat against the side of the tubes so that numbers could be directly written on the surface. The tool to change colors was also used to make them all uniform in the set.
Because of the errors created with the camera holder, it would be more practical to change the design so that it is easier to use. This could easily be completed on TinkerCAD because the current version could be modified into one that would be easier to use. One idea for this would be to make it so that the camera holder slides out from the fluorimeter so that it is able to stay a constant distance away without being moved. Also, it would be beneficial for the phone to be standing completely upright when the images are being taken. This would result in a clearer picture that is able to correctly detect the amount of light in each drop of substance. To demonstrate this on TinkerCAD, new shapes could be added in order to demonstrate how the camera holder would slide out from the fluorimeter. Also, The front of the camera stand could be extended to be completely vertical and taller to have a straight on picture of the device. Feature 1: Cancer SNP-Specific PrimersBackground on the cancer-associated mutation In the case provided to us,the gene rs 17879961 is a pathogenic single nucleotide polymorphism (SNP) that is usually found in Homo sapiens. This mutation occurs in the 22nd chromosome out of the 23 chromosomes that Homo sapiens usually have. The gene that this SNP affects is the CHEK2 which is known as the Checkpoint Kinase 2. The CHEK2 protein is cell cycle regulator that works to inhibit the CDC25C phosphatase which prevents entry into mitosis. The CHEK2 protein has also been found to stabilize the tumor suppressor protein p53 causing the cell cycle to go into arrest during the G1 stage. Primer design
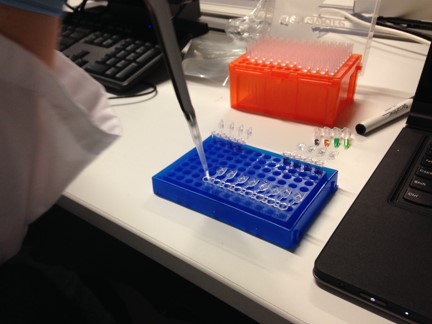
How the primers work: During the denaturing of DNA in the PCR reaction, the 94°C temperature causes the double helix DNA to unwind and separate into two complementary strands. As the process moves along to the annealing step, the primers attach themselves to the target sequence which is used as a template for the amplification. In this situation, the target sequence is the rs 17879961 SNP which is the cancer-associated SNP. In simple terms, PCR is the amplification of the target sequence and since the target sequence here is the cancer-associated SNP, this particular SNP will be found in every PCR result because that specific sequence was used as the template of the amplification. Feature 2: Consumables KitThe consumables, such as the micro-pipette tubes, micro-pipette, tips, PCR primers, and PCR mix will be packaged in an unfoldable box that functions as a "mini-lab station". The micro-pipette tubes will be packaged and stored in micro-pipette tube racks that are built into the sides of the box. While the racks can remain on the sides of the box, they are also removable so the individual can place the racks on the table to have better access to specific tubes during the experiment. The micro-pipette tubes will also have a non-glossy, smear-free coating on the side to make labeling each tube easier. A black foam stand with holes to insert micro-pipette tubes into is also included. Similar to the design of a micro-pipette tip holder, this stand is intended to hold micro-pipette tubes that have PCR mixtures, primers, and SBYR green. The PCR mixtures and primers come in clear bottles and are stored in a black foam stand.
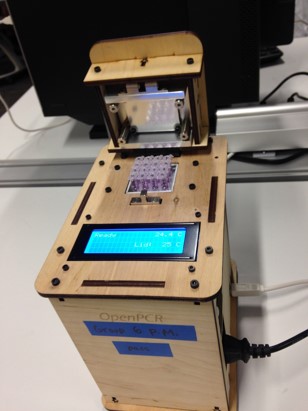
Feature 3: PCR Machine HardwareThe PCR machine will be utilized in parallel with the Consumables Kit to amplify DNA. The PCR machine will contain a back-lit LCD display, power supply, heat sink, open PCR control circuit, heating elements, and thermopile. The preceding components are essential in a thermal cycler allowing for denaturation, annealing, elongation, and resulting exponential growth of DNA. The PCR machine will run the cycles with the prepared samples created with the Consumables Kit. To obtain ease and increased efficiency in performing DNA amplification for lab/facility use, modifications of the machine will be implemented.
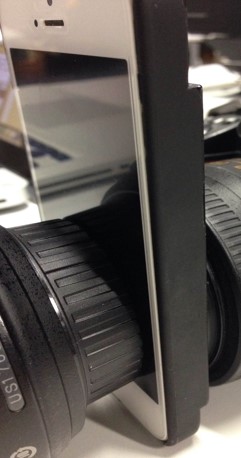
Feature 4: Fluorimeter HardwareThe fluorimeter will be used for the same purpose as it is now: to fluoresce the drop of SYBR green and PCR product sample to identify whether or not the sample tests positive or negative for a cancer sequence. Cell phone cameras capture the image of the fluoresced drop. The phone itself is placed in an adjustable cradle which will make the phone perpendicular to the table and the camera parallel to the drop. The bottom of the stand also holds the phone cradle on an adjustable arm that slides out of the fluorimeter. Once the set-up is complete, a black box is needed to cover the entire design to block surrounding light. This ensures the best image to use for analyzing if the sample is cancer positive or negative. Finding the best distance between the fluorimeter and phone and making the camera parallel to the drop were two the biggest challenges in the original design. Therefore the adjustable phone cradle and extendable arm aim to remedy these two issues. The new cradle design will have adjustable sides to fit the thickness of various phones used for to conduct an experiment, enabling the phone to stand up right. One of the problems encountered with the current version is that the phone was diagonal in the stand. This made centering the drop on the screen difficult and slowed down the image-taking process by having to readjust the angle each time. By allowing the cradle to be tailored to each phone, the individuals can adjust phone and camera position to allow the camera to be parallel to the drop each time. Finding and keeping the proper distance between the camera and the drop was difficult because the cradle often moved during the process. The extendable arm helps solve this difficulty by being attached to the fluorimeter stand itself. Instead of having to measure and check each new picture that the cradle is in the right spot to get an accurate image, individuals can set the specific distance at the beginning and secure the arm so it does not move throughout the experiment. Bonus Opportunity: What Bayesian Stats Imply About The BME100 Diagnostic ApproachIn calculation 3, the answer was very small: less than 50%. Therefore, the probability in predicting whether a patient that has the disease will test positive is very low. This shows that the CHEK2 PCR diagnostic test system is neither sensitive nor reliable. If the value for calculation 3 was close to 1, it would show that CHEK2 PCR is very sensitive and very reliable in predicting cancer in patients. In calculation 4, the answer was greater than 1, which is impossible for a probability. This calculation is supposed to show the probability that the diagnostic test correctly diagnoses a patient that does not cancer as negative for cancer. However, because the probability calculated in the experiment was greater than 1, it shows that CHEK2 PCR is not reliable in predicting cancer. If the calculation was very small, it would show, too, that CHEK2 PCR is not reliable in predicting cancer and is not very specific, while if it was close to 1, it would show that CHEK2 PCR is highly reliable in predicting cancer and is very specific. |
||||||


