User:Alexi Fitch/Notebook/Biology 210 at AU
3/21/14
Zebrafish Labs
The purpose of this lab was to learn the different stages of embryonic development by observing different organisms, such as chicken eggs, and starfish and tadpole development. What was observed and learned was then used to set up an experiment studying how environmental conditions can have an effect on the embryonic development of zebrafish.
Procedure
- Compare the embryological features of developing Frog, chick, human and sea star. (See table 1)
- Choose an independent variable to test with zebrafish
- Nicotine was the chosen independent variable
- Take ~20 zebrafish embryos and place in control and experimental groups
- ~60 zebrafish embryos were placed in a control of 0% nicotine
- There were two experimental groups (12.5mg/L and 25mg/L of nicotine)
- Remove all the dead zebrafish
- Check on development of embryos over the next 2 weeks
- Save dead embryos in paraformaldehyde solution
Hypothesis
- As Nicotine concentration increases, increased developmental effects will occur.
Prediction
- If the 25mg/L survives they will have the most deformities. If they do not, the 12.5mg/L will live the longest and develop the most deformities.
Conclusion
This lab explored understanding the development of the starfish, frog, and chick in terms of environment as well as parental care and fertilization. This lab was important because it helped to give a background on embryology since the next experiment that will be performed will be with zebrafish and observing their ecological development as well as embryonic features.
2/23/14
Lab 5
The purpose of this lab is to understand invertebrates in terms of body structure as well as their importance in the overall ecosystem of the niches they live in.
Procedure I
- Observe the acoelomate worm
- look at the cross sectional slide of the Planaria
- Observe a cross sectional slide of their pseudocoelomate structure
- Pay attention to movement in the worms
Procedure II
- Get liquid with invertibrates inside from the burlese funnel set up
- examine the invertebrate organisms inside
- Identify organisms found from transect
Procedure III
- Identify which vertebrates might have lived in transect (5 total, 2 birds)
- Determine the classification of each animal (phylum-species)
- Describe which biotic and abiotic characteristics would be beneficial to the species
- Construct a food web based on the organisms observed in transect
Data
Observations
- The worms moved by scrunching up their body then extending one half of it before extending the other.
- The leaf litter had organisms that were much smaller in size compared to the rest from West Virginia. The invertebrates from West Virginia were much larger, over 10 mm larger.
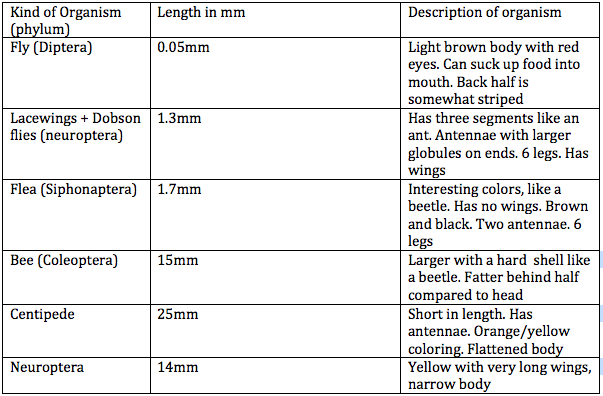 Table 1: This table shows the invertebrates found in the transect and in West Virginia
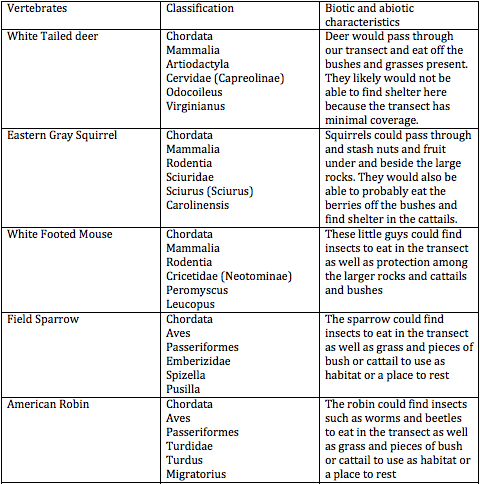 Table 2: This table shows the vertebrates that would likely be found in the transect
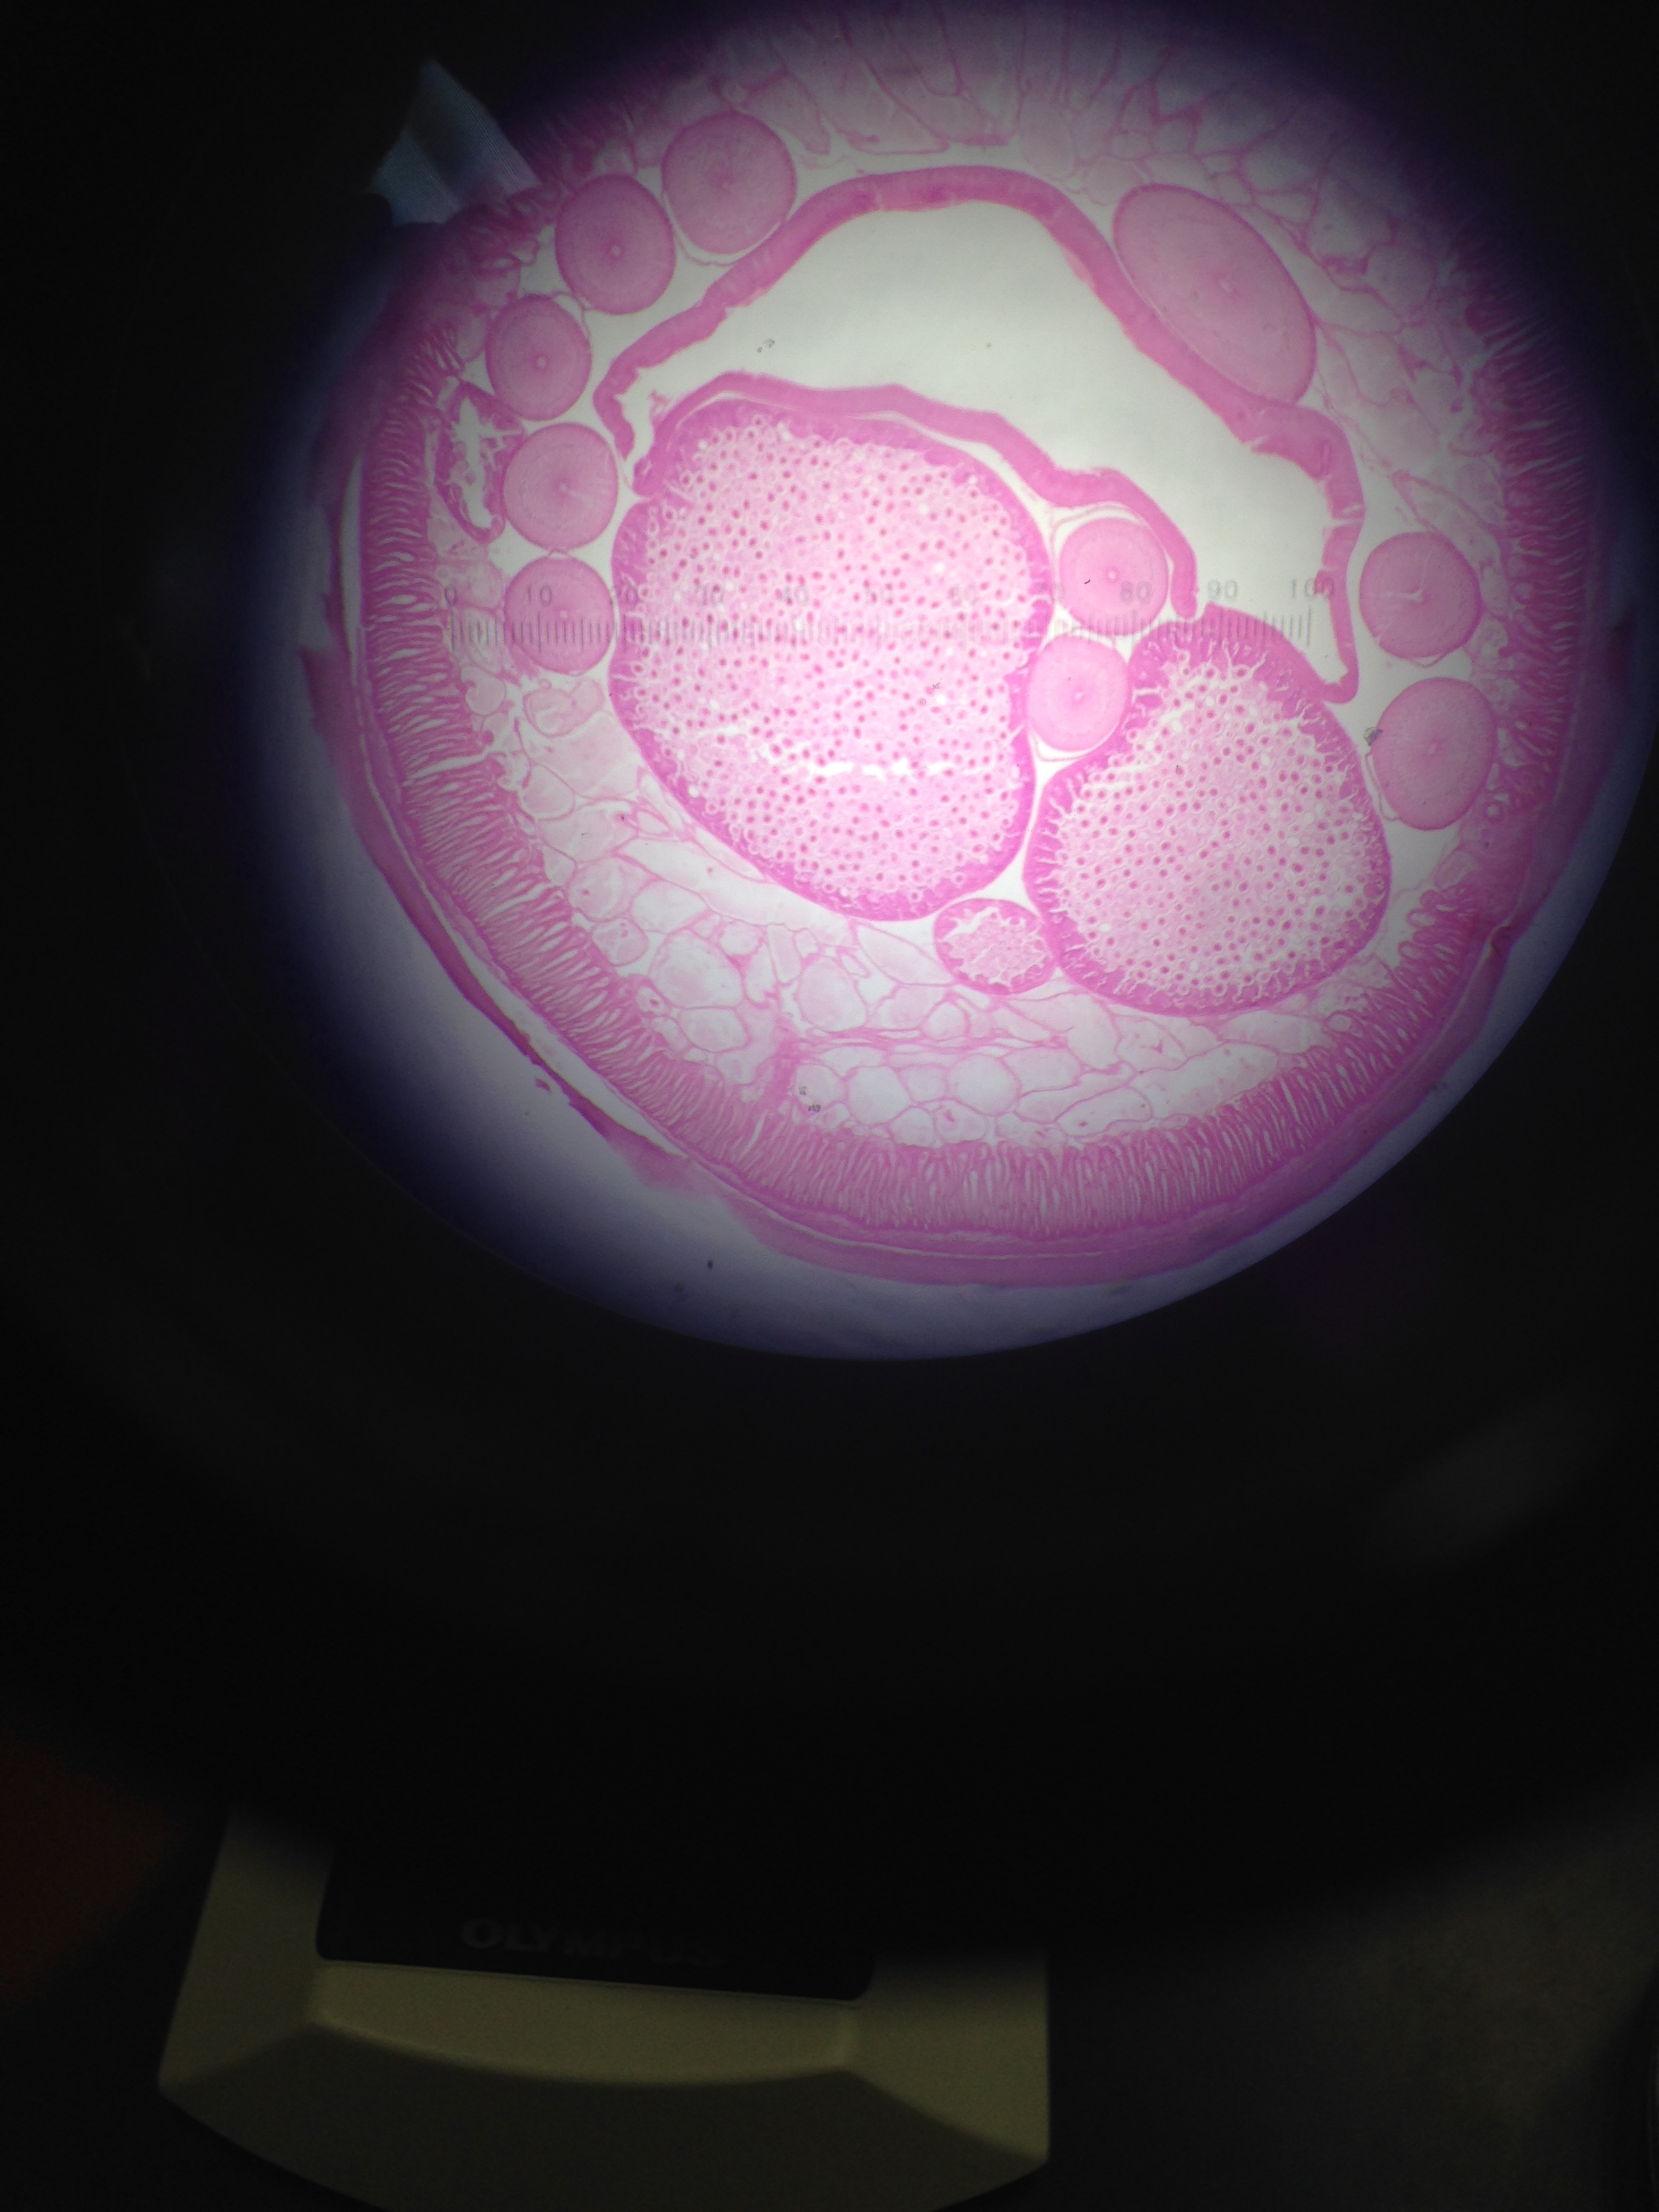 Figure 1: This figure shows the cross sectional slide of their pseudocoelomate structure
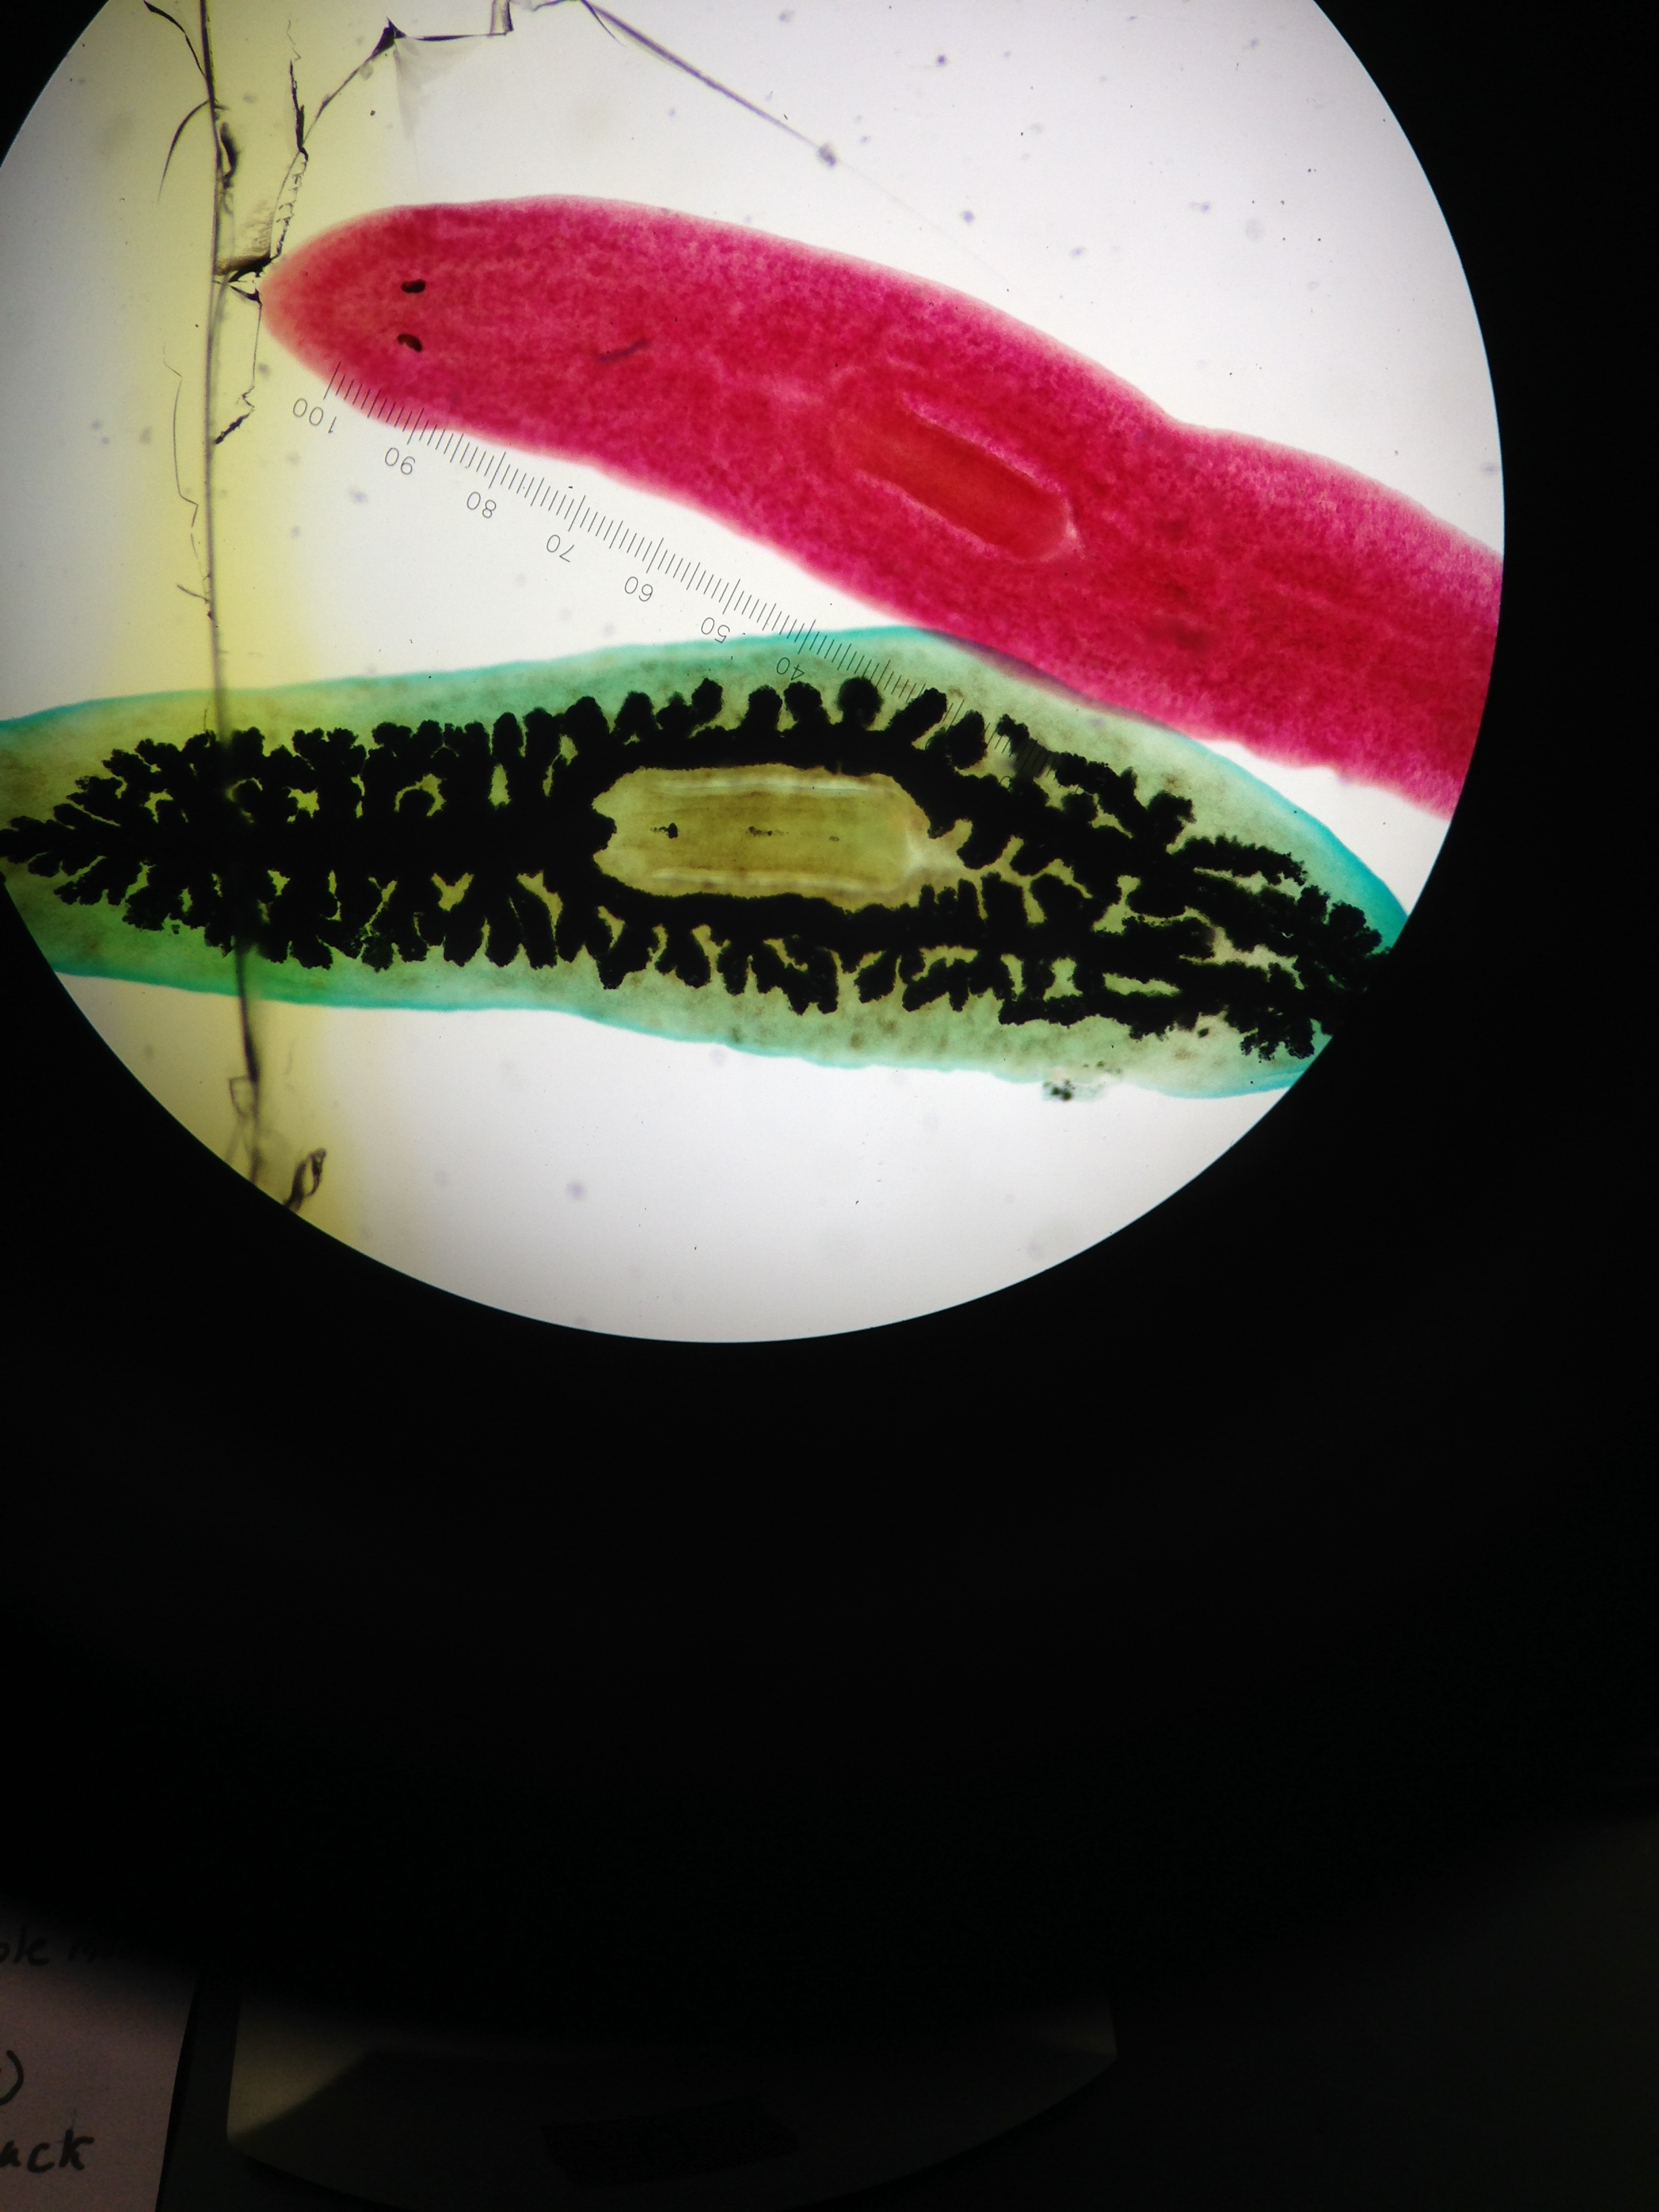 Figure 2: This figure shows the planaria stained red and the digestive track as black
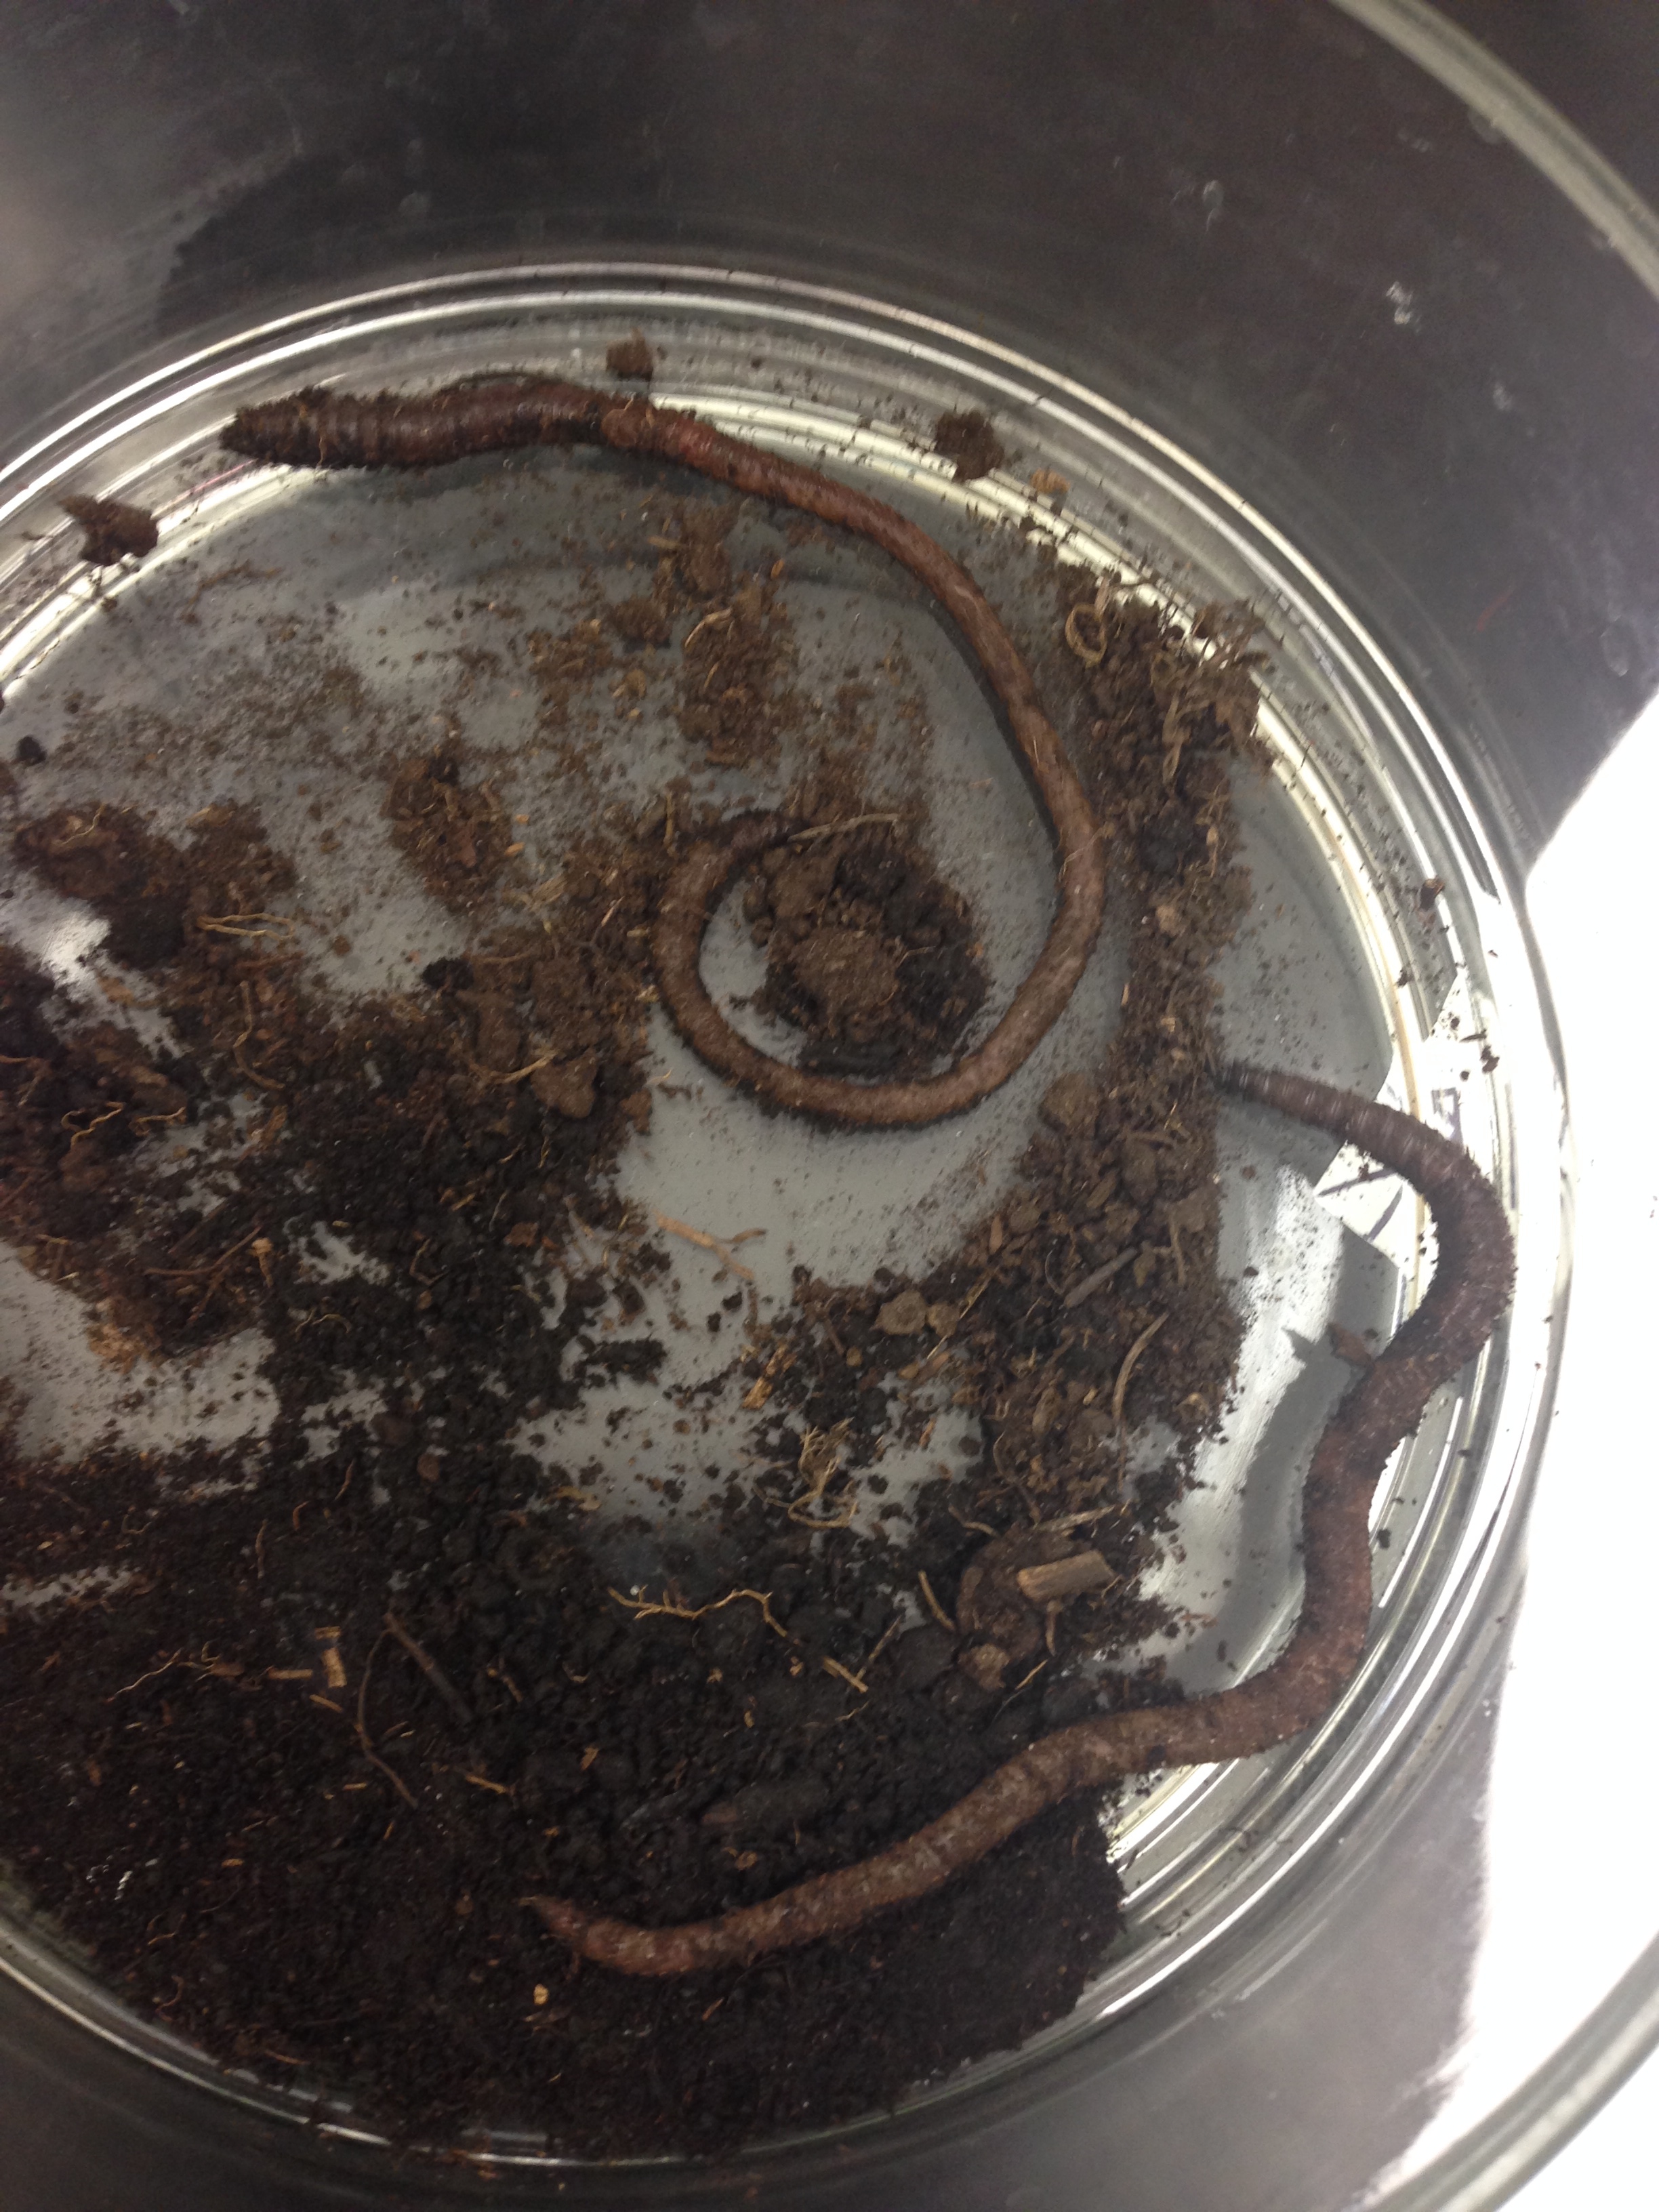 Figure 3: This figure shows the earthworms observed
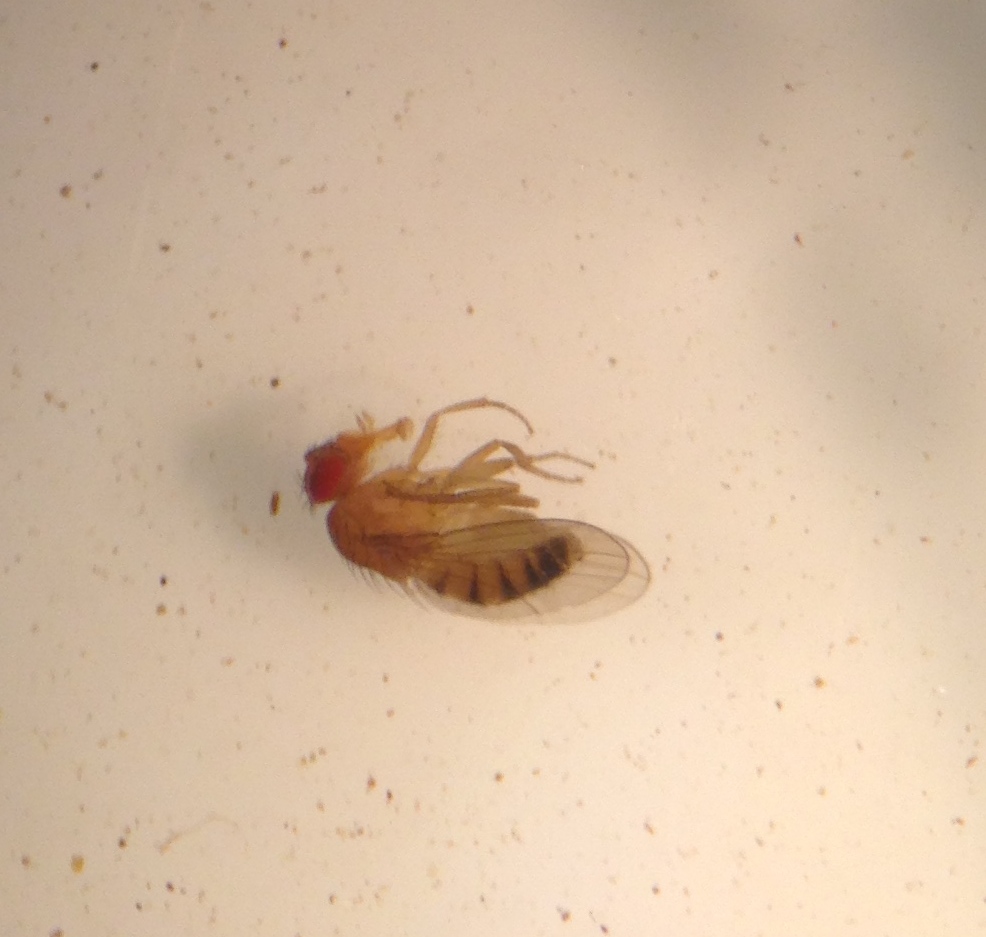 Figure 4: This figure shows the fly like invertebrate from the transect
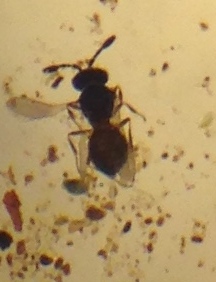 Figure 5: This figure shows the ant like invertebrate from the transect
Lab 4
The purpose of this lab is to observe and understand the characteristics of a moss as well as an angiosperm, and five plant samples from the group’s individual transect observing structure, vascularization and reproduction. After observing the different attributes of known plants and the ones collected from the transect, invertebrates were collected from the collected plant matter.
Procedure I
- Collect leaf litter sample from transect
- Collect five plants total from transect area choosing the most diverse
- Find seeds, and flowers to observe
- Describe the five plants and where they were found
- Identify the genera for each of the five samples
Procedure II
- Compare the angiosperm of the lily with the moss
- Observe the moss and note the height of the plant
- Examine the lily stem and measure the height
- Describe the vascularization of each of the five transect plants
Procedure II
- Examine the leaves of the moss closely
- Examine cross section of angiosperm leaf
- Describe shape, size and arrangement of leaves on plants collected from transect
Procedure III
- Examine the leaves of the moss closely
- Examine cross section of angiosperm leaf
- Describe shape, size and arrangement of leaves on plants collected from transect
Procedure IV
- Examine Polytrichum, a moss. Identify the male and female sporophyte and gametophytes
- Note haploid and diploid parts of life cycle
- Dissect a lily flower and identify the reproductive components
- Dissect the soaking seeds
- Identify seeds from transect as monocot or dicot
Procedure V
- What are fungi sporangia and why are they important?
- Look at samples of fungal organisms and decide which of the three divisions they best fit in
- Draw a picture of one
Procedure VI
- Pour 25 mL of ethanol/water solution into the flask
- Put screen on bottom of funnel so plant matter doesn’t flow through
- Place funnel inside flask
- Place leaf litter and transect plant matter in funnel
- Place a lamp over the funnel and cover everything with foil
Data
Data Important Observations
- Information from the booklets in class were used to identify the genera of the plants found in the transect
- There were no bryophytes collected from the transect. Only vascular plants were found
- The five plants collected from the transect were grass, maple leaf, branch from a bush, a ground plant (herb) and a cattail
- The grass leaves were two or three leaves that opened up from the center of the grass, often there was only one leaf remaining that occupied the whole plant. Grass leaves are short, long and narrow.
- The leaf had fallen from a nearby tree outside of the transect and had a stem where it would have attached to the branch of a tree. The maple leaf was about the size of a hand and had the normal three lobes to the leaf and jagged edges.
- The bush had dead dried and shriveled leaves that attached to smaller branches that were attached to the larger branch of the bush. The leaves were redish and without much form. About the size of a quarter.
- The ground plant was small and the leaves and was though to be the broad leaf plantain in its early stages with about five leaves opening out from the center of the plant and developing more leaves outside of that.
- The cattail had no leaves that were collected, The leaves of cattail are similar to grass where they are long and narrow. They are usually several feet tall.
- No seeds were collected from transect
- The sporangia of the fungi are important because they hold the spores of the plant that open and allow the fungi to reproduce
- The fungus observed all belonged to the Zygomycota group. They are fungus because they look furry and either white or blue, some were yellow little balls, but they had the furry, sporelike characteristics of fungi.
- Plant heights: Lily stem 73cm, moss 24cm, moss II 9cm
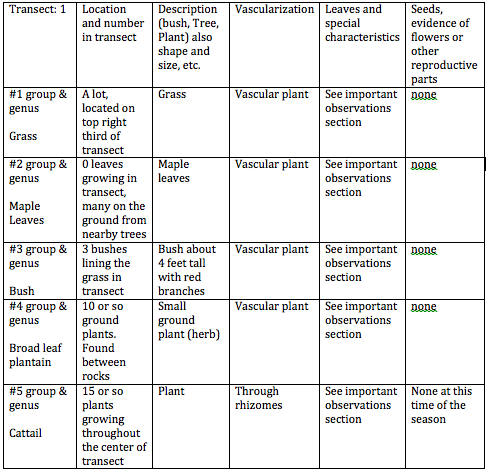 Table 1: Transect Plants 1-5 showing descriptions and location found
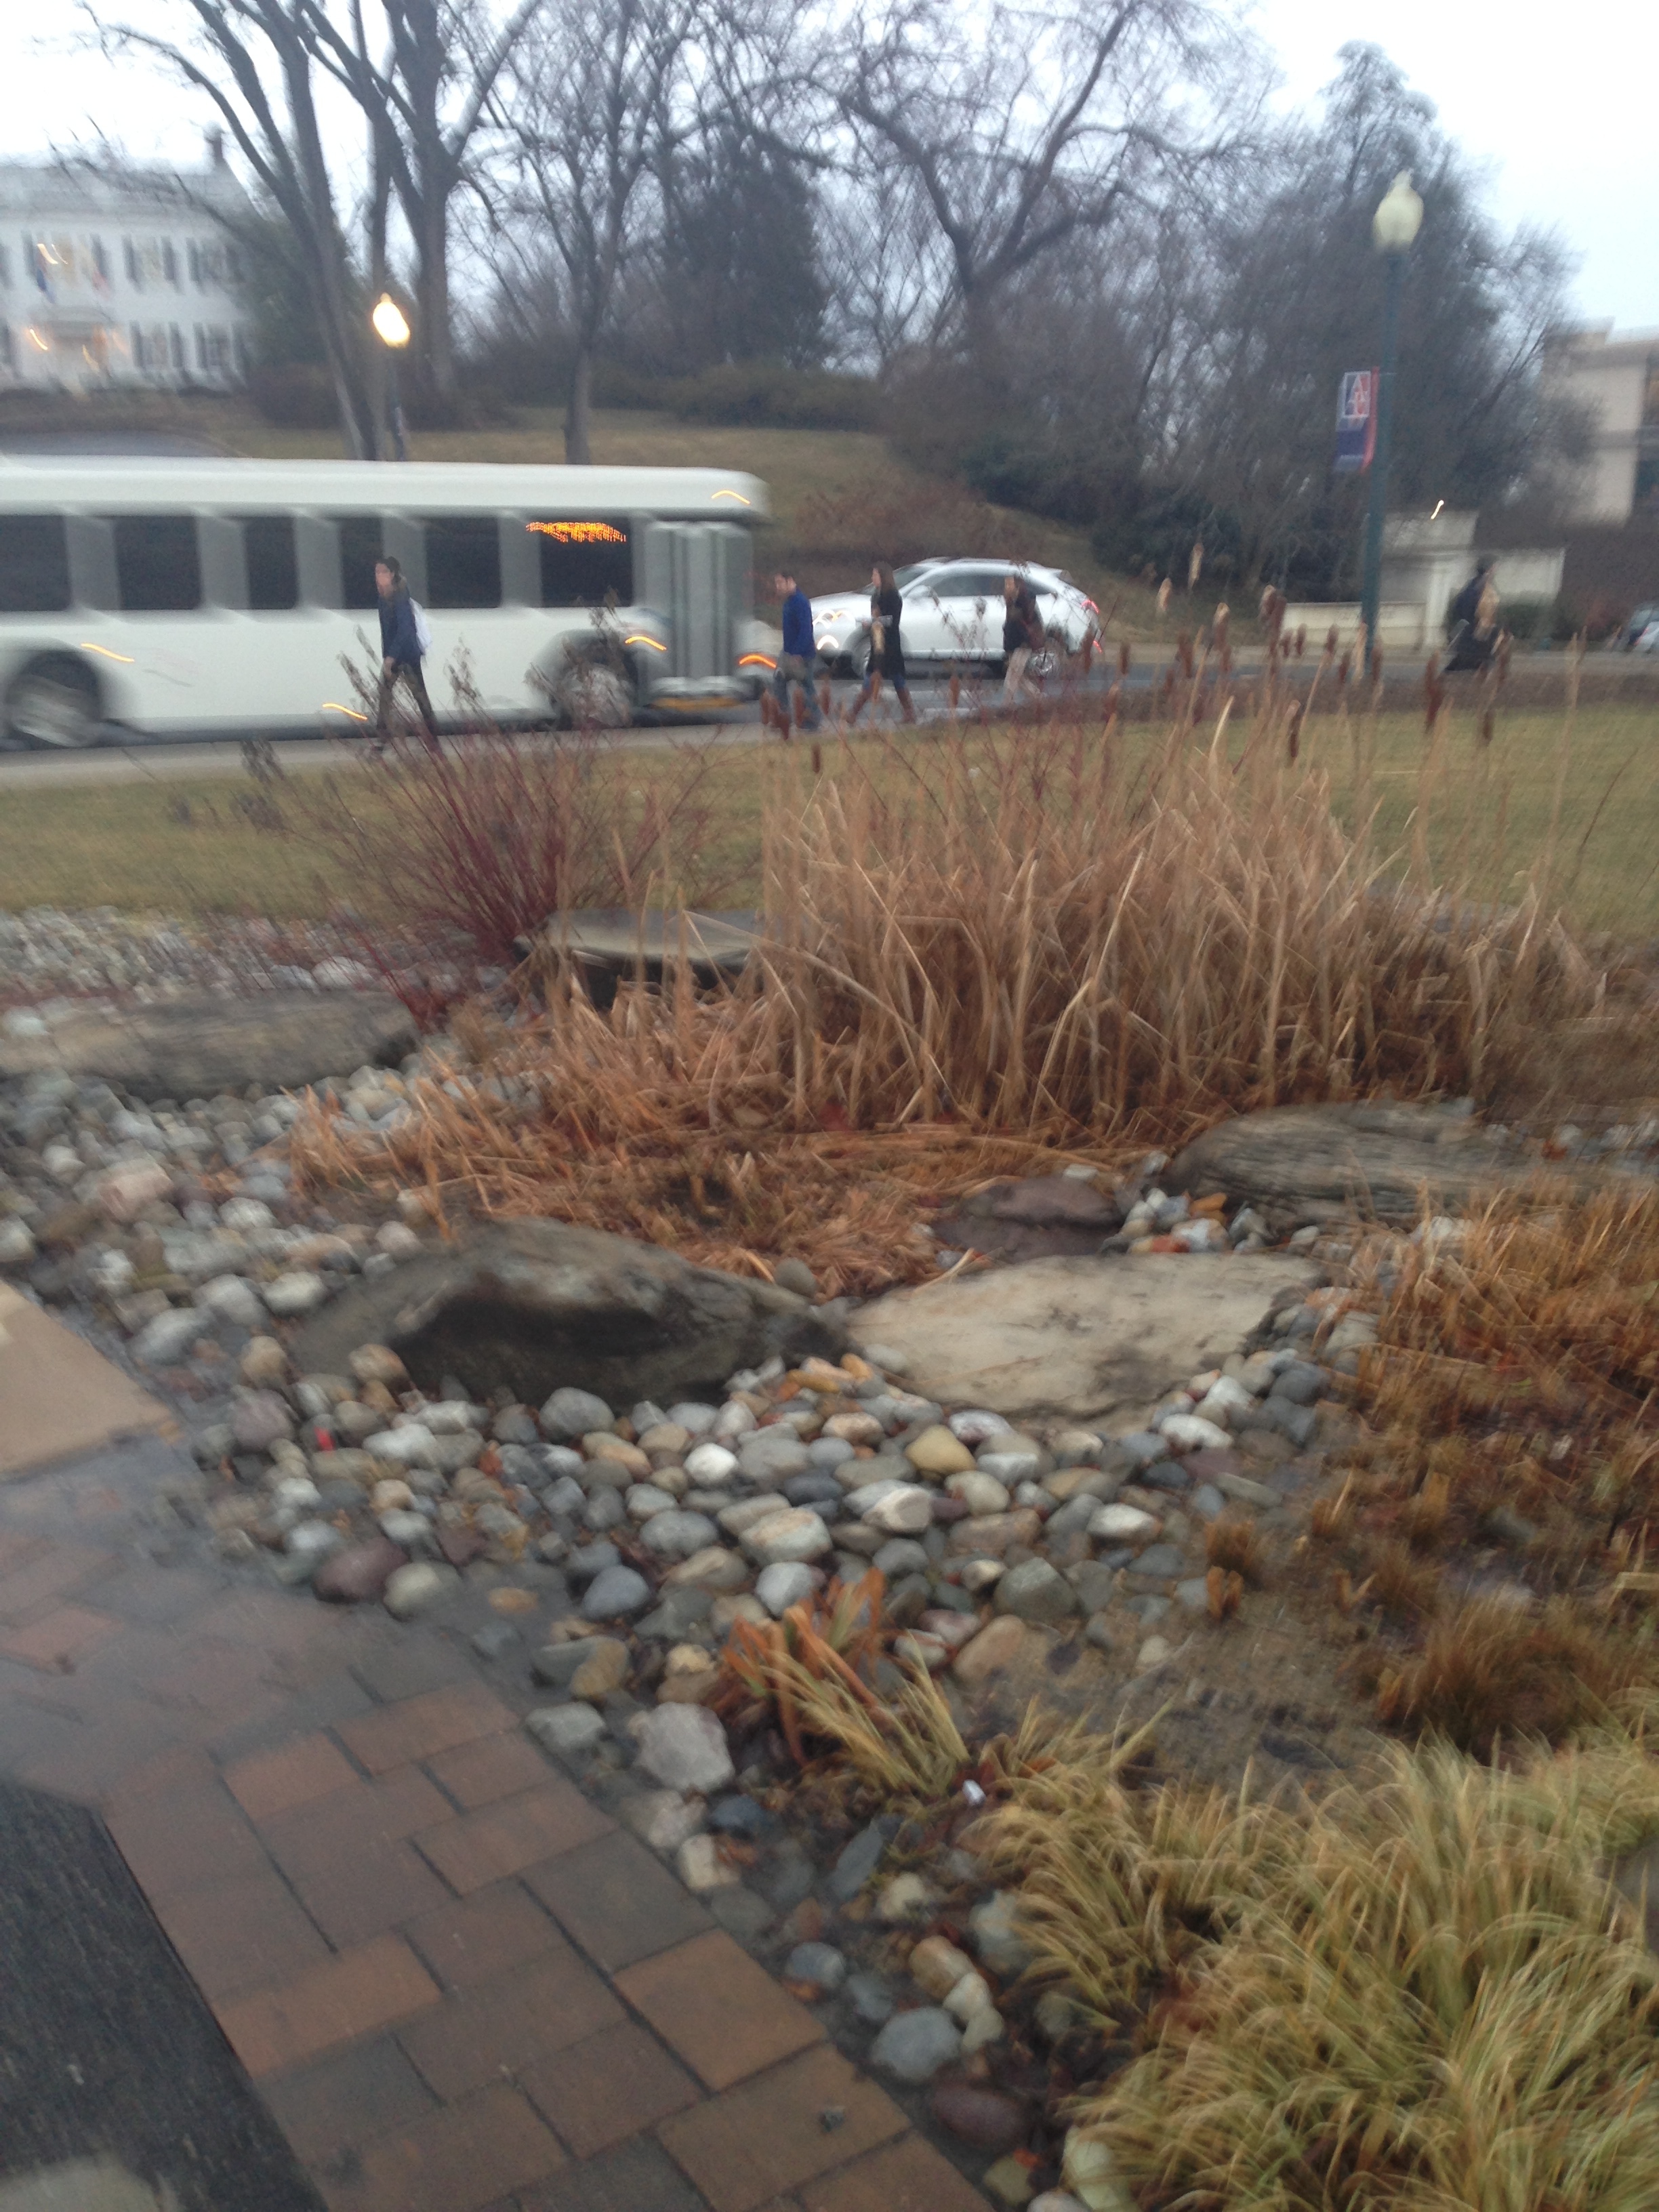 Figure 1: View of transect at time of lab
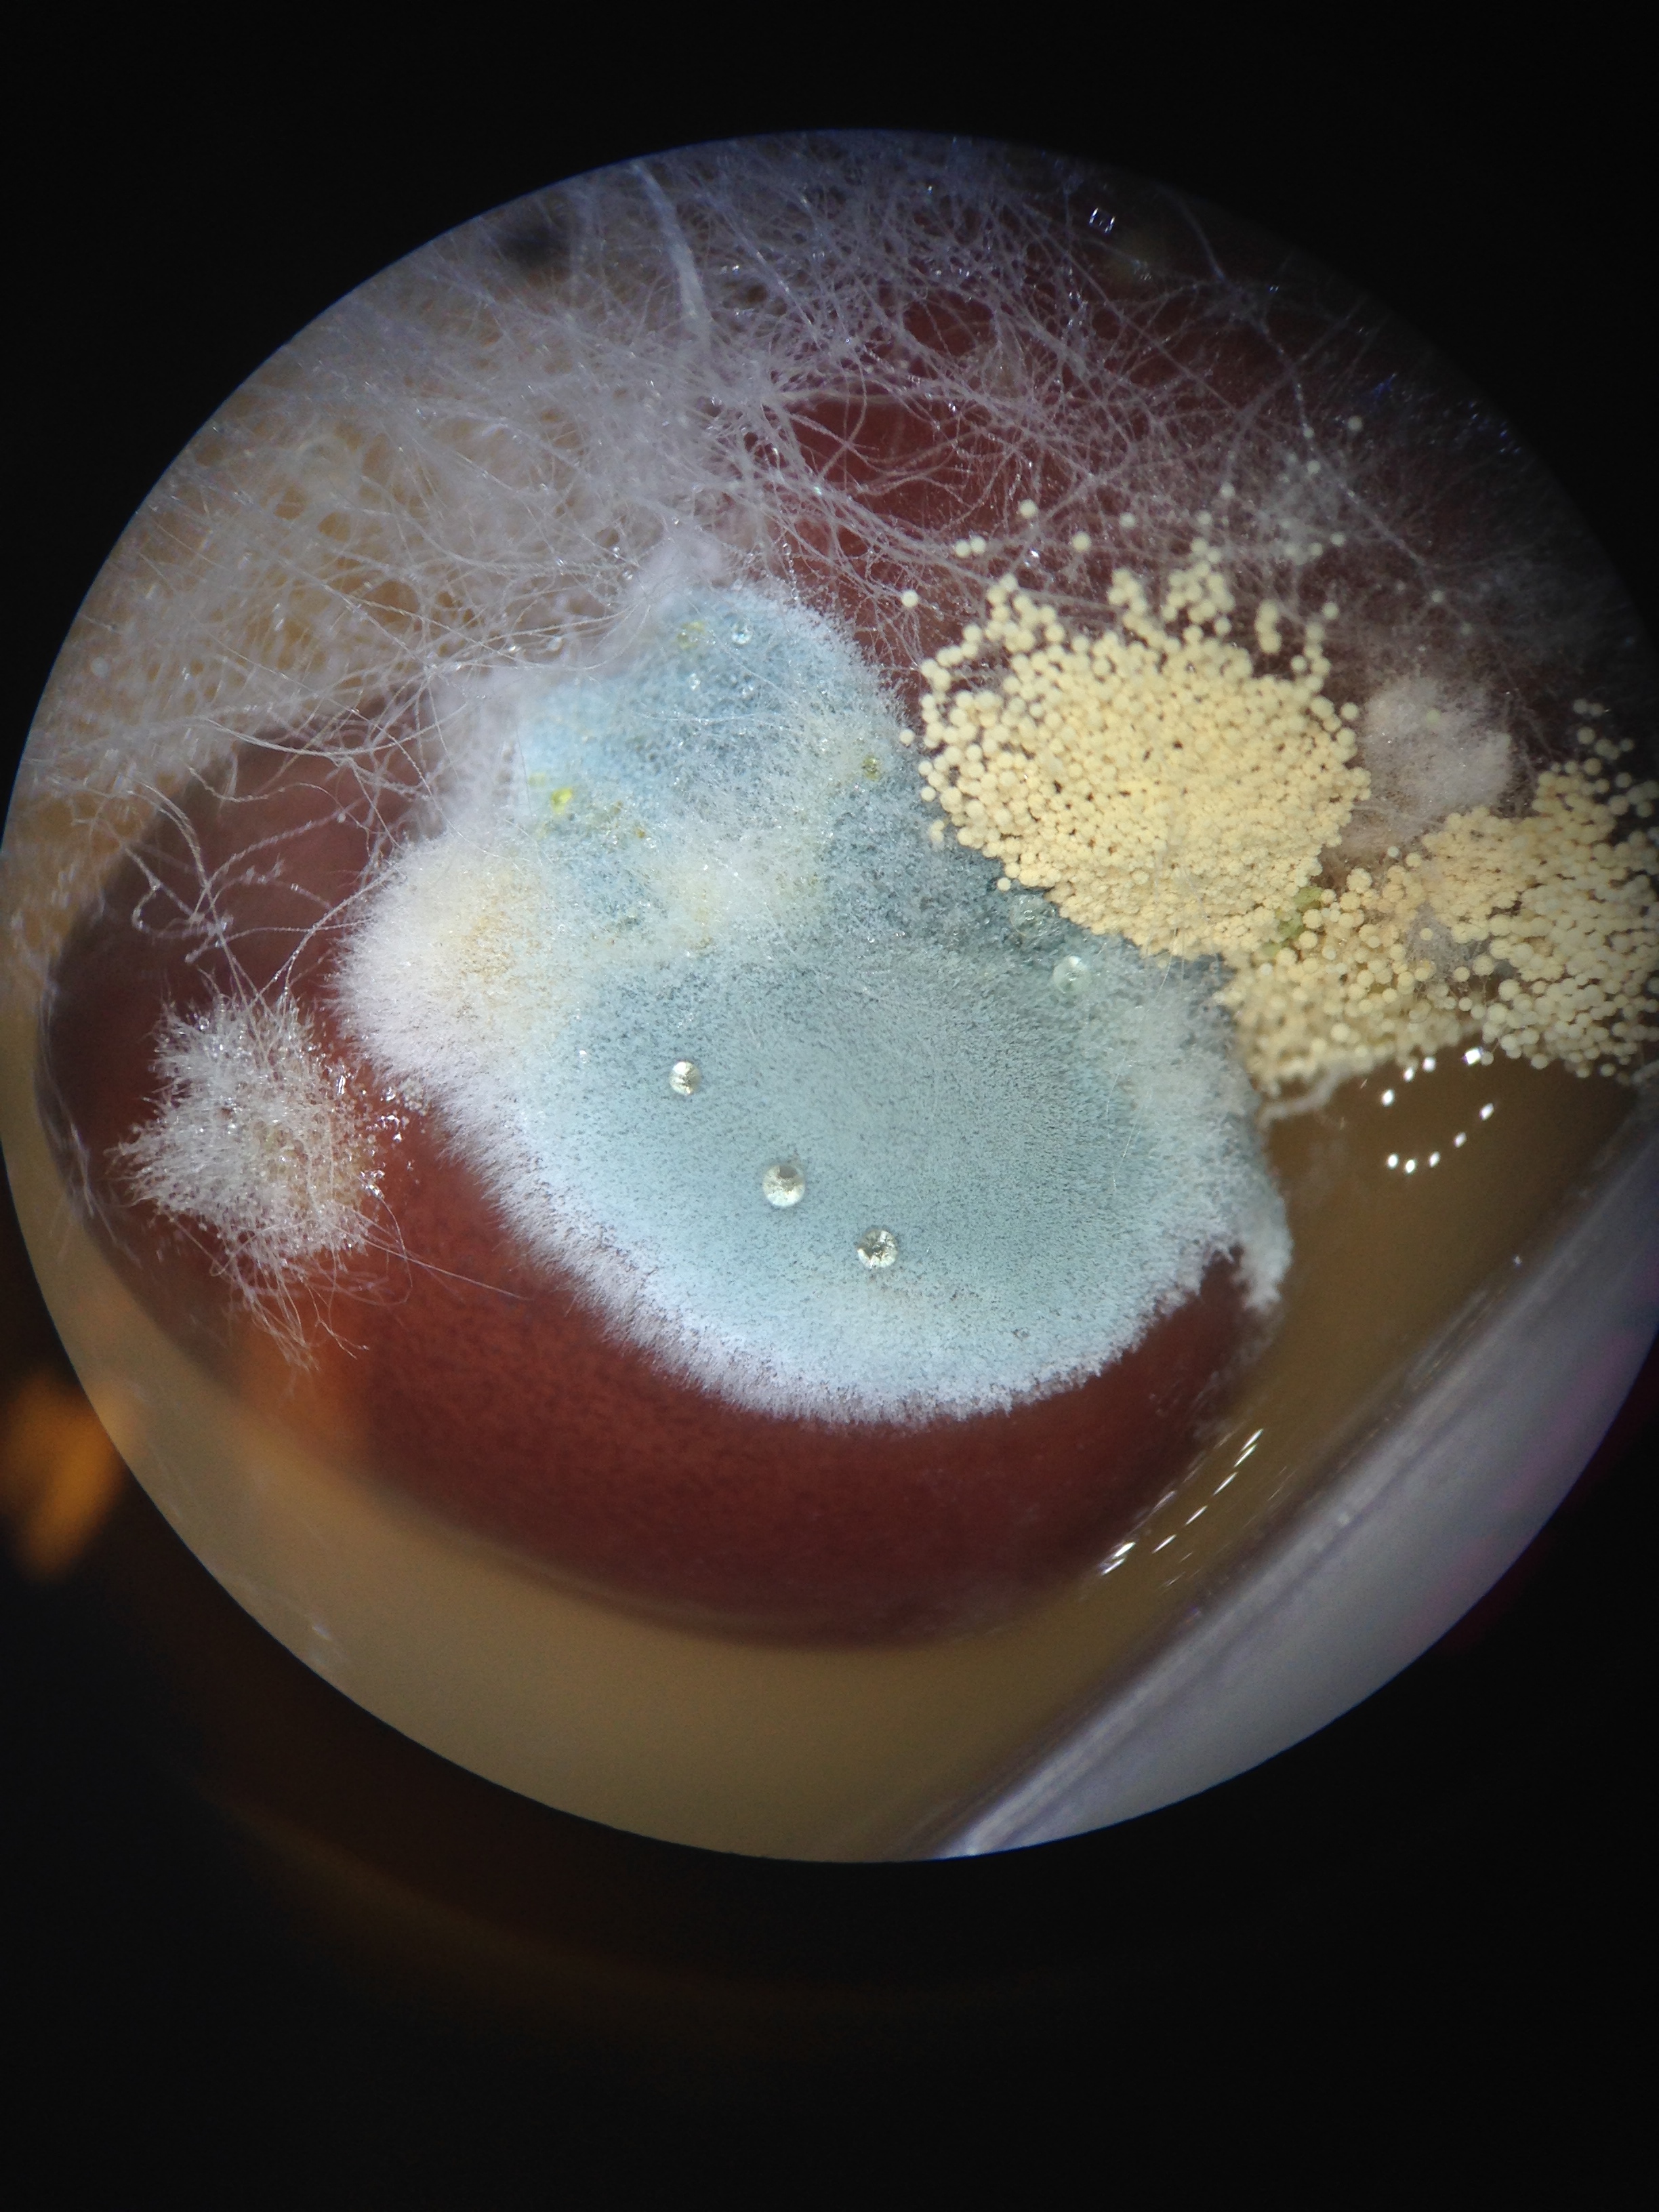 Figure 2: View of fungi (mold) growing on beans. Mold is blue and yellow, some of the white Zygomycota can be seen
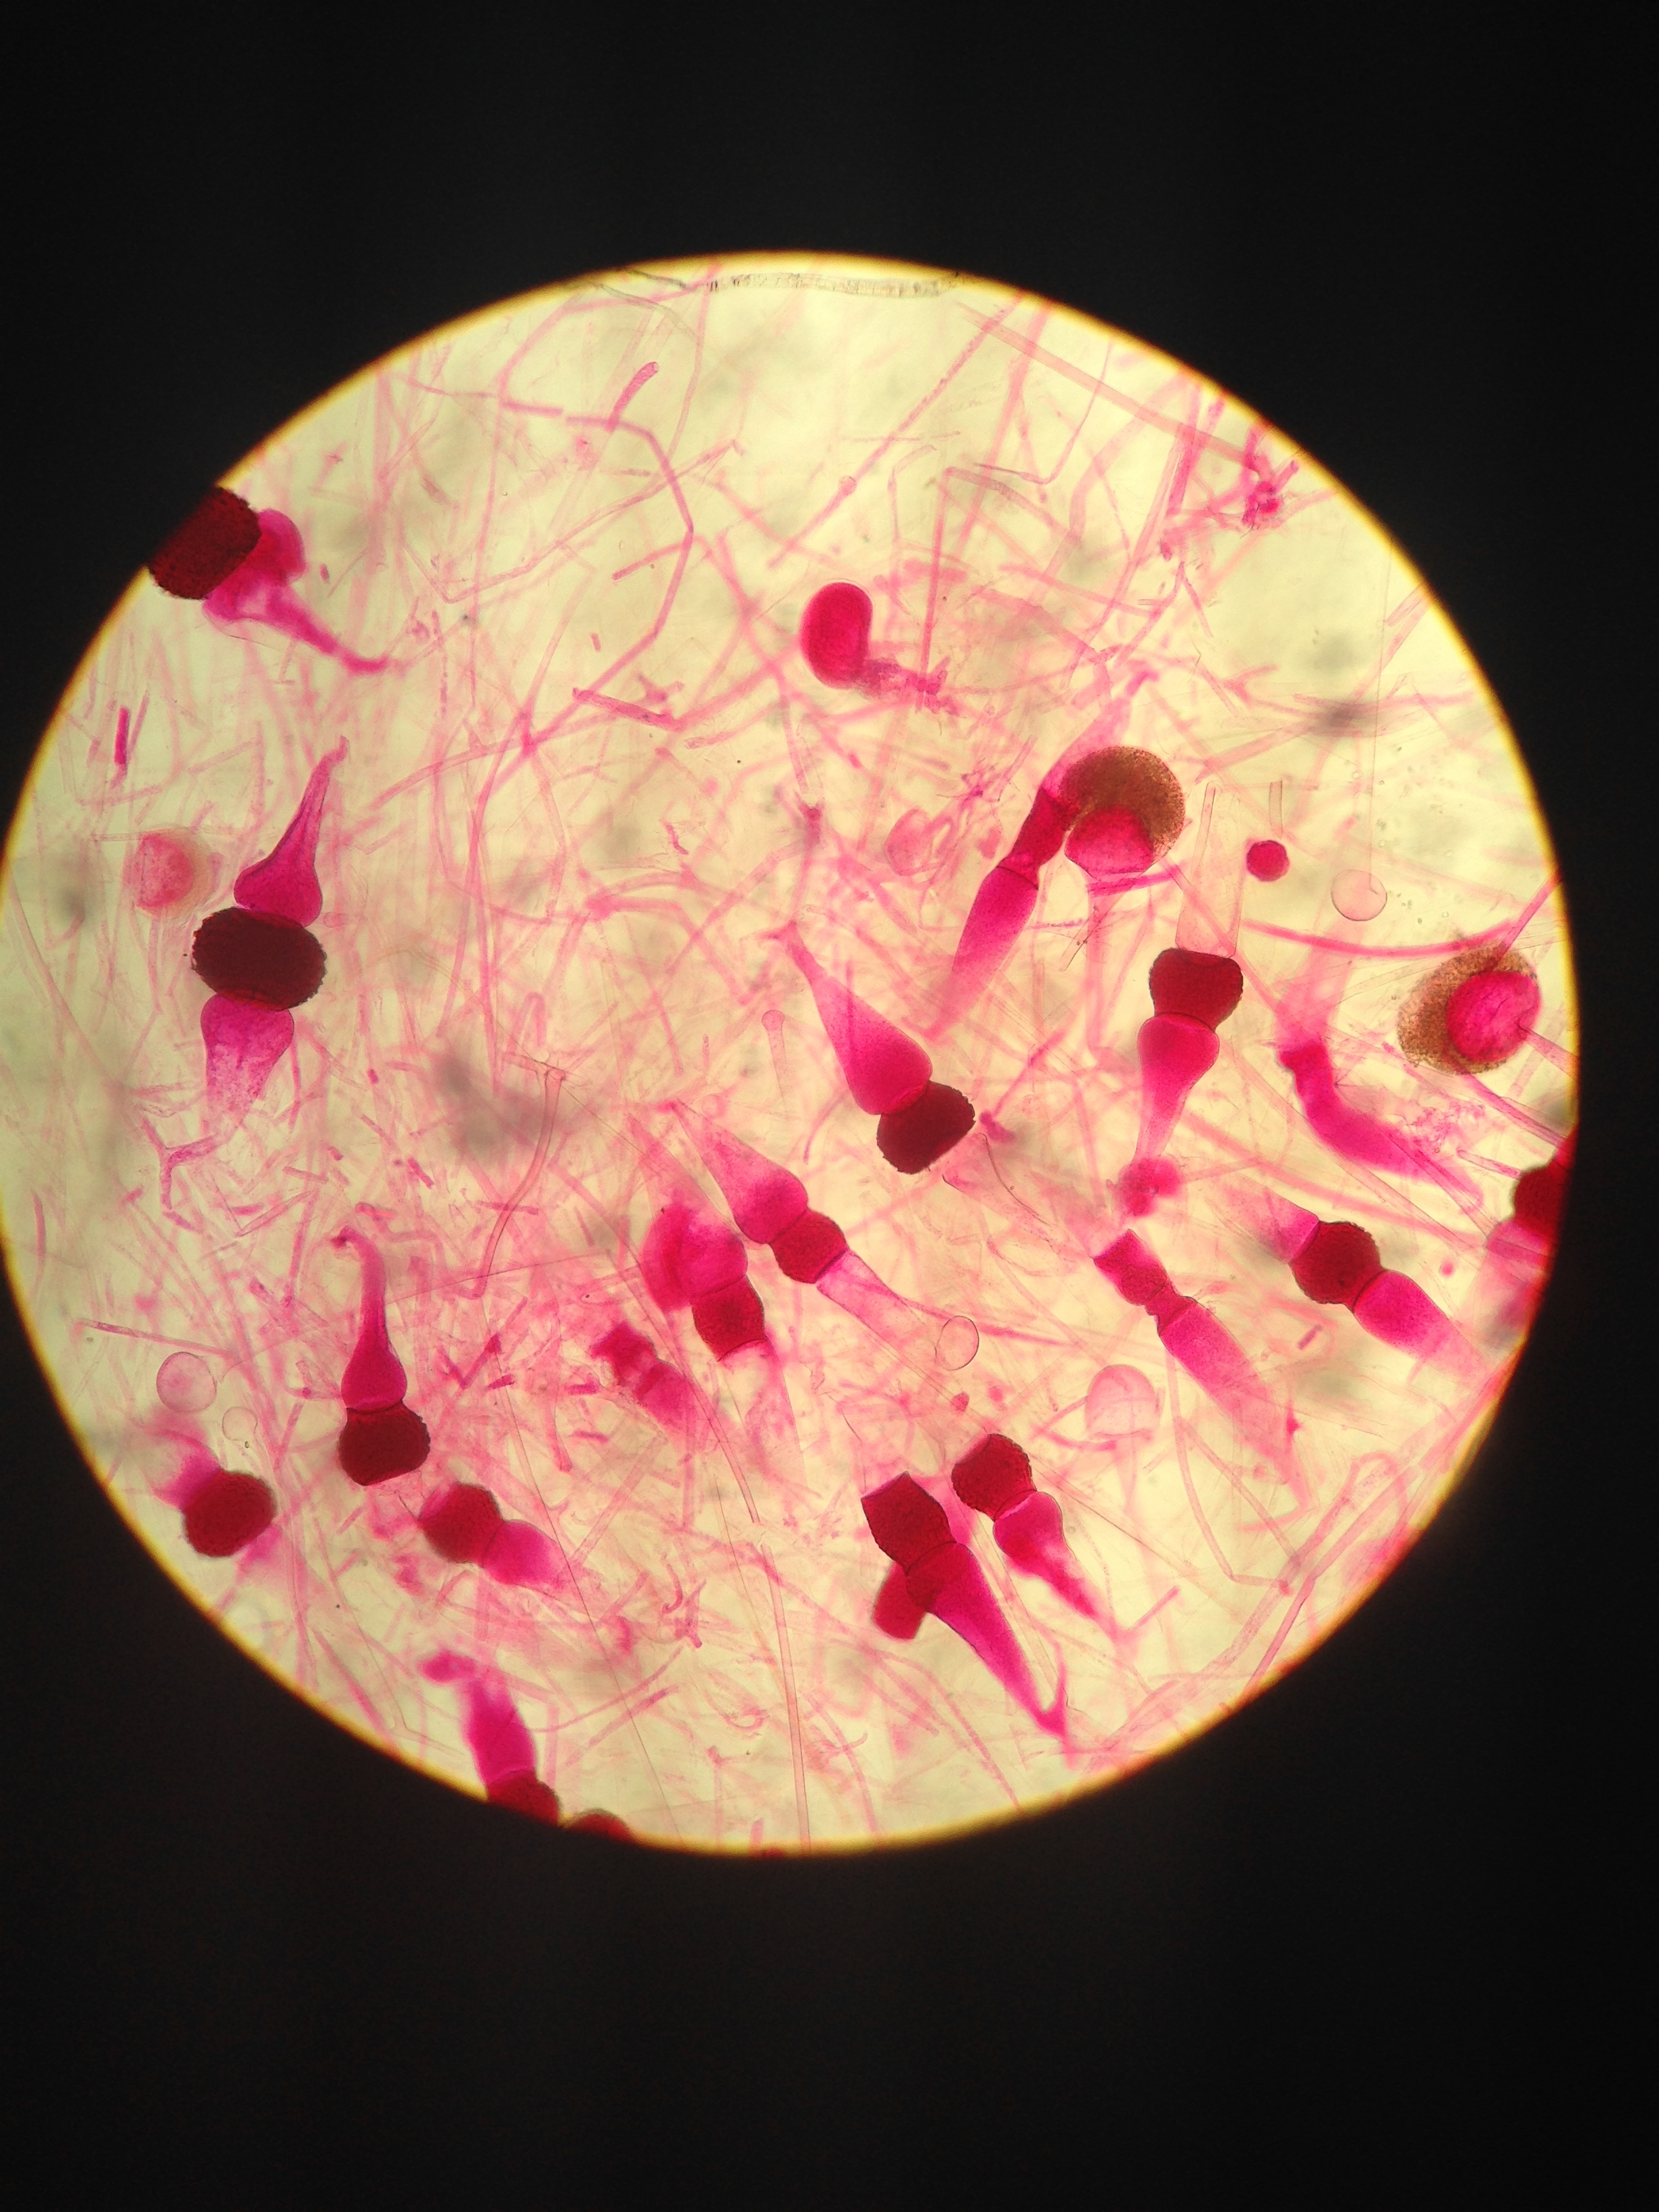 Figure 3: View of rhizopus of sporangia zygotes
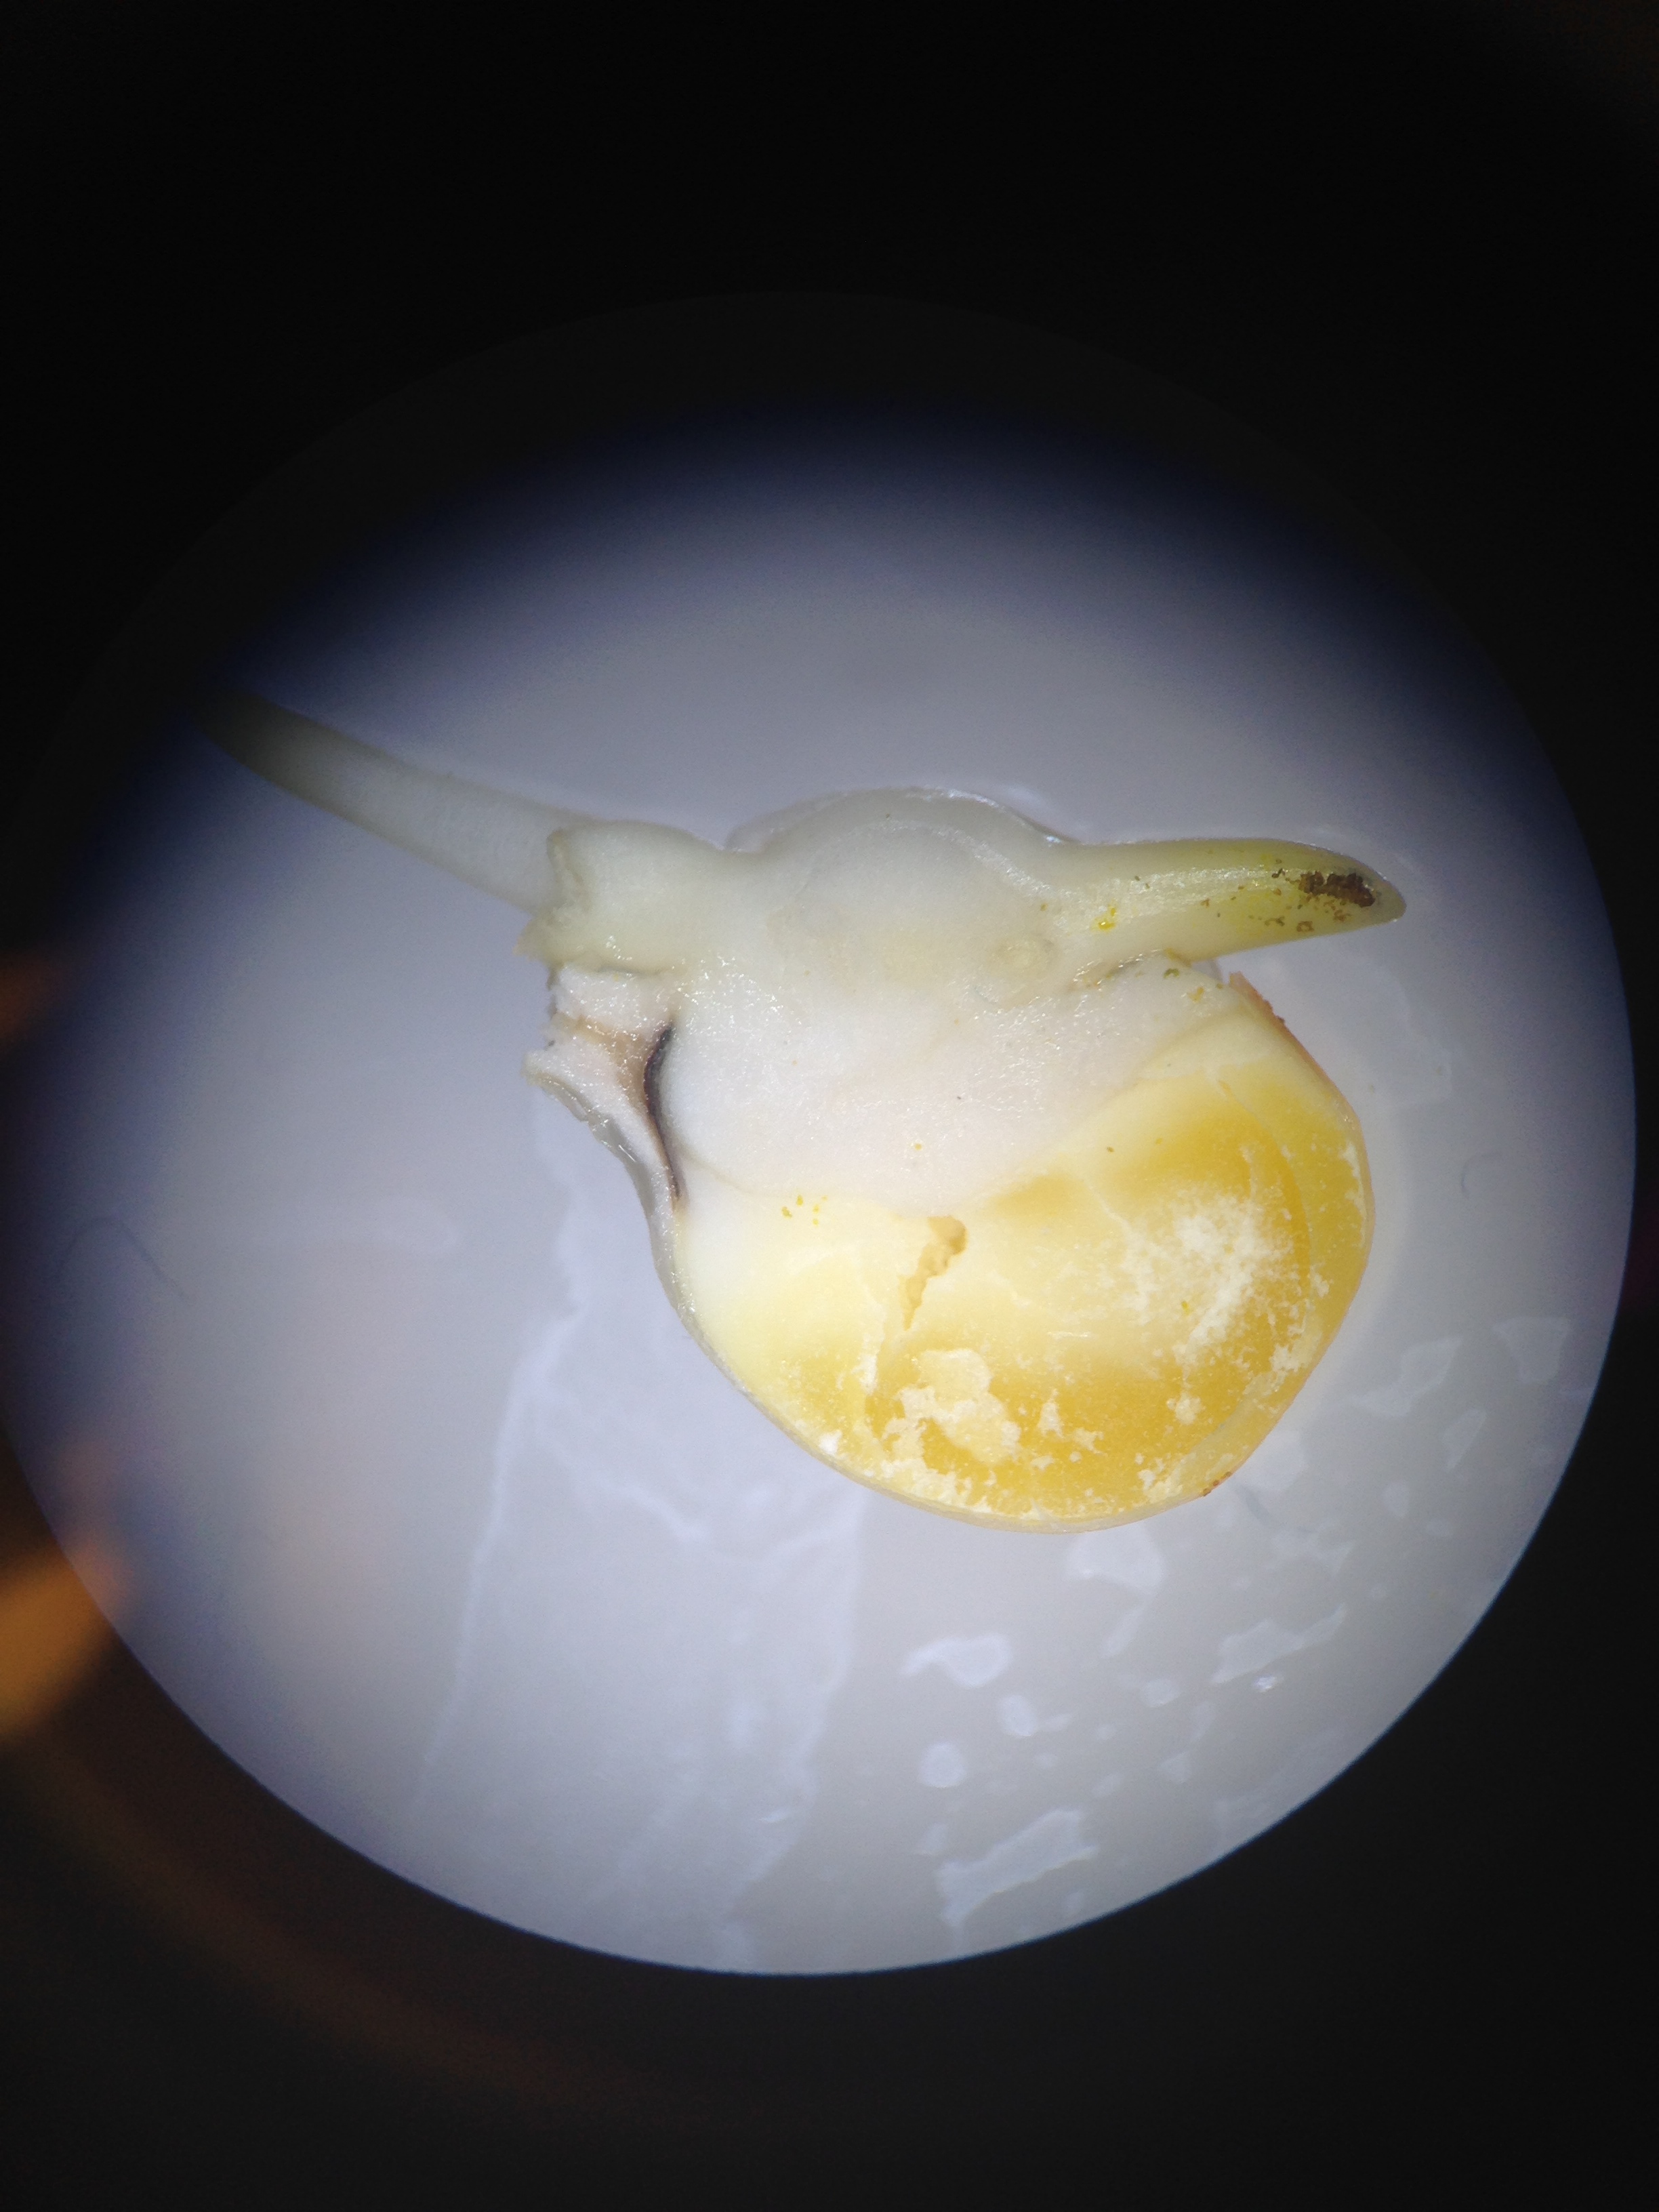
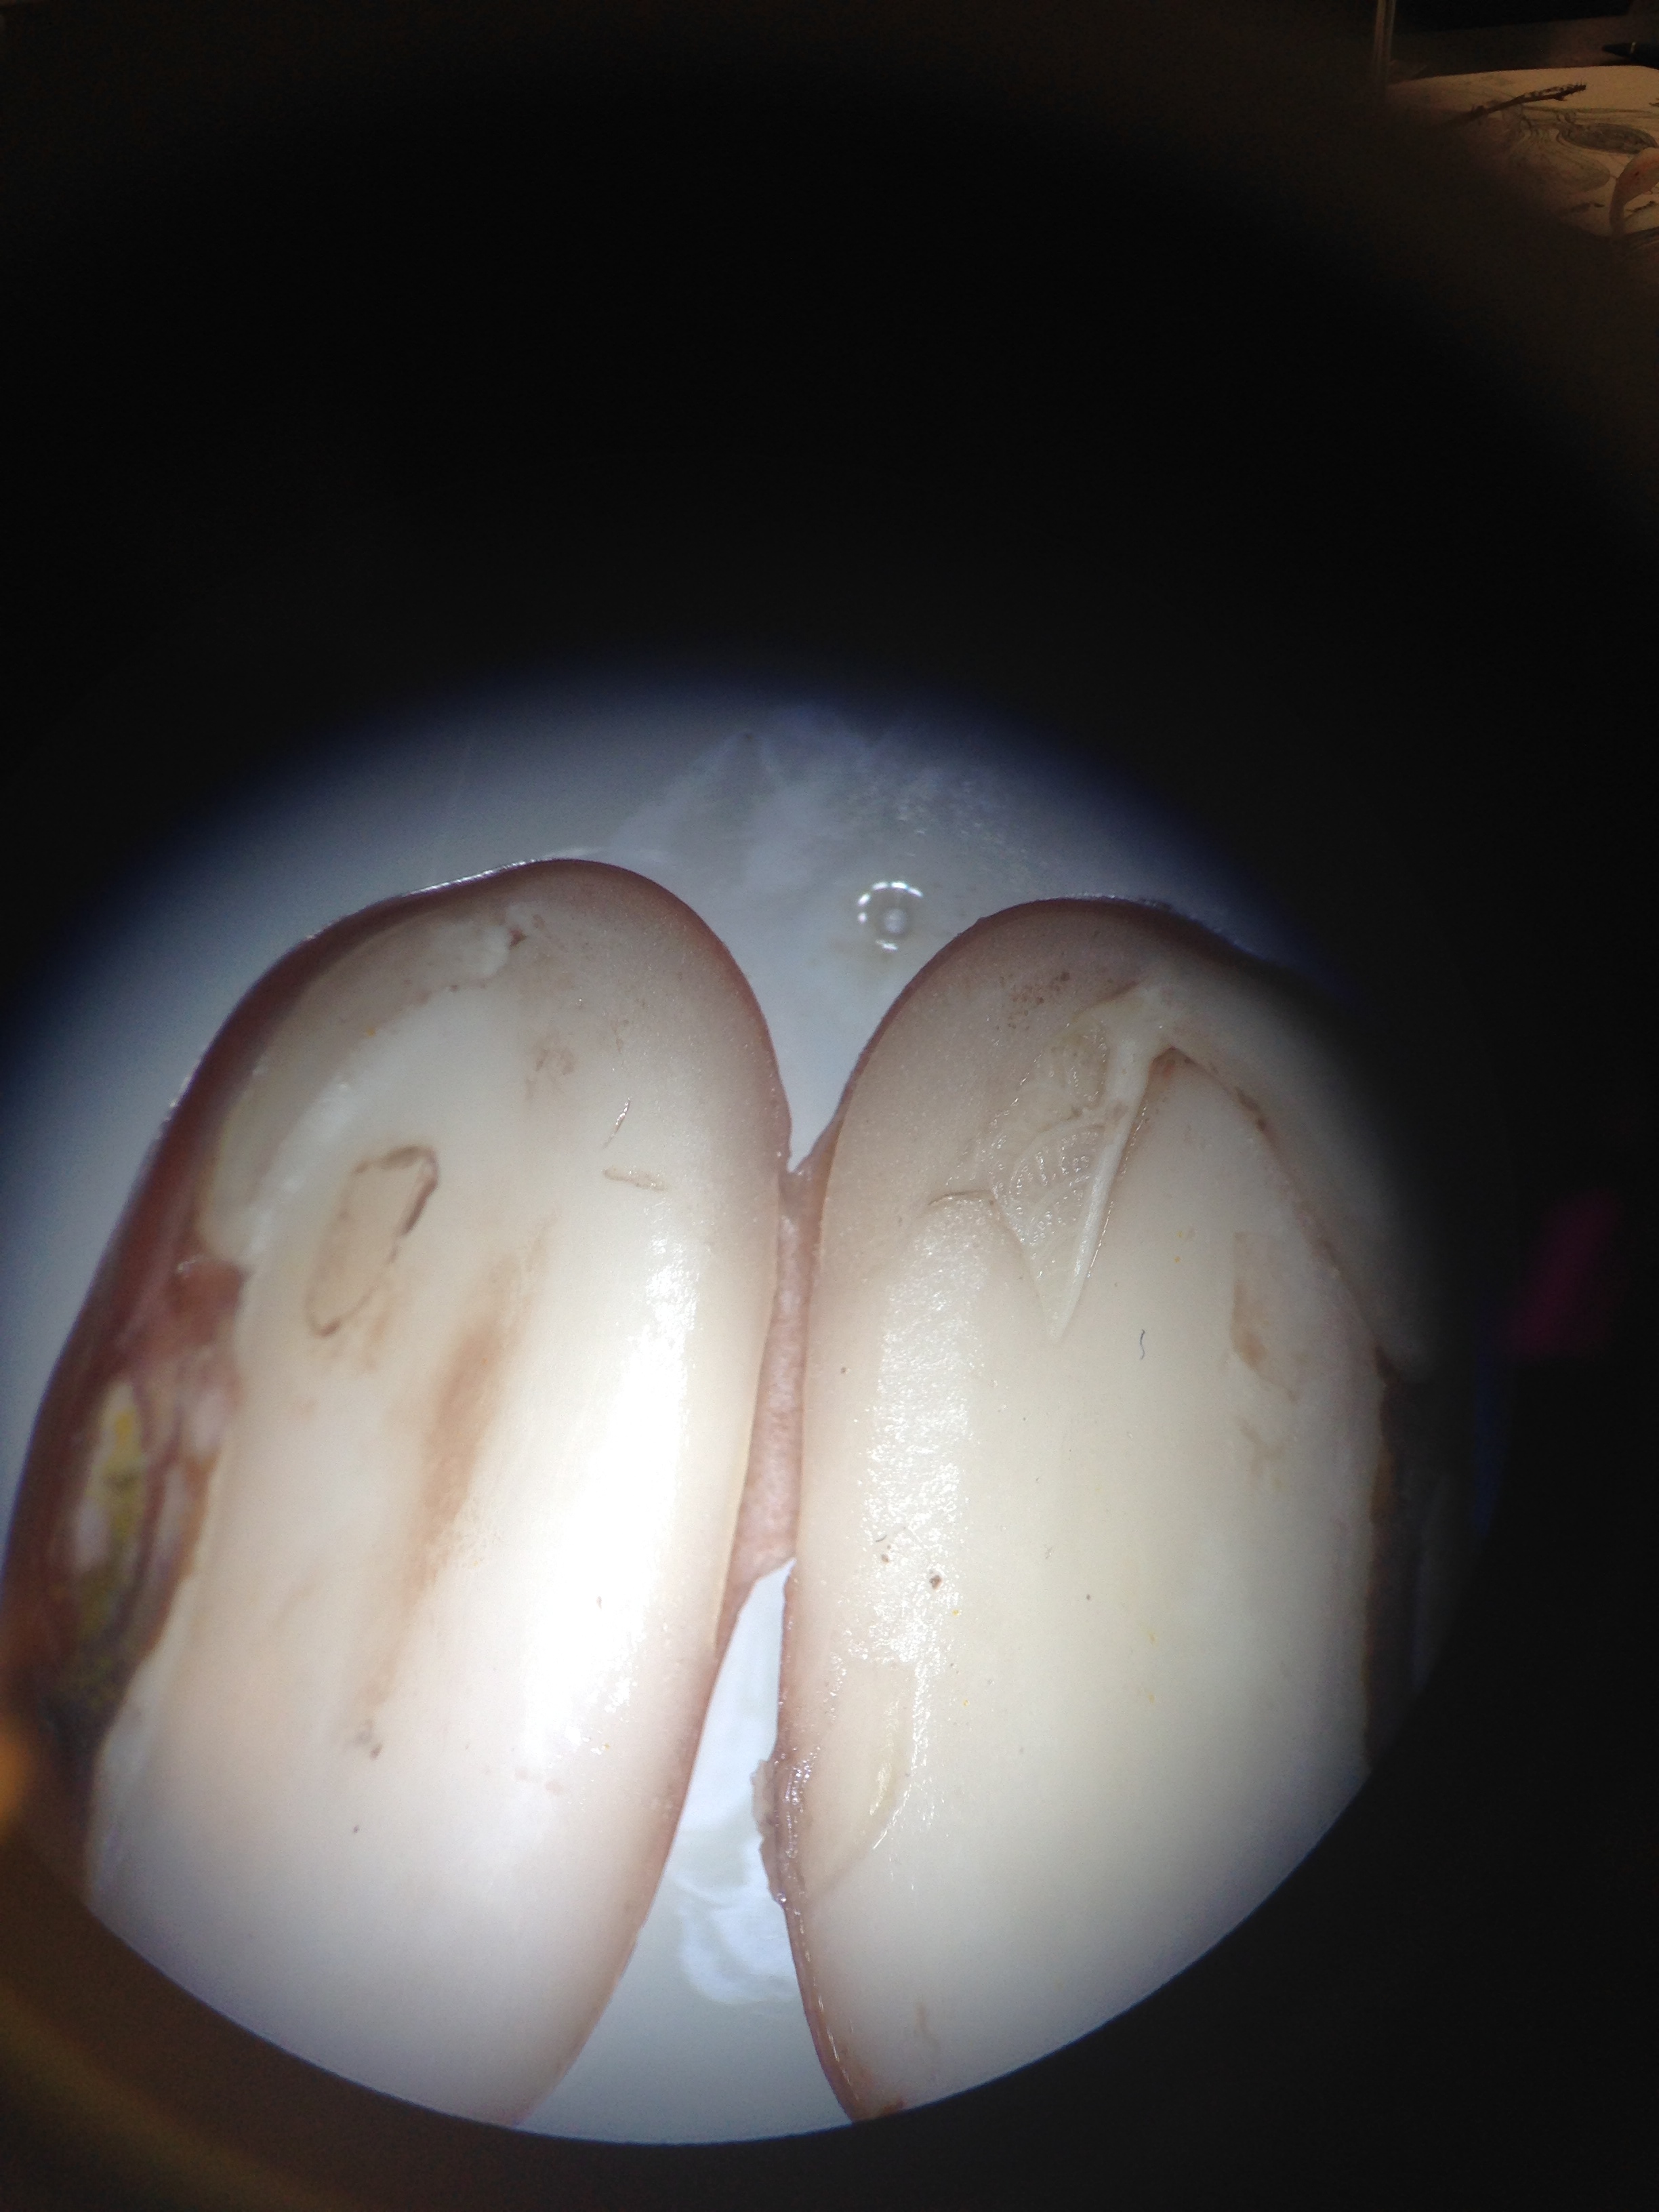 Figure 4: View of corn and bean dissected from procedure IV
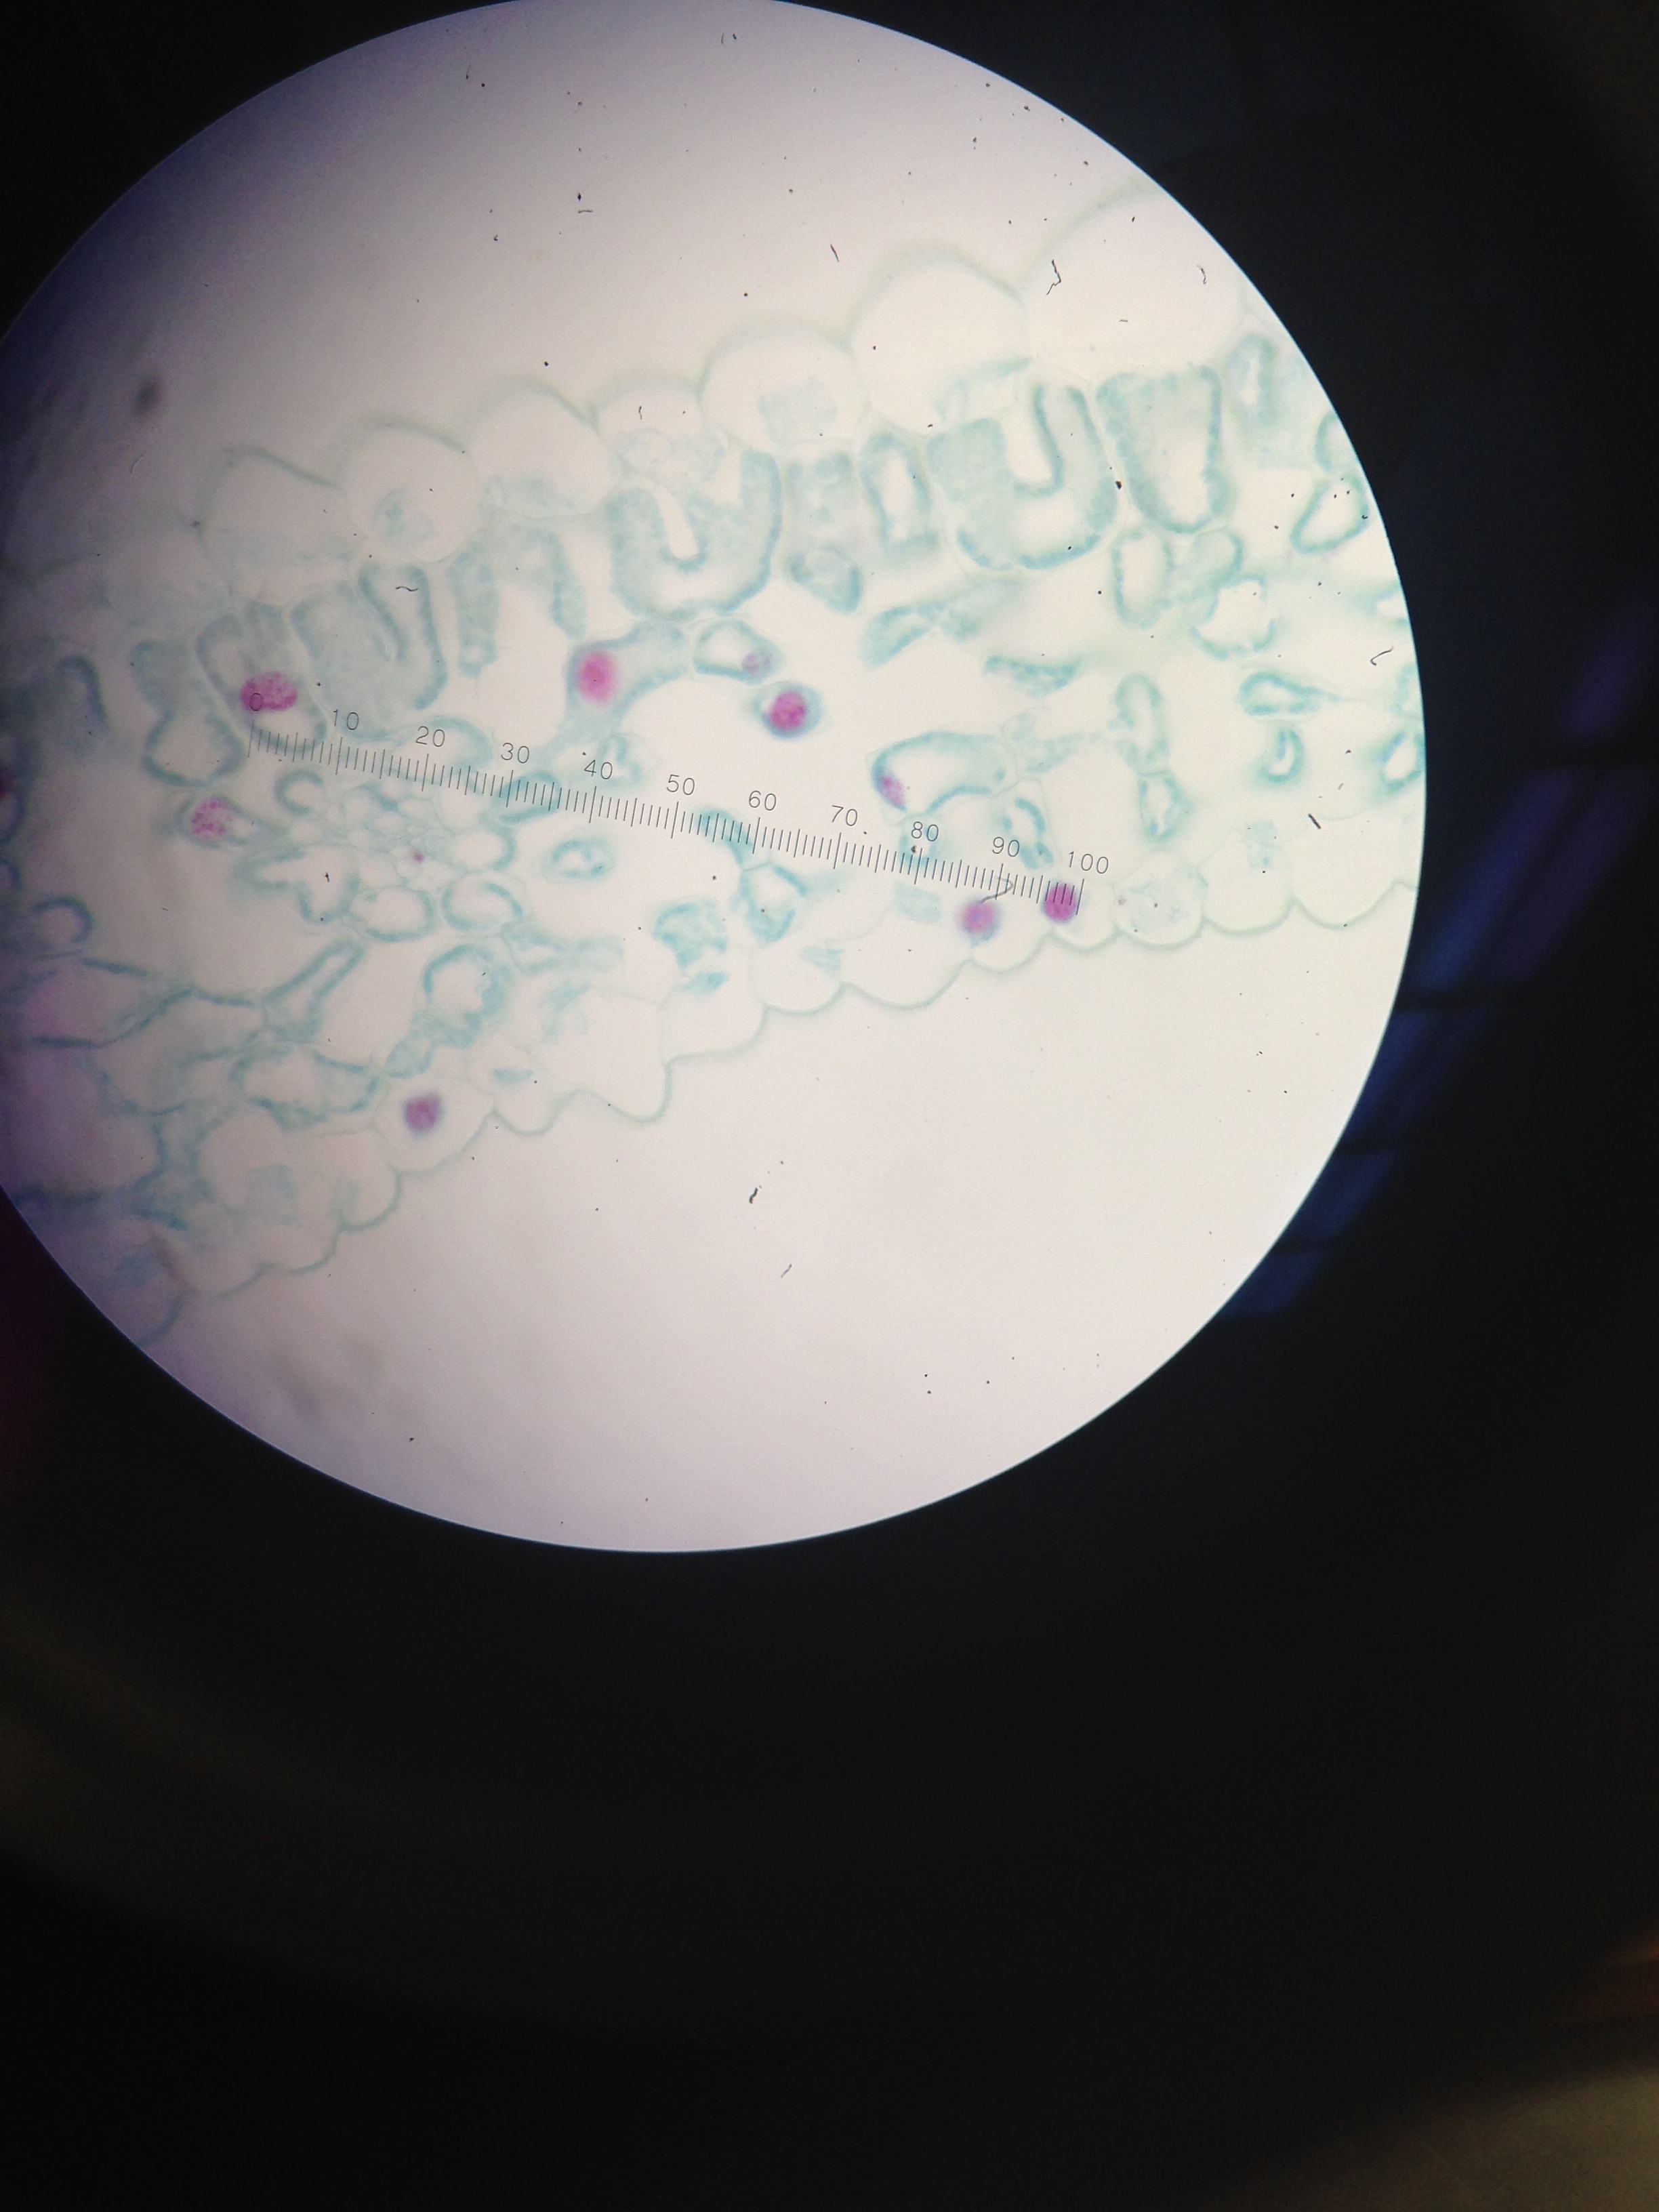 Figure 5: View of lily stem cross section
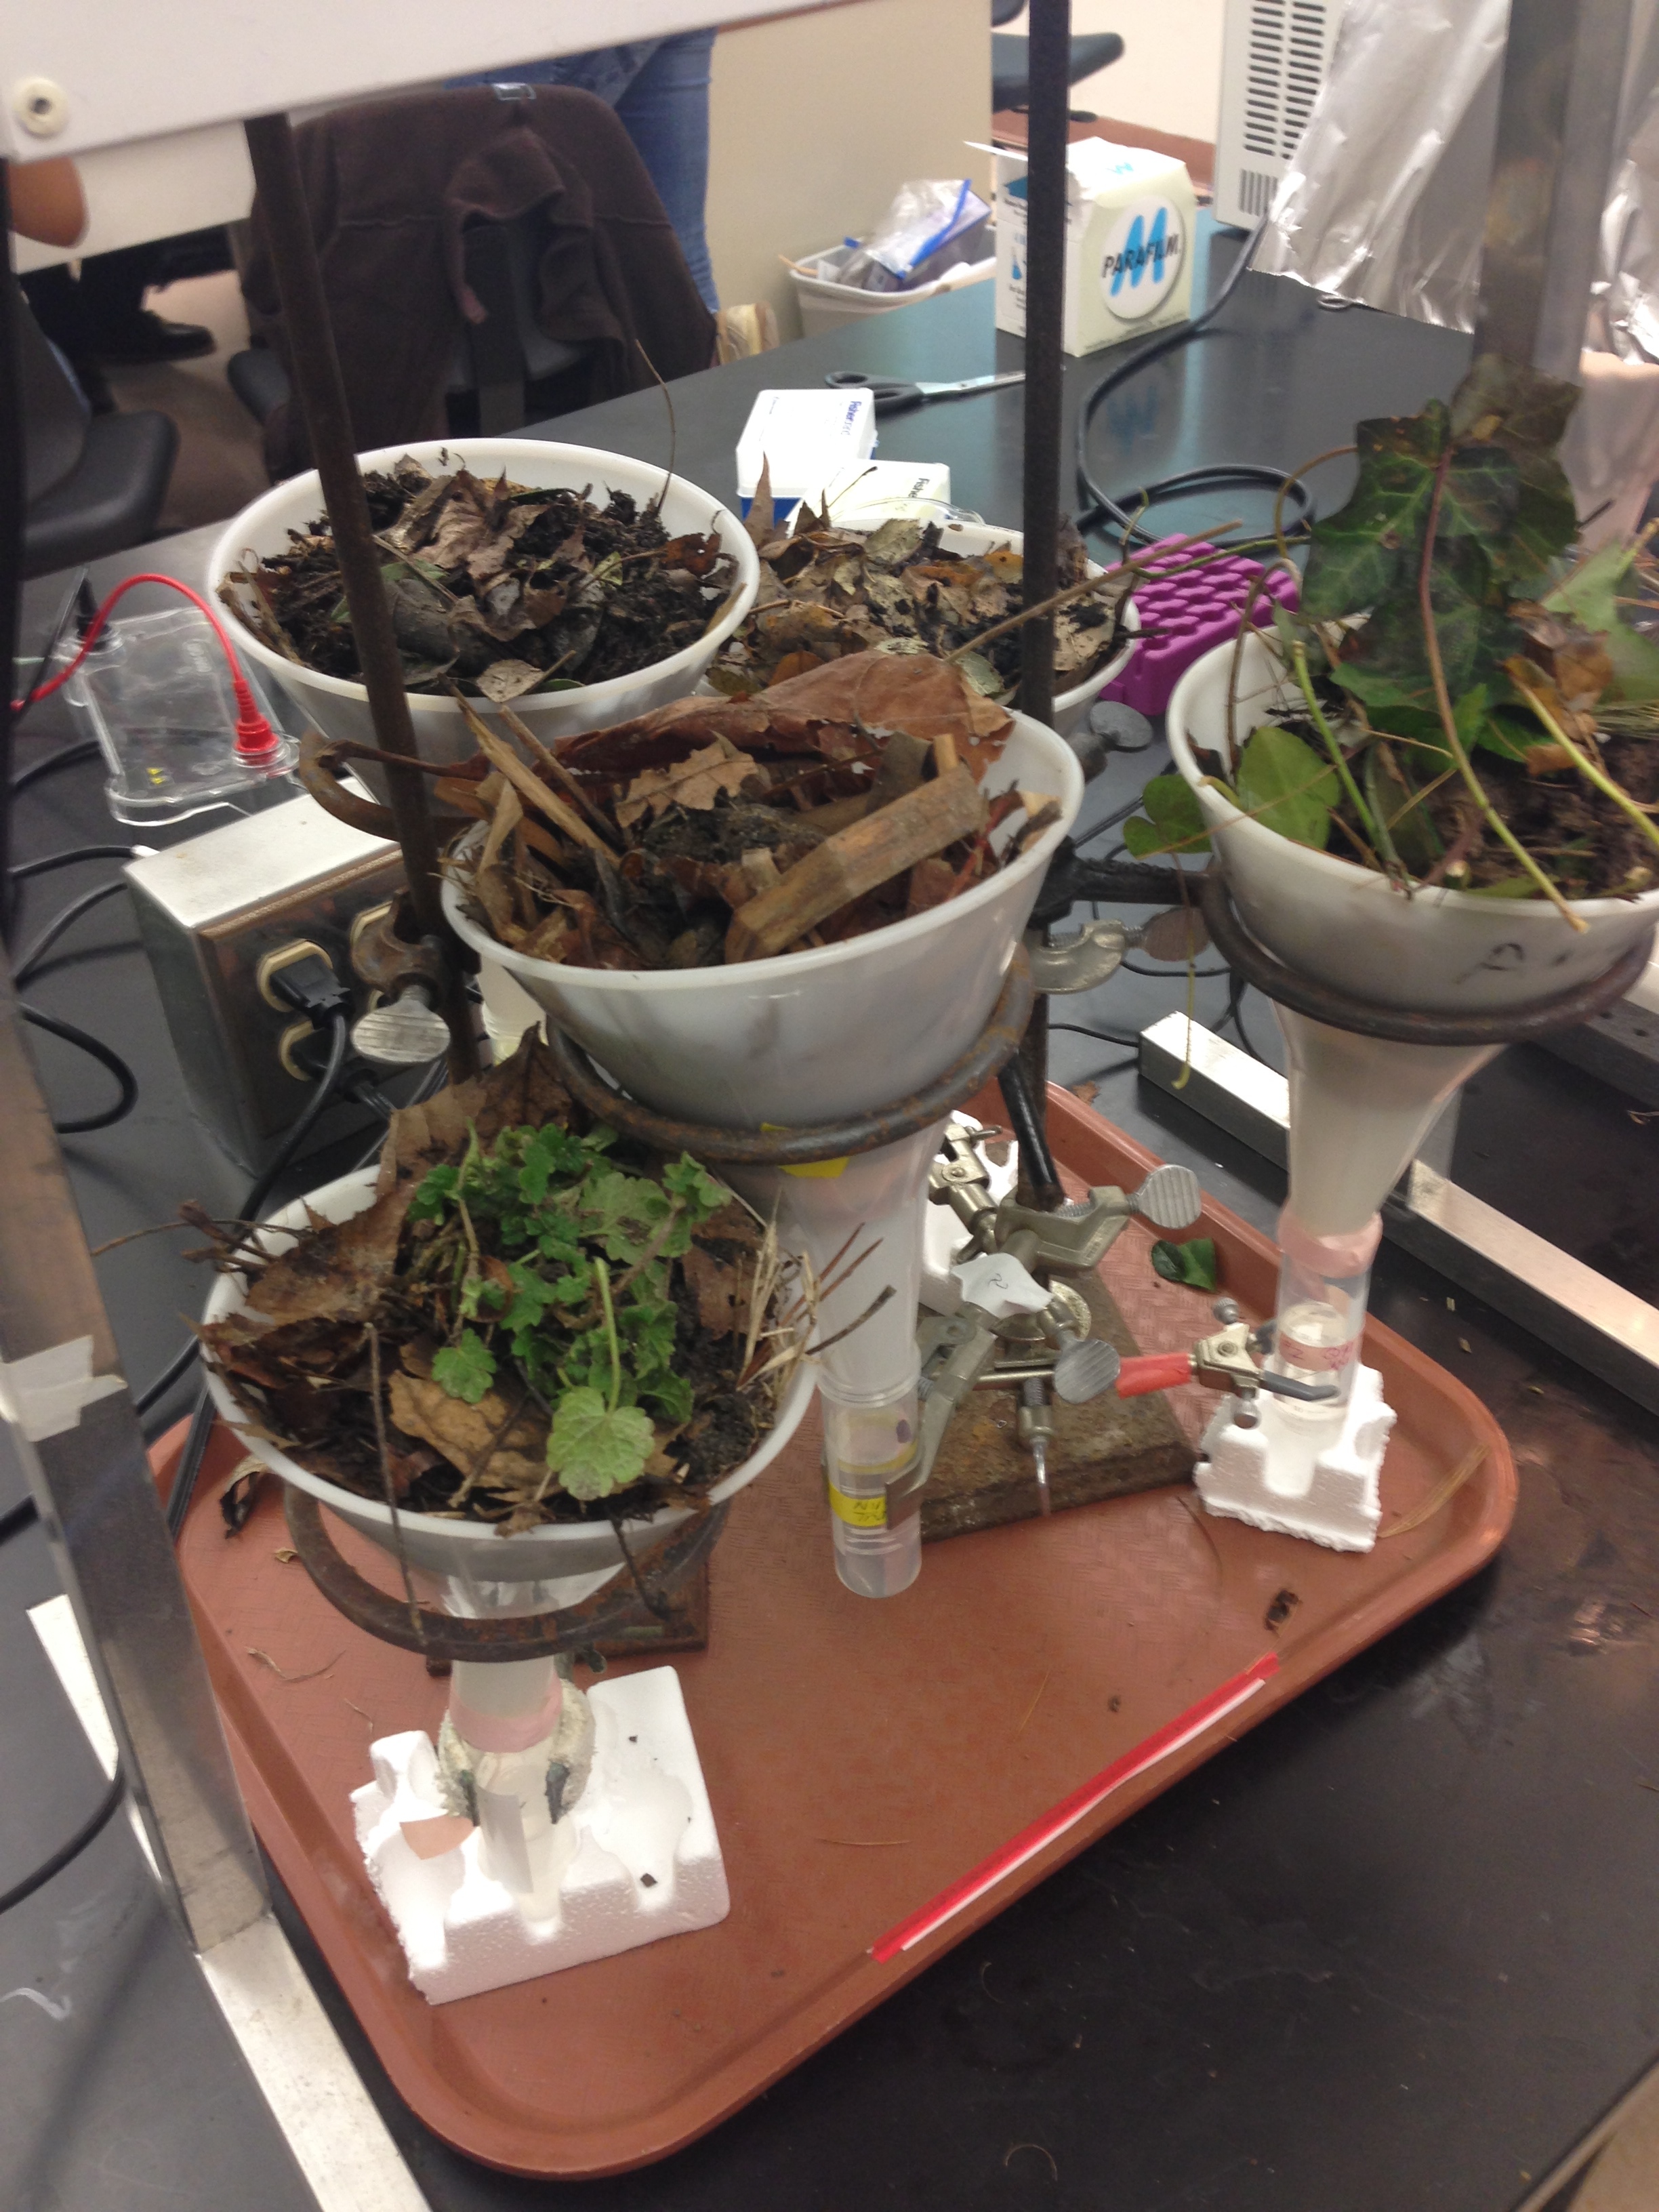 Figure 6: The setup for the invertebrate collection funnel
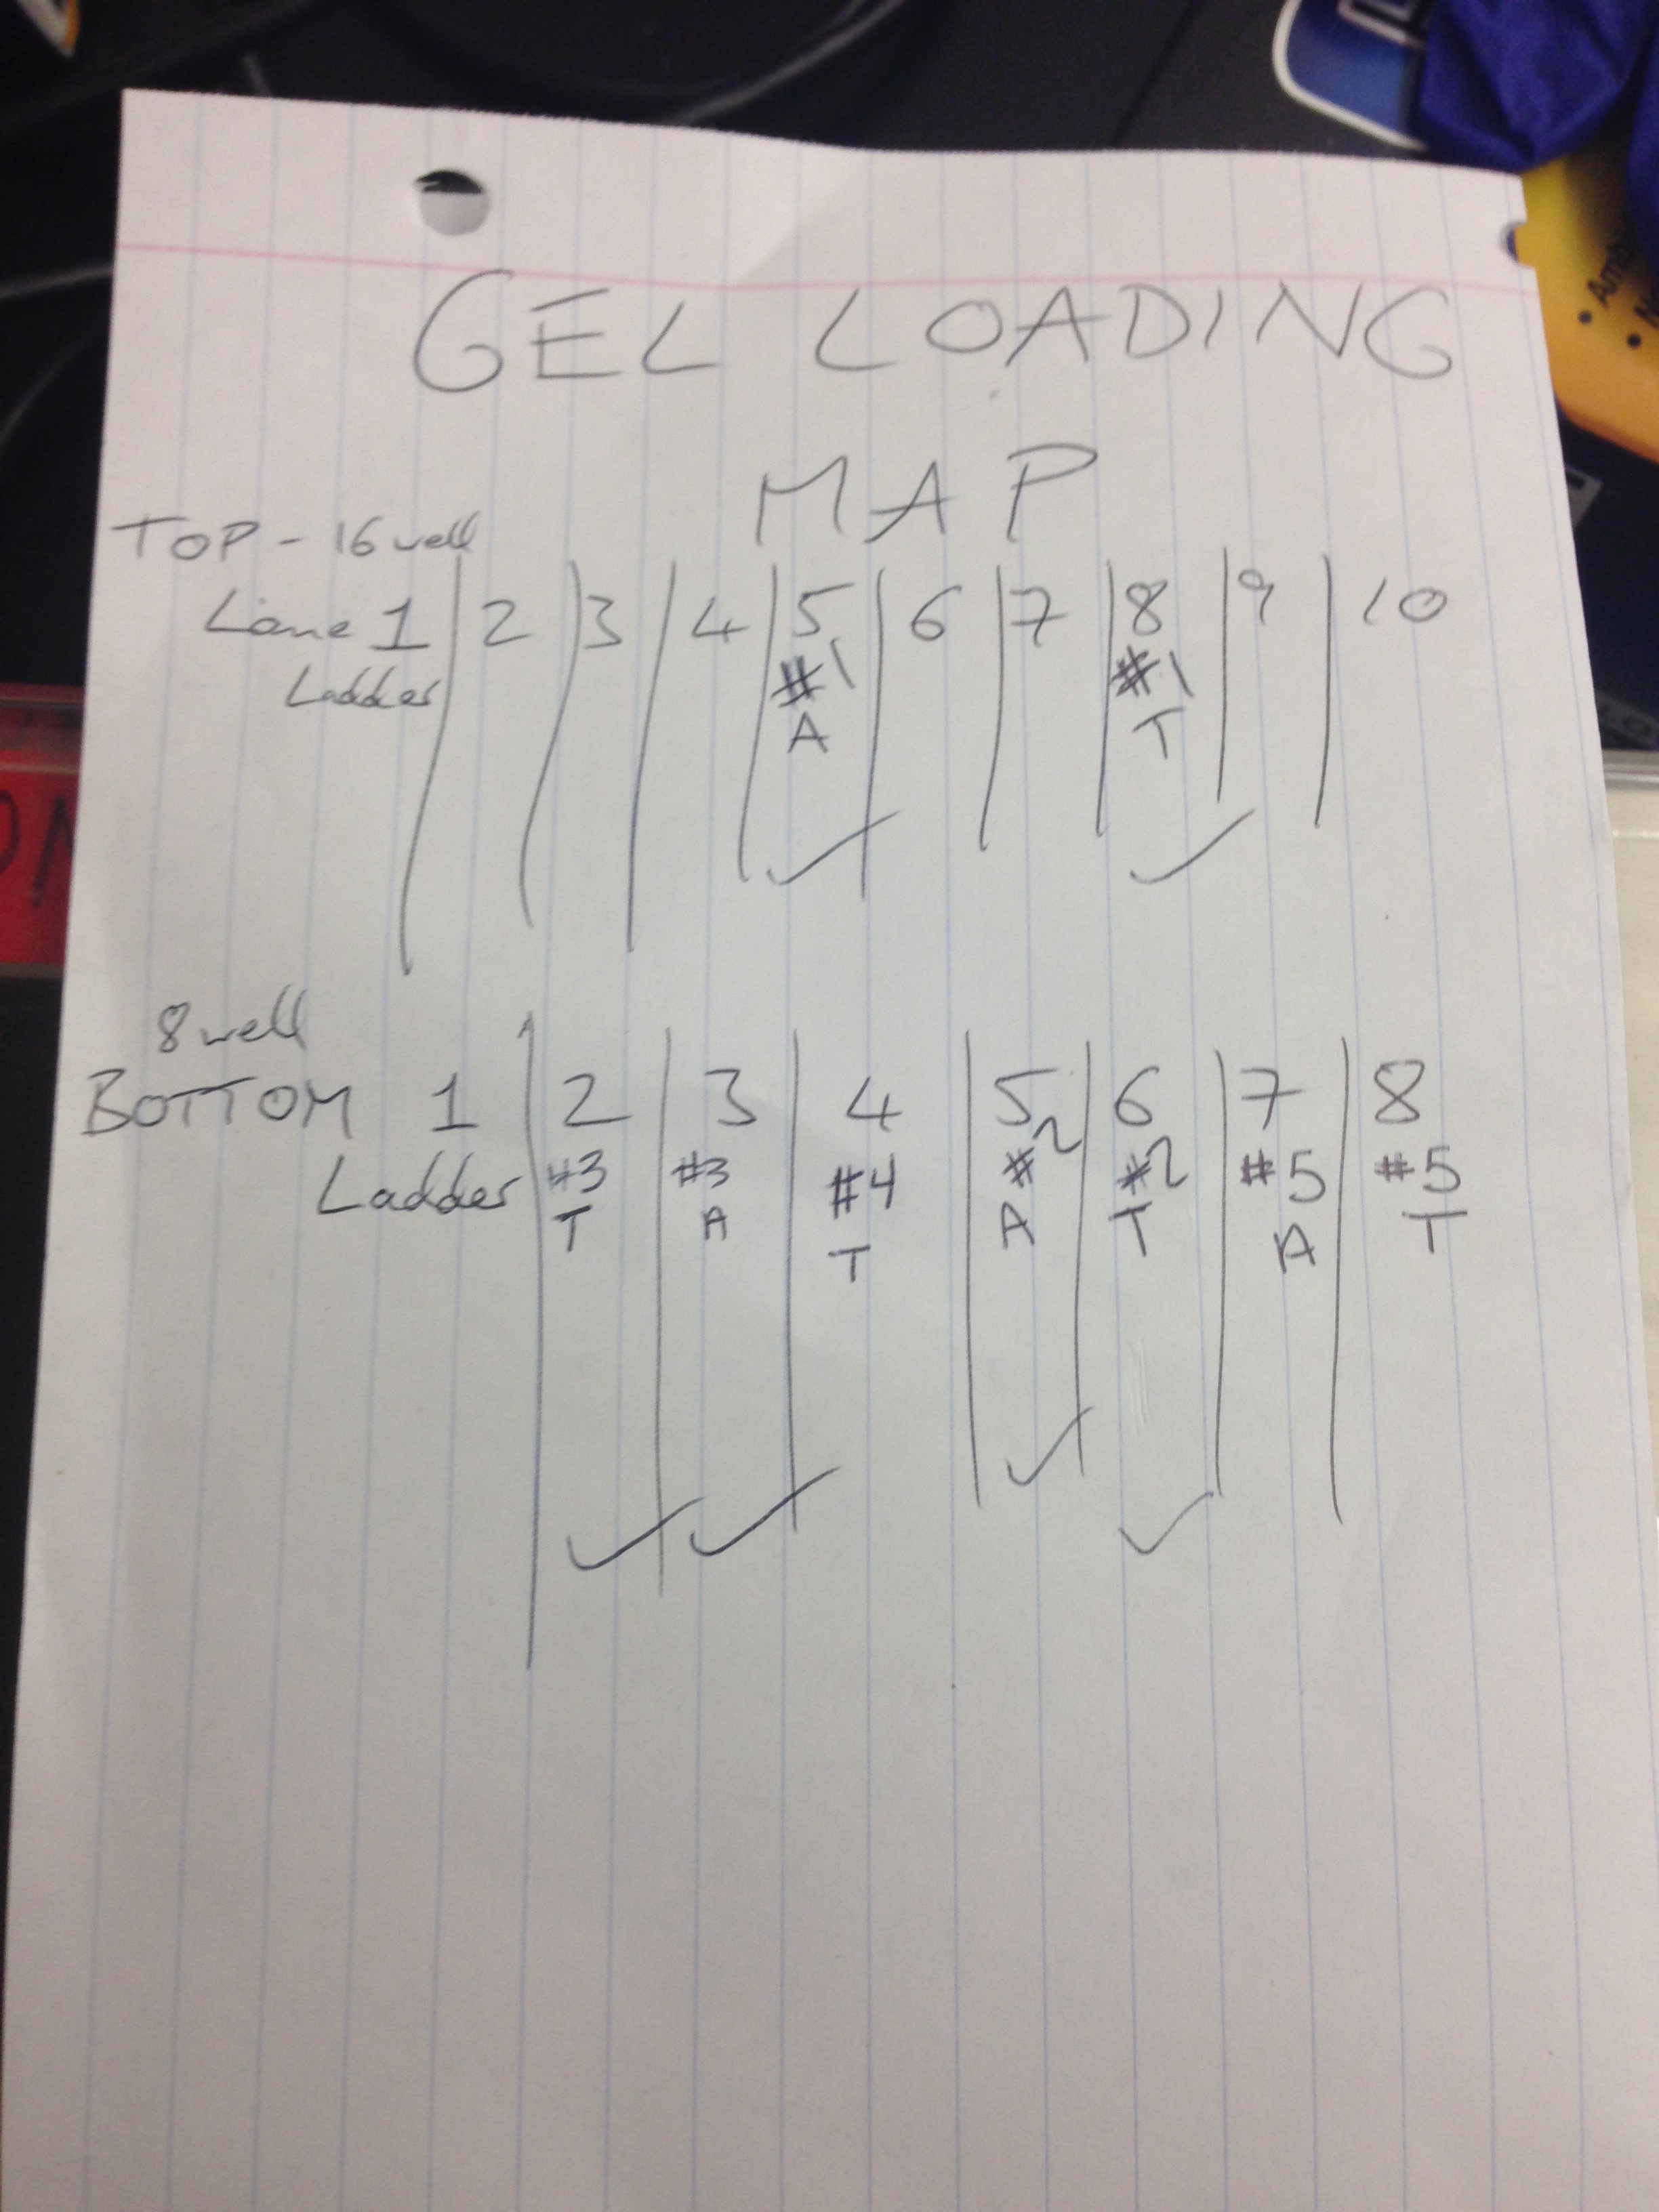
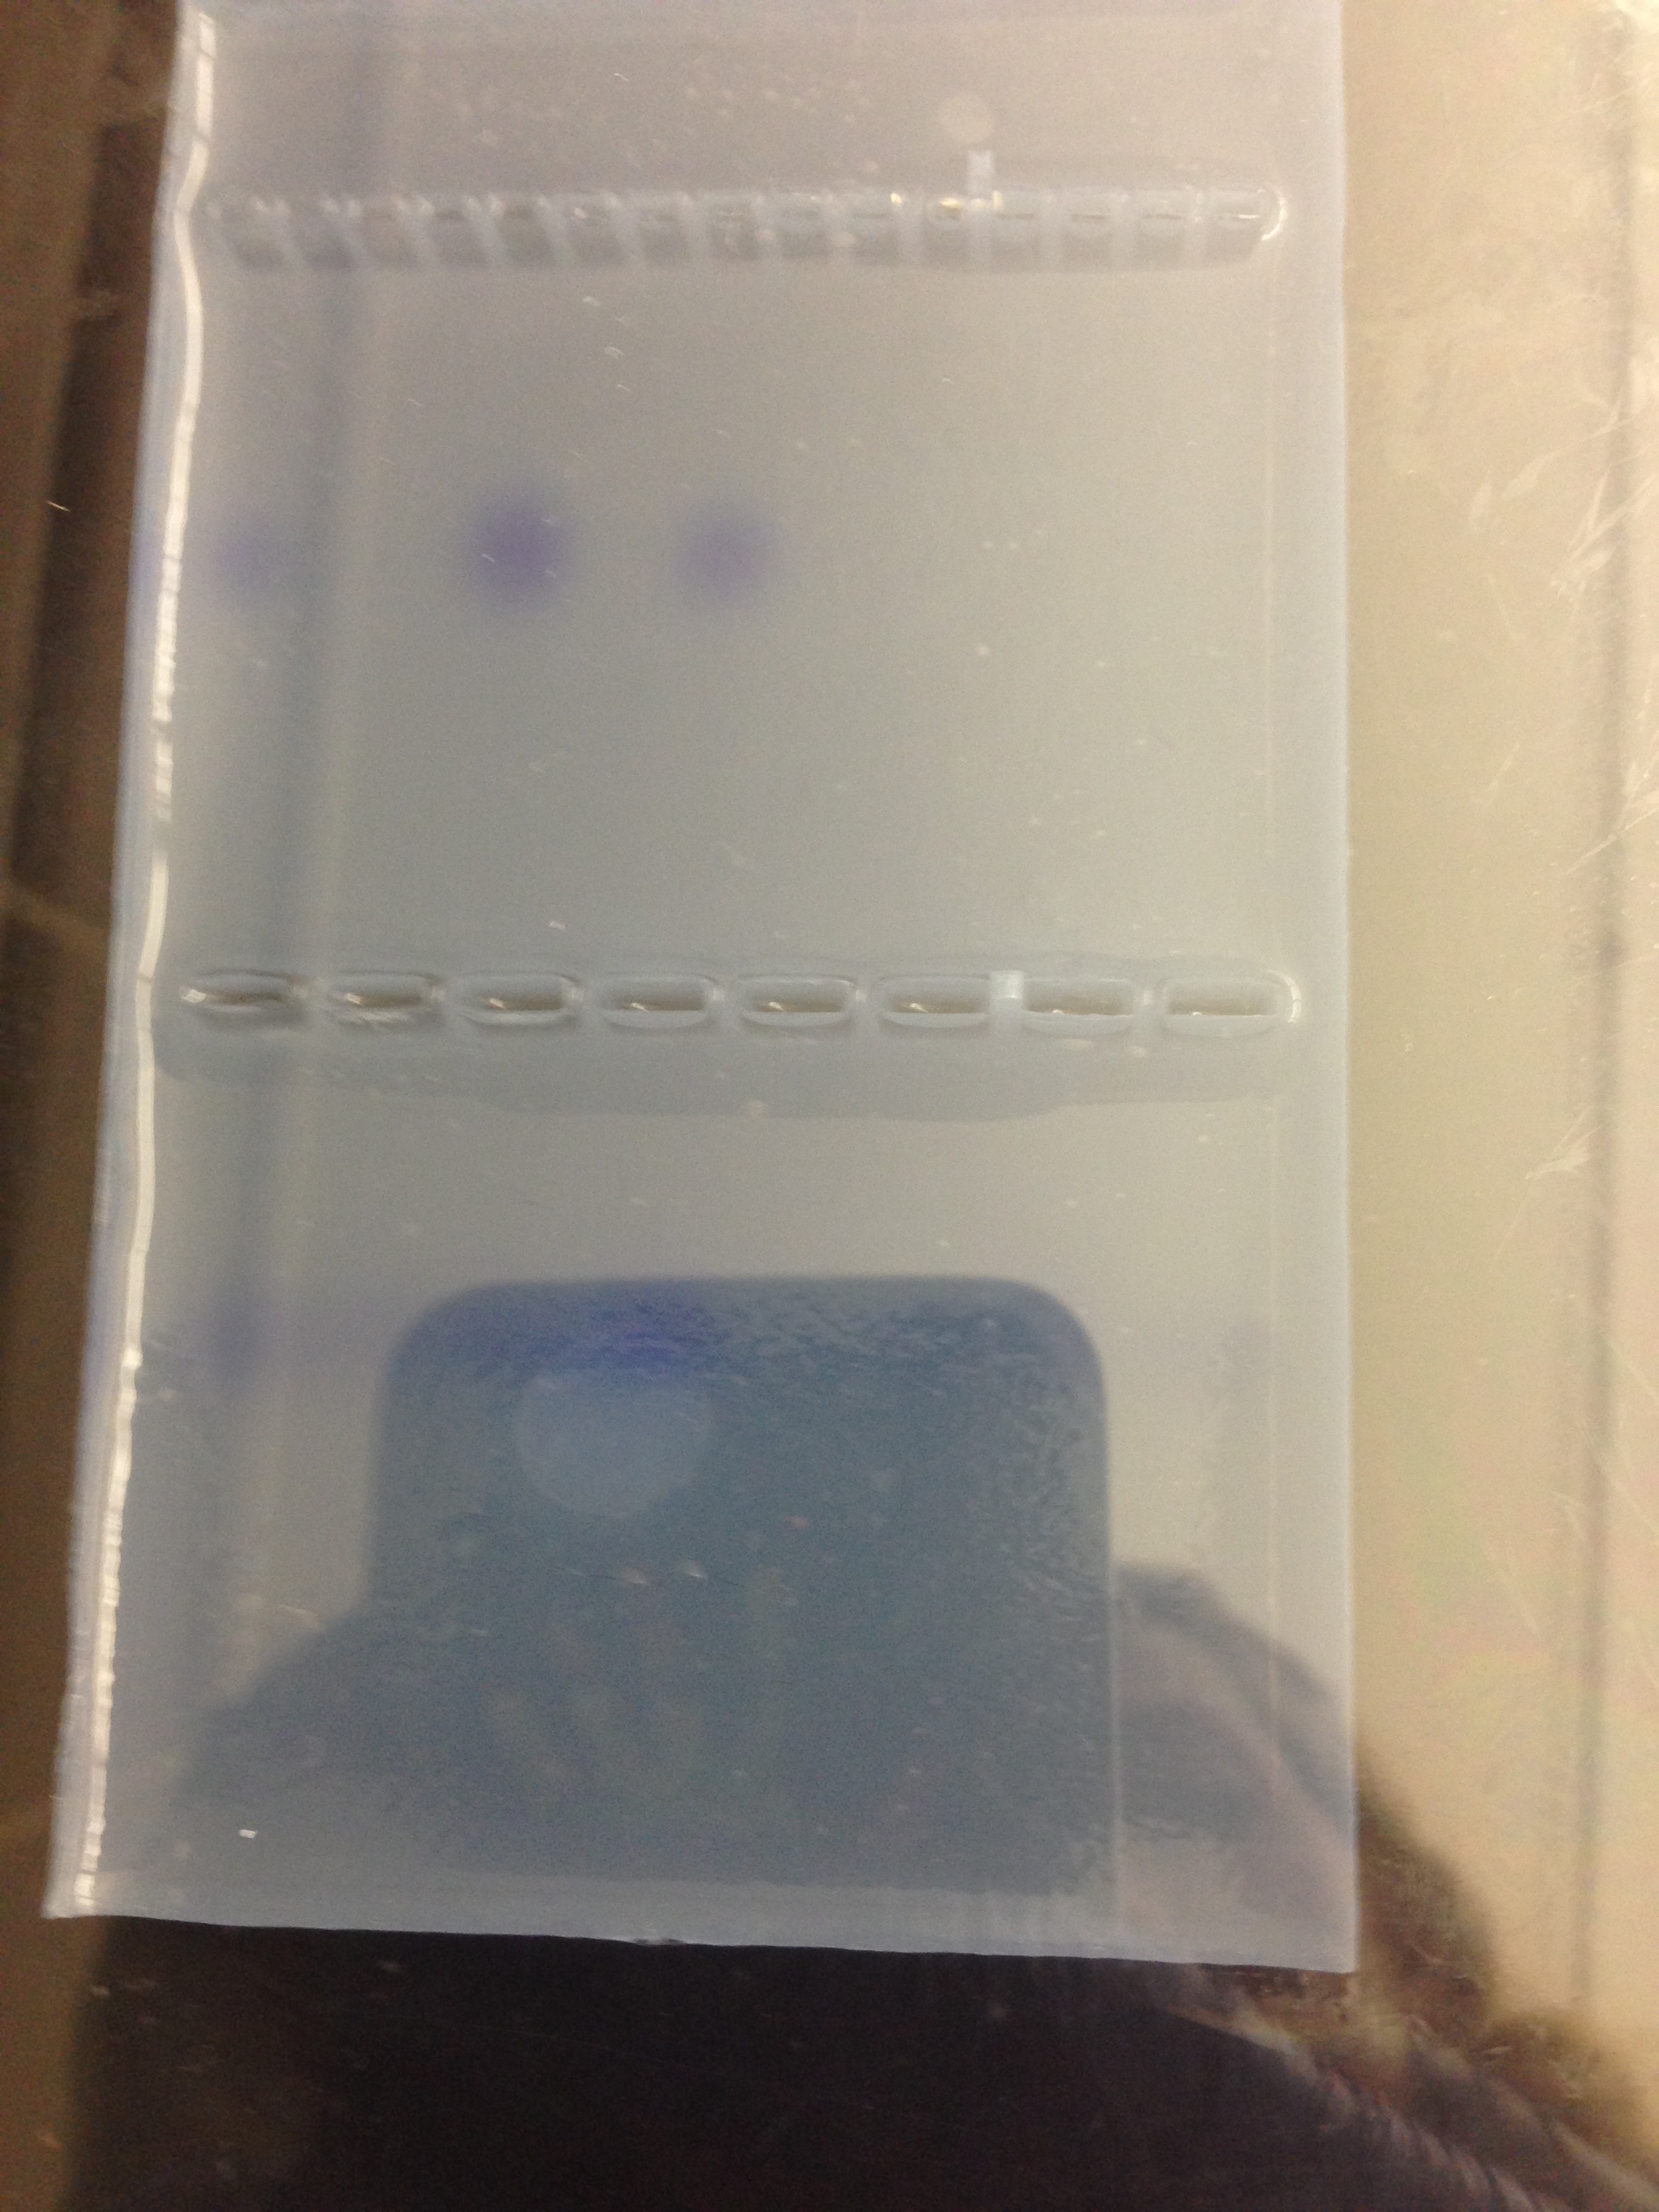 Figure 7: gel loading map and DNA from bacteria collected from previous lab to ensure it is okay to send of to be coded
Conclusions
This experiment adequately represented the different types of plants that can be found in nature and specifically in the individual transect. Observations made were very interesting and further showed the diversity of organisms not only on the planet but also in the individual transect.
2/16/14
Lab 3
The purpose of this lab was to understand common characteristics of bacteria, and to observe the bacteria that grow with antibiotics present, and also to understand how DNA sequencing can identify an individual species. This lab will help to identify some of the bacterial species present in the transect and that grew in the hay culture.
Procedure I
- Check the Hay infusion culture and note any changes.
- Count the total number of colonies on each plate and record
Procedure II
- Answer questions about antibiotic resistant bacteria.
Procedure III
- Obtain a prepared slide with different types of bacteria, observe the using all microscope objectives including the oil immersion
- Pick four colony samples from the agar plates, two from the regular agar plates, and two from the agar plus tetracycline.
- Prepare a wet mount and a gram stain of the cells and observe under the microscope.
- To make the wet mount use a sterile loop to scrape a piece of the growth and mix it with a drop of water on a slide. Make a second slide with the same colony, but let it dry.
- Observe wet mount under 10x then 40x
- Gram stain each of the four colonies selected
- Label slides, heat the air dried slide through flame
- Cover smear with crystal violet for 1 minute, rinse
- Cover smear with Gram’s iodine mordant for 1 minute, rinse
- Flood smear with 95% alcohol for 10-20 seconds, rinse
- Blot excess water
- Observe under microscope
Procedure IV
- Select one of the two agar colonies and one of the two antibiotic resistant colonies
- Selectively amplify the 16S rRNA gene
- Transfer colony of bacteria to 100 microliters of water in a sterile tube
- Incubate at 100 degrees Celsius for 10 minutes, centrifuge
- Use 5 microliters of the supernatant liquid in the PCR reaction for next week
Data
Important observations
- Water in hay infusion is less smelly, the water is also less cloudy and much of the water has evaporated, over half. There are a lot of algae growing up on the sides.
- The appearance and smell can change week by week because many different organisms are originally present in the hay infusion, and over time certain bacteria take over the environment and others die, especially as the water evaporates and the habitat decreases for the organisms that were originally present.
Figure 1: This table shows the number of colonies formed based on the dilutions.
- The tetracycline colonies were very orange, whereas the nutrient agar only colonies had some orange, but there was also blue and yellow. Most of the colonies were round; some were cream colored with a yellow center on the 10-9 agar.
- Many more colonies appeared in the agar without tetracycline.
- Only one visible species of bacteria was unaffected by the tetracycline. They had an orange coloration and the colonies were round.
Figure 2: This table shows a description of the colonies taken to make the gram stain
- Tetracycline works by inhibiting the protein synthesis of bacteria. It binds specifically to the 30S ribosome of the bacteria. This prevents the aminoacyl tRNA from attaching to the RNA-ribosome complex. Tetracycline doesn’t directly kill bacteria it inhibits it. Tetracycline is effective against a wide range of gram-negative and gram-positive bacteria, spirochetes and large viruses.
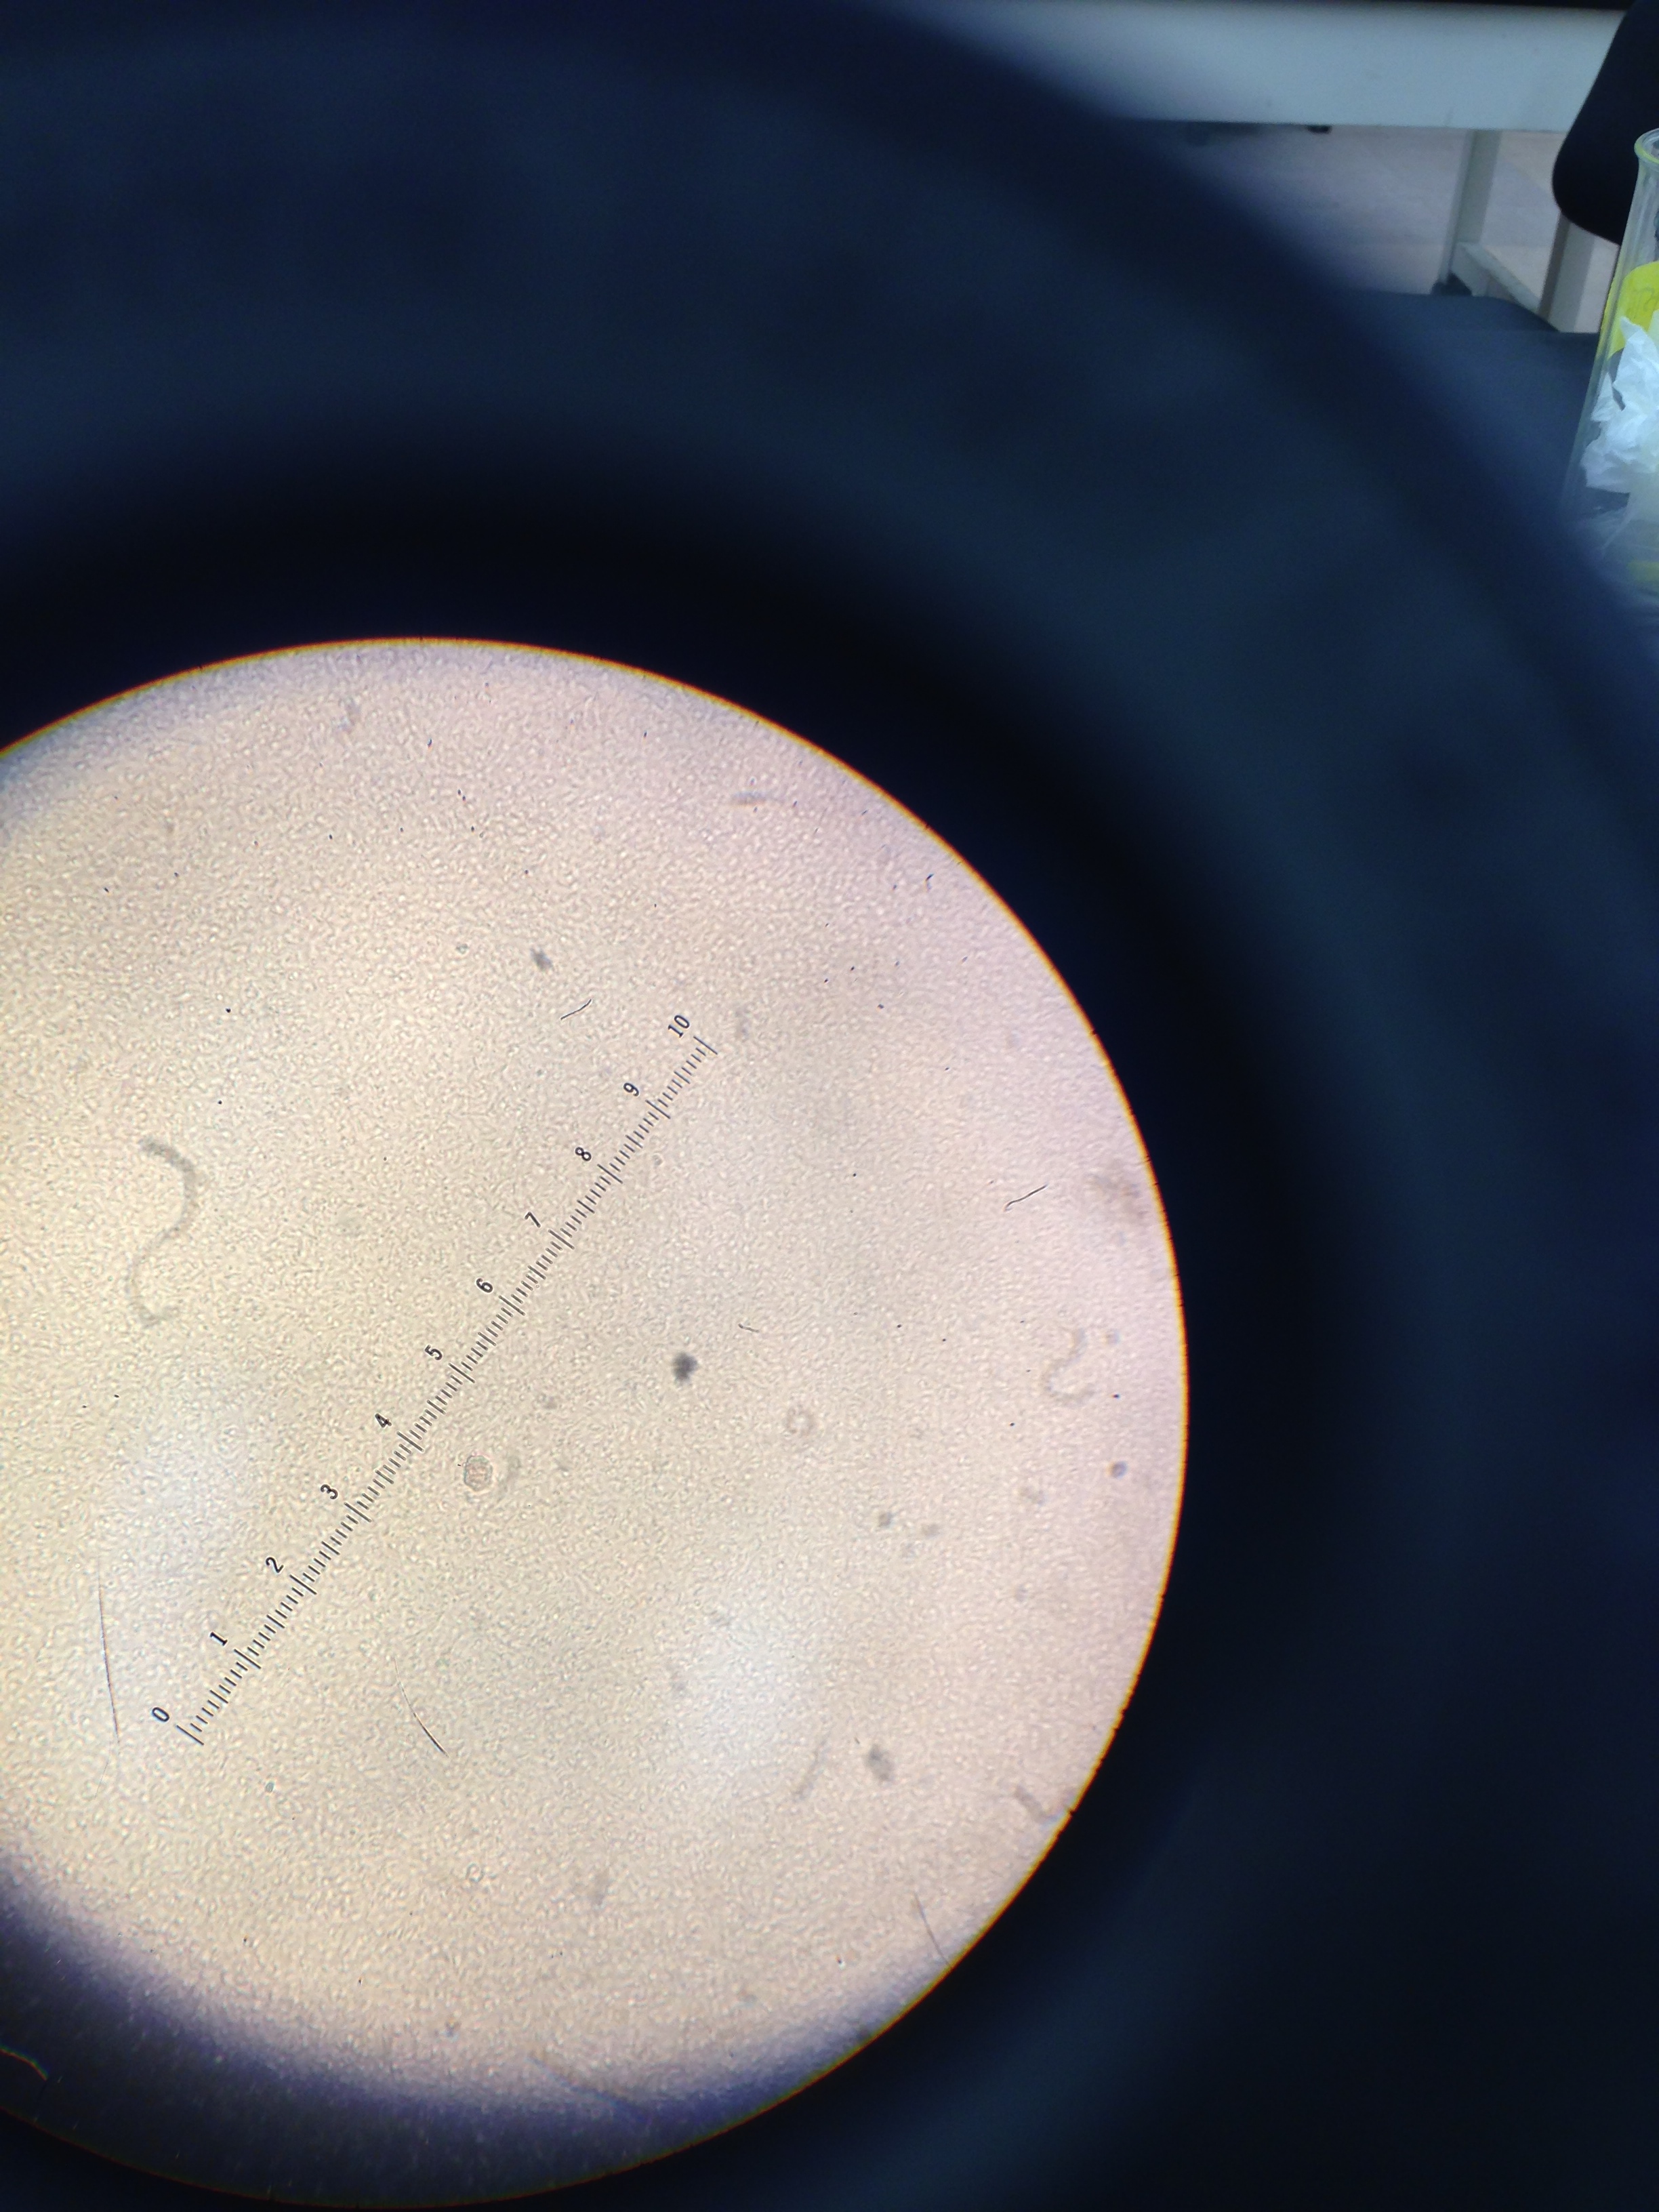
Figure 3: This is an image of cells from the 10-9 agar dish without tetracycline and before it was gram stained. The clumps that are visible are clumps of bacteria stuck within a gel like substance.
Figure 4: This image shows the cells from the 10-7 agar dish without tetracycline. This is before it was gram stained and the bacteria are moving with the flow of the liquid they are in.
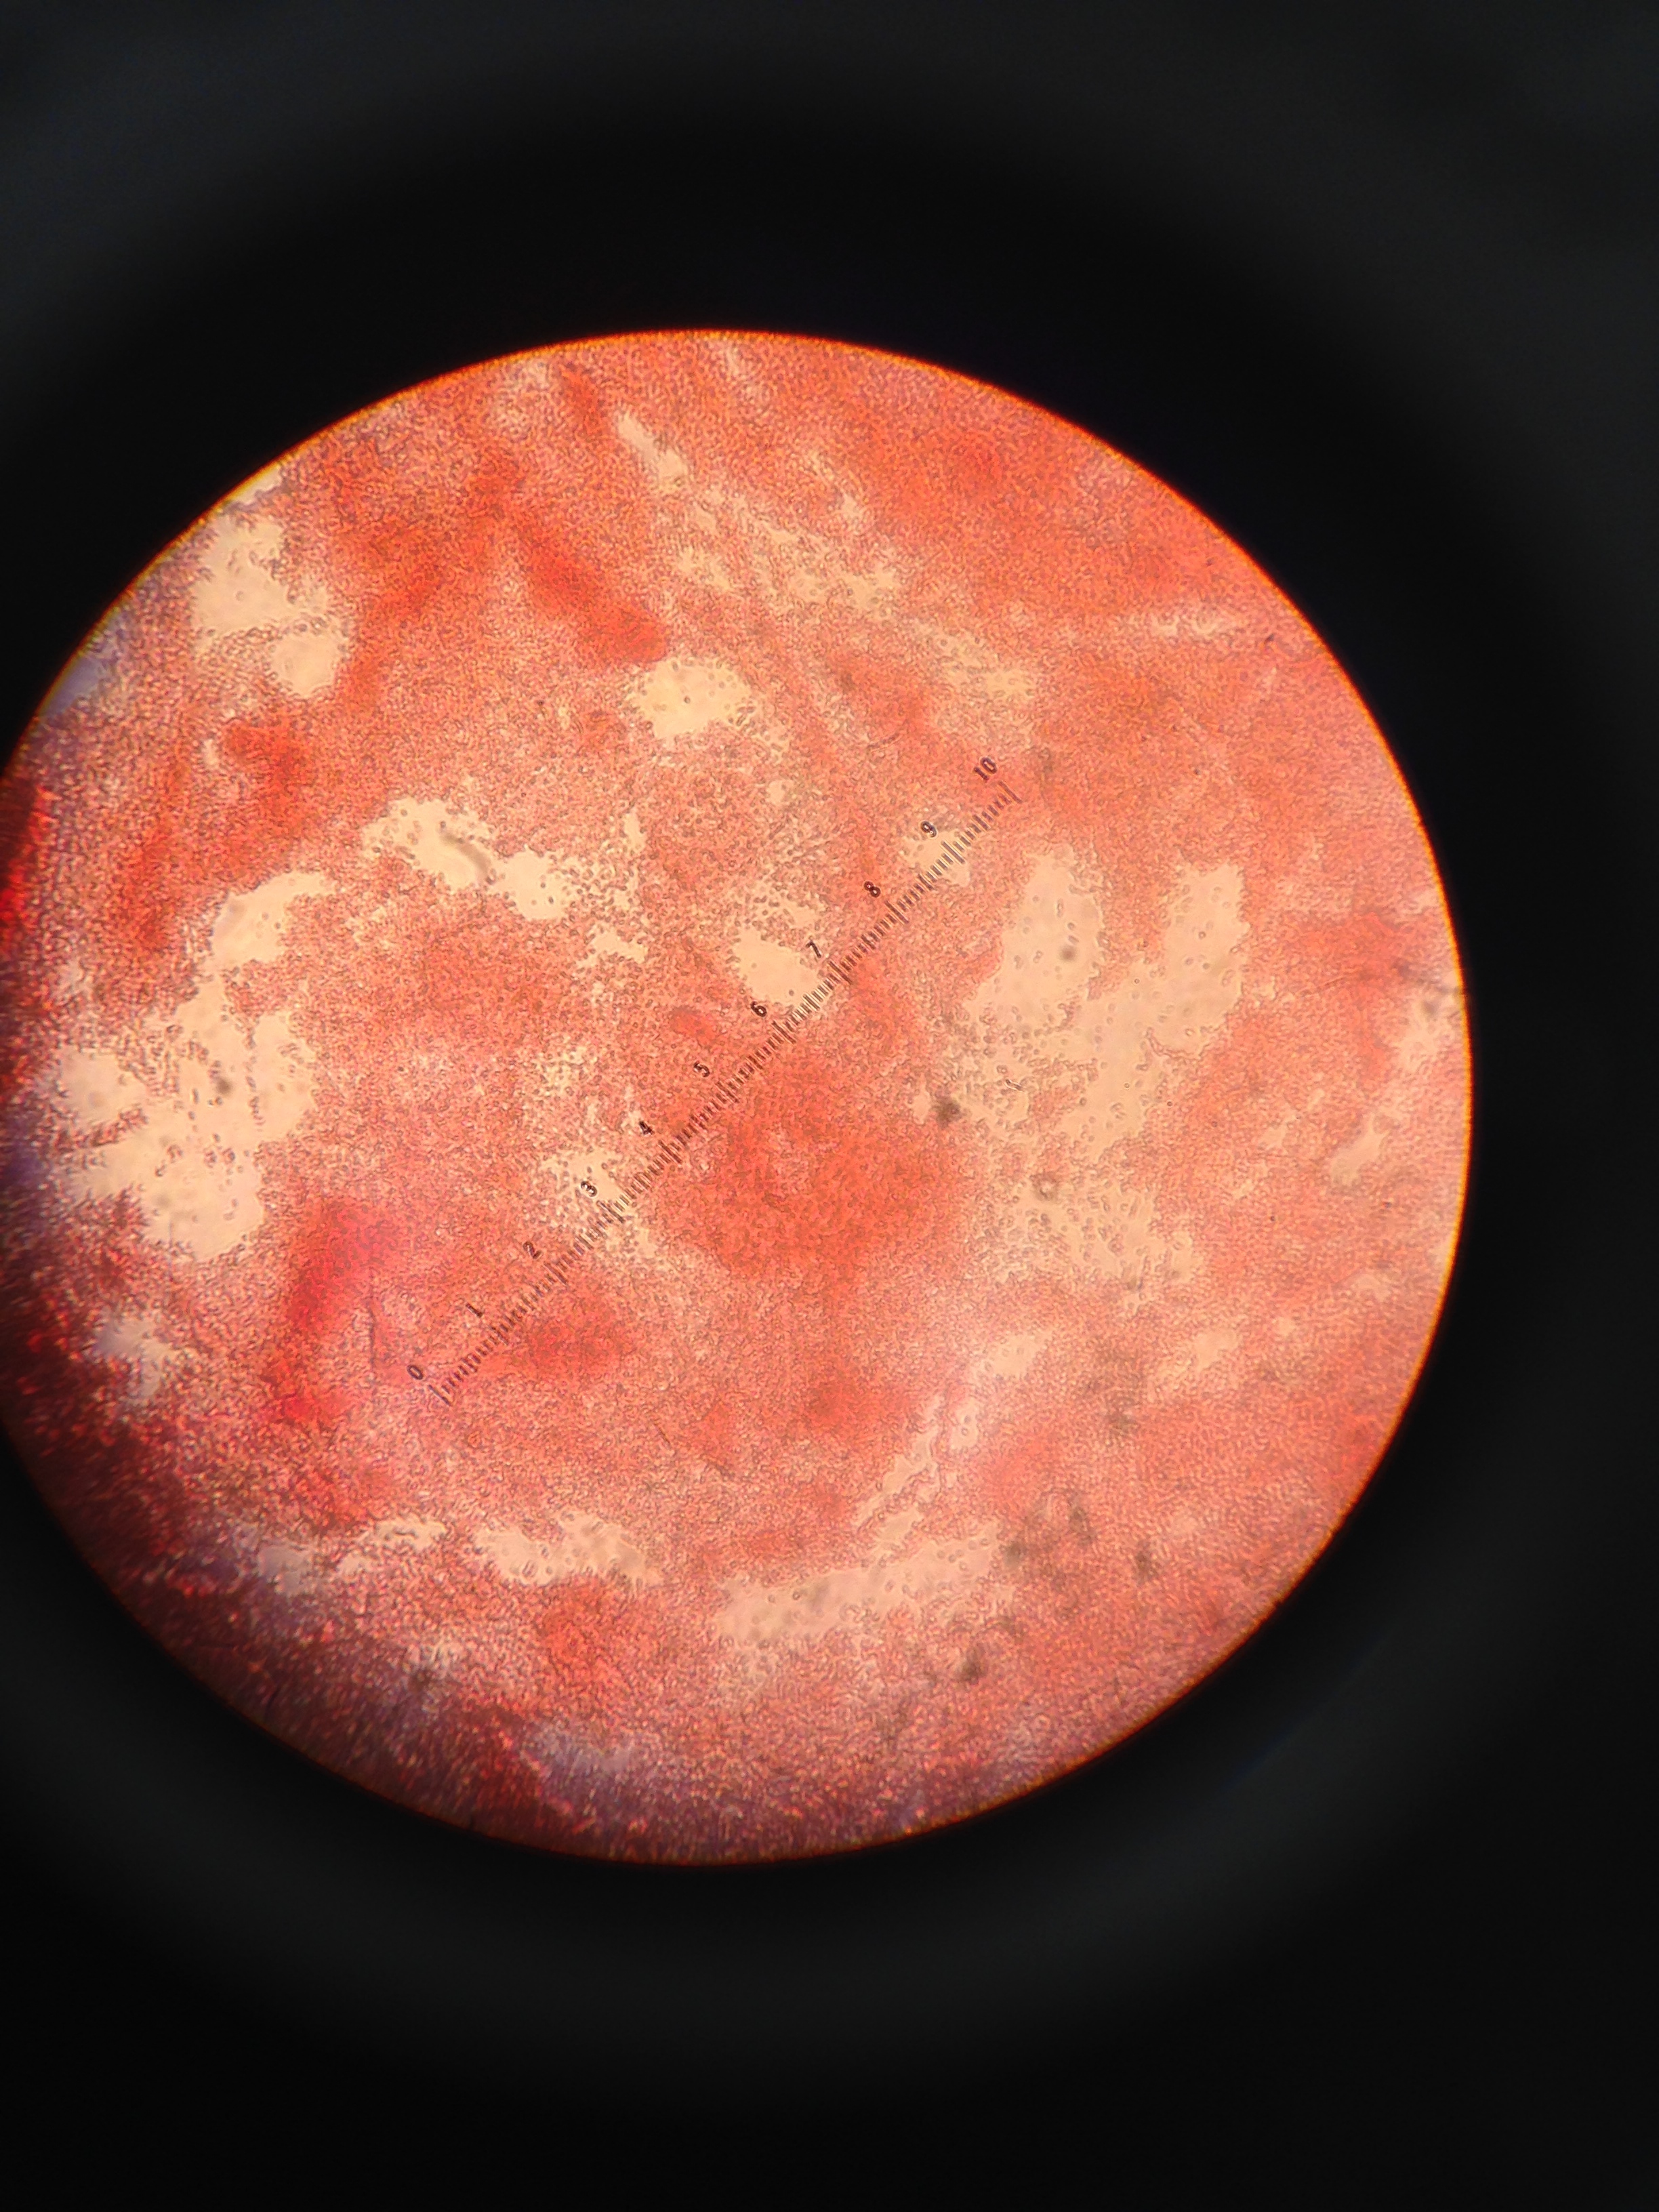
Figure 5: This image shows the cells from the 10-7 agar dish with tetracycline. This is before it was gram stained and the bacteria are moving with the flow of the liquid they are in.
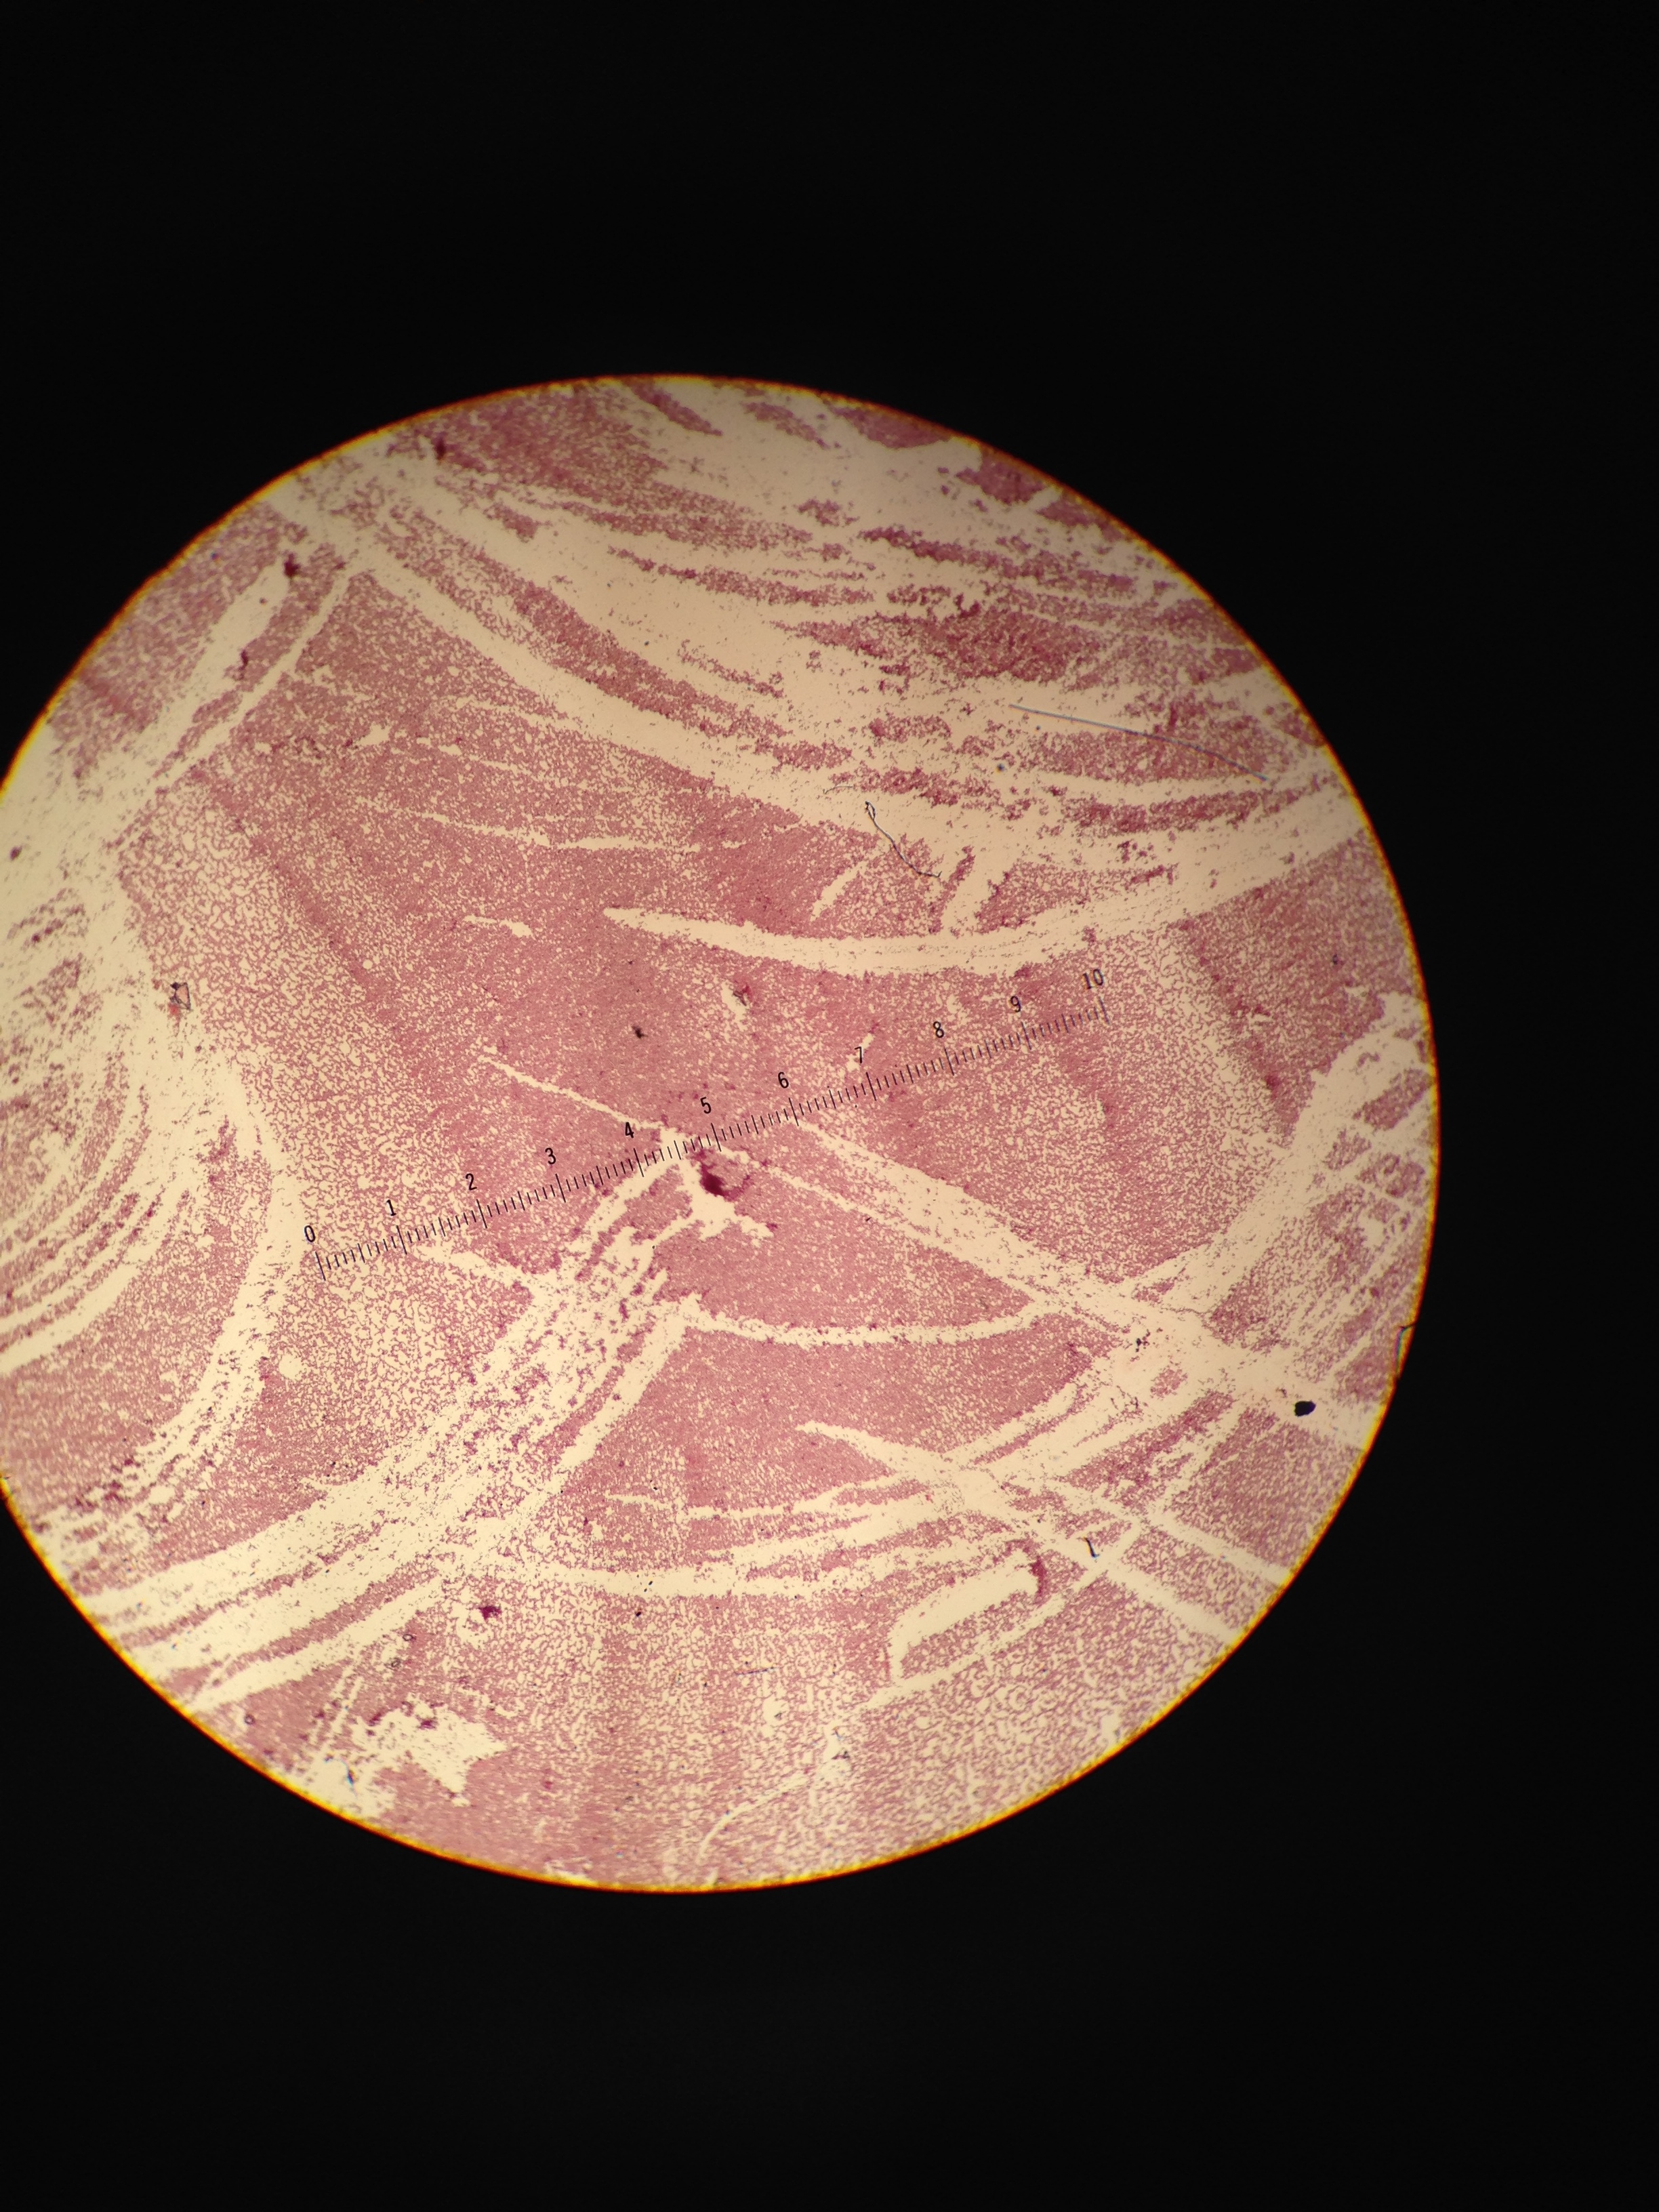
Figure 6: This image shows the gram stain negative of the 10-9 agar dish
Figure 7: This image shows the gram stain negative of the 10-7 agar dish
Figure 8: This image shows the gram stain negative of the 10-7 agar with tetracycline dish
Conclusion:
This lab showed the diversity and complexity of the minuscule world and adequately demonstrated how gram negative and positive testing worked. in the future it would be interesting to study exactly why the bacteria present in the individual agar plus tetracycline was resistant to tetracycline. What characteristics made it resistant?
Source Klajn, R. "Tetracycline - Antimicrobial properties." Chemistry and chemical biology of tetracyclines. N.p., n.d. Web. 16 Feb. 2014.
2/9/14
Lab 2
The purpose of this lab is to understand algae and protists and to learn how to identify them using a dichotomous key. Using the knowledge learned from identifying algae and protists, organisms were identified that lived in the hay culture created during the previous lab. Also, using the hay culture, several dilutions of the hay culture were spread on agar plates to later observe the colonies that would develop in the dish.
Procedure I:
1. A wet mount slide was made from a solution with several known species within it.
2. The organisms within the individual slide were identified using the dichotomous key given.
3. This was repeated with two different organisms.
Procedure II:
1. The hay culture was observed and changes were noted
Procedure III:
1. Hay infusion culture was mixed up
2. 100 microliters of mixed culture were added to a tube to be diluted 1:100 (10-2 dilution)
3. 100 microliters were then taken from diluted solution and added to another tube to further dilute to 10-4
4. This was repeated two more times to get dilutions of 10-6 and 10-8
5. Solution from each of the four tubes was spread on an agar plate and a plate with tetracycline.
6. Each plate diluted the 10 times more when added to the plate.
7. The plates with the individual solutions grew for a week at room temperature
Data Important observations • The dirt all settled to the bottom of the hay infusion, a grass chunk was in the middle, and a film had developed on top of the water. The water overall was not very clear. • It smelled like gross pond water. There was a brown film on top of the water and climbing up the walls of the container. Grass was also emerging from the surface of the water slightly. On the surface of the film on top of the water there were a few white specks, possibly mold. • Near the plants there would likely be an entirely different realm of bacterial species living compared to those that would live near the surface of the water and the bottom of the hay infusion • Samples from the culture were collected from the surface film on the water, as well as from the plants in the middle of the culture. • If the hay infusion culture was observed for two months longer, much of the water would likely evaporate, and the organisms that were present that lived near living plants and in water would not be as abundant. Organisms that thrive on dirty surfaces would have a better chance of survival by the end of the two months. • The selective pressures that affected the sample would be where the samples were taken from. Also, since all the cultures from the class sat open to the air next to one another it is possible organisms moved from one culture to another. • The paramecium found in the culture is considered a life form because it is capable of replication, a product of evolution, evolving from simpler life forms, is made up of a single cell, stores and processes information, and gains energy by using its cilia to get nutrients into its body.
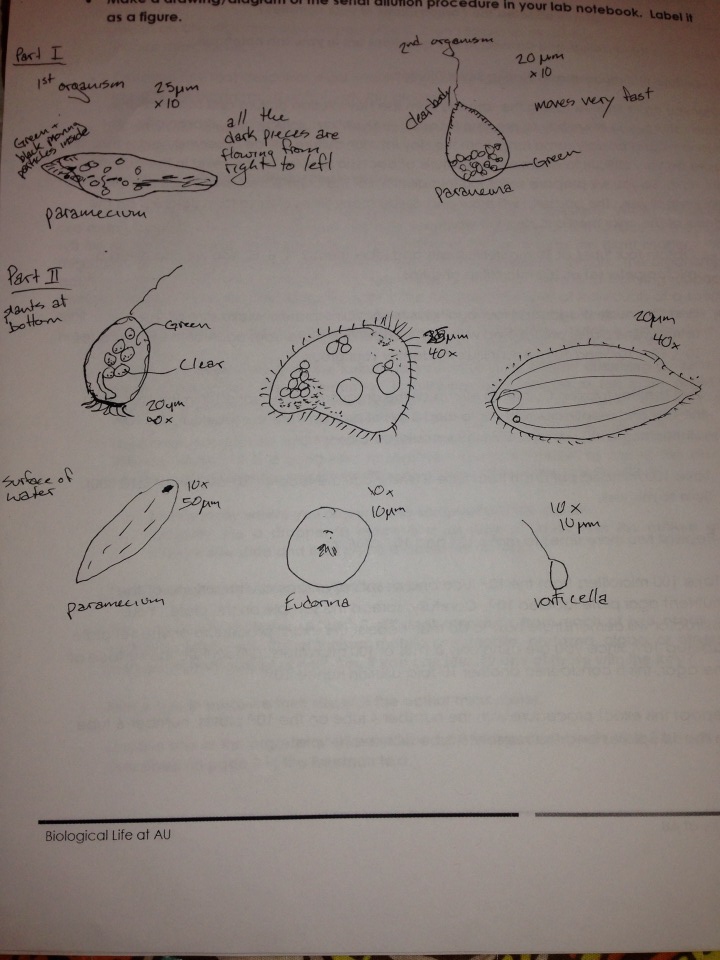
Figure 1: This drawing shows the organisms found in part one as well as the organisms identified from hay culture in part II
Figure 2: This figure shows the serial dilution procedure.
Figure 3: This image shows a microscopic view of the organisms found in the algae surrounding the plants near the bottom of the hay culture
1/31/14 Lab 1 Abstract
The purpose of this lab is to observe a specific niche in the environment on American University’s campus, and to understand the abiotic and biotic characteristics of the niche. In this lab the evolutionary process of the members of the volvocine line are observed. As well as understanding evolution, the organisms that could be living in the individual niche were grown. This experiment will observe the diversity of species living within a confined area and living in different portions of the small niche itself. This is an ongoing experiment that will test the diversity of species as well as the ability of bacteria to grow, among other things.
Hypothesis: • The characteristics of a cell’s structure and reproductive capability will increase in complexity over time and demonstrate evolution. • If a specific niche is left untouched throughout a semester the species that live within it will change over time due to the changing seasons and the different types of biotic species that would live and die throughout the period of time.
Procedure
1. Observe niche and draw the area 2. Take note of abiotic and biotic characteristics of niche 3. Take samples of both biotic and abiotic features were collected. 4. The sample is then weighed and placed in a plastic jar with deerpark water 5. 0.1g of dried milk are added to the solution 6. with the jar left off, the mixture sits for a week and an entirely new niche is created within the jar.
1. Take a sample of Chlamydomonas in solution 2. Add drop to slide and add protoslo so that the organisms can be seen and do not move too quickly 3. Take note of cell numbers, colony size, functional specialization, and reproductive specialization. 4. Repeat with Gonium and Volvox
Data
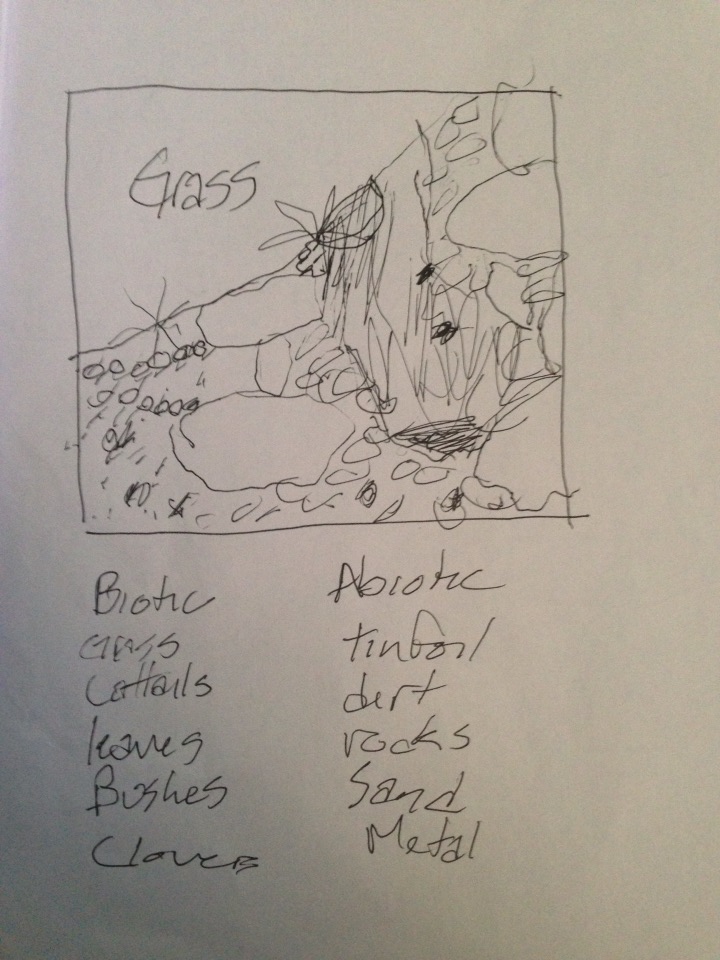
Figure 1: This is a drawing of the Niche #1 on American university’s campus. Showing rocks large and small, grass and bushes. There is also a large area of cattails.
Abiotic features 1. tinfoil 2. dirt 3. rocks 4. sand 5. metal rod
Biotic Features 1. Grass 2. Cattails 3. Leaves 4. Bushes 5. Clover
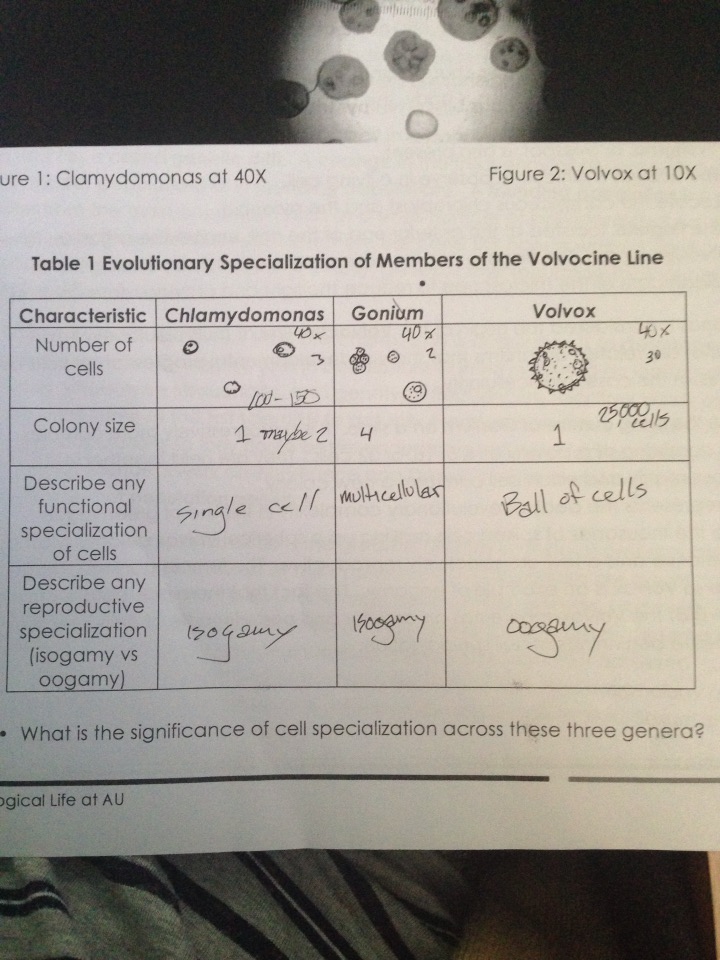
Figure 2: This figure shows the differences and evolutionary changes between Chlamydomonas, Gonium and Volvox.
Conclusion
In this lab the process of evolution was observed through the characteristics of Chlamydomonas, Gonium, and Volvox. Chlamydomonas is a single celled organism that uses isogamy reproduction, Gonium is the intermediate organism that has progressed to multicellularity but mantains isogamy. Volvox is the organism that progressed the furthest forming a ball of many cells and has also evolved to oogamy reproduction—where there are different male and female organisms within the species. It is fascinating to observe the outcome of evolution. In terms of the specific niche, it would have been helpful to have actually taken photographs of the area when the project began. Photographs can still be taken, but it would be interesting to see the change over time from the very beginning. The idea of evolution was observed in this lab, and further observed in future labs. The diversity was also noted in the niche and will be noted in the niche that grows in the hay infusion culture.
Good start, clear and concise description of the lab including an introduction to the transect project. Start each entry with the date in bold font and add new entries to the top of the page. Please upload pictures when possible. SK


