Koch Lab:Protocols/Flow cell
Kinesin technique
Kinesin assays can be very frustrating when things go wrong. There are many steps in the preparation and any one of those steps can cause the assay to not work if improperly executed. Since there are so many steps, the experimenter is left in the dark when things go wrong since it is the final product that we look at and none of the steps in between. In order to prevent inadvertent mistakes from occurring when making flow cells, this page is going to outline how to make them. This flow cell is specific for kinesin assays however, the techniques can apply to preparation of other flow cells for other experiments.
Slips & Slides
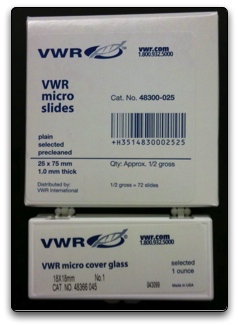
We use slides (#48300-025) and slips (#48366-045) purchased from VWR, pictured below.
Procedure
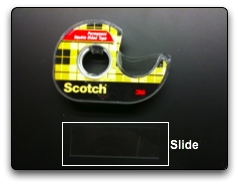
When making a flow cell, take out one slide and place it on the counter. You can clean the slide if you wish however, it is not necessary. In the below image, the slide is surrounded by a white box.
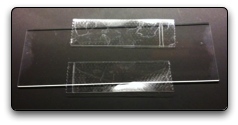
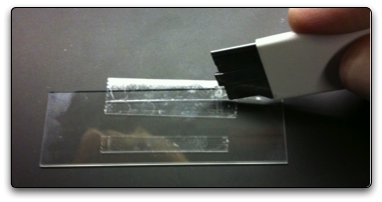
Take 2 strips of double stick tape and place them on the slide such that they are approximately 6 mm from each other. The tape should also overhang the slide as shown in the below picture. The reason for doing this is to ensure that any particulates on your gloves do not get any where near the flow cell which is effectively in between the two strips of tape.
The next step is to use a box cutter to smash the tape onto the slide. The best way to do this is to ensure that the box cutter is flat against the tape and slide and to not use just the tip of the cutter. You want to start from the part of the tape that is closest to the flow cell (in between the two strips of tape) and work your way out to the edge of the slide, smashing the tape onto the slide. Do this for both pieces of tape.
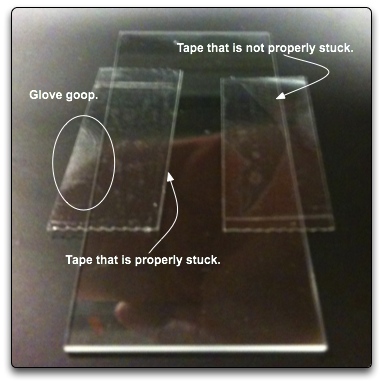
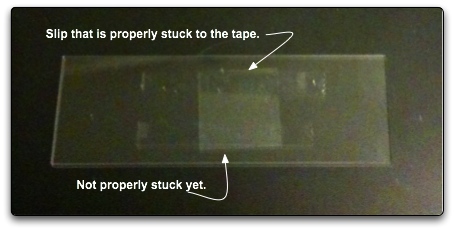
You can see if you have done a good job of making the tape adhere to the slide by looking at how the light reflects off of the tape, seen below. Make sure that the boundary that defines the flow cell is properly stuck to the slide. Otherwise, you will get a leaky flow cell.
The next step is to take the box cutter and trim the double stick tape. Depending on the size of slip you use, you can take as much or as little off as you want. Typically the slips used in this procedure warrant taking off only a moderate amount of excess tape.
After trimming the excess tape, you will want to put a slip over the tape channel. Start by placing an edge of the the slip on the double stick tape and let it fall on the tape such that it the slip is somewhat squared up with respect to the slide. Once the slip is on the slide, use the box cutter to smash the slip on the tape.
Do not be afraid to apply pressure to the slip in order to make it stick properly to the tape. This is why we try not to take too much of the excess tape off of the slide when trimming. The slip will be supported better with wider strips of tape allowing you to apply decent pressure without it breaking. Once again, you can determine if the slip has properly adhered to the tape by looking at how light is reflected off of the chamber. Below is an image trying to depict this, however, trying to photograph this is not easy. Your eyes and brain are a much better instrument for determining whether or not the slip has been completely smashed on the tape or not.
You can tell somewhat in the above image that there is a darker region on the slip where it has adhered to the tape properly (top tape strip). As opposed to the bottom strip where the slip has yet to be stuck to the tape.
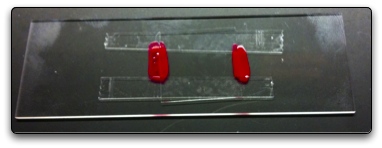
Once you have stuck the slip to the tape completely, you are now able to flow in a motility solution. The approximate volume for a flow cell of this size is about 10 µL. Once the solution is in the flow cell, you must fix the slide. Fixing the slide just means that you cap the two exposed ends of the channel with nail polish. You must do this in order to prevent evaporation from occurring. If you don't, then you will be able to see your sample evaporate under the microscope.
Congratulations on your flow cell. You have made Kiney proud!
Video Procedure
<html>
<object style="height: 344px; width: 425px"><param name="movie" value="http://www.youtube.com/v/wHYCI9OSEcs"><param name="allowFullScreen" value="true"><param name="allowScriptAccess" value="always"><embed src="http://www.youtube.com/v/wHYCI9OSEcs" type="application/x-shockwave-flash" allowfullscreen="true" allowScriptAccess="always" width="425" height="344"></object>
</html>
DNA Tethering Technique
Old Technique
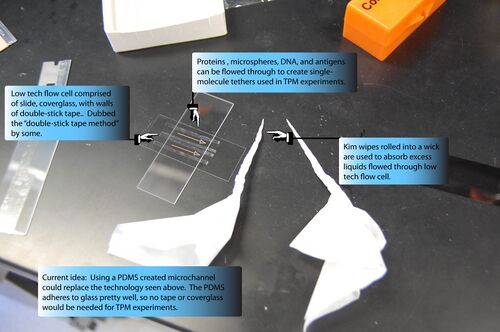
You can use more sophisticated sample chambers, obviously, but our most common method remains the ultra-low-tech "double-stick tape" method. For this you need:
- #1 coverglass (or whatever your microscopy requires). 60 x 24 mm is convenient. You can get Corning from Fisher.
- regular glass slides (or you can use another coverglass). 1 inch x 3 inch, about 1.2 mm thick.
- 3M double-stick tape (like the kind you can get at Office Max).
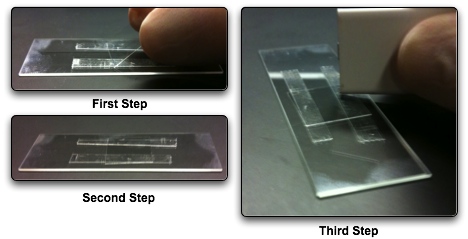
Attach a strip of double-stick tape to a glass slide (the tape and the slide should be parallel). Cut strips into the tape with a razor blade. Get a new glass slide. With curved forceps, carefully pull a strip of tape off the slide with tape and place it near the edge of the slide without tape (see image above for guide). If you pull straight up, the tape won't curl making it easier to lay on another slide. Do this with 3 more strips of tape. You want to leave spaces between the tape strips so you can flow material down each "channel". The middle channel will be used as a buffer so you may want to make the gap between the strips smaller. Again see image above as a guide. Once the tape is laid out, put a coverslide perpendicular to the slide on top of the tape. With the forceps, you can press on the slide where the tape is bound to make the seal better. Finally flow your samples and then seal the chamber with nail polish.
New Technique
This is a moderate improvement to the ultra-low-tech "double-stick tape" method. The major improvement is that instead of using a large coverslide, you can substitute the coverglass used in the kinesin method above.
Once again you will use 2 slides. One will be used to cut tape into strips (and then discarded) and the other will be for flow cell construction. Because the coverglass is of smaller area than before you will need to make thinner strips of tape. You can, of course, opt for just one channel if you feel 2 is unnecessary and in this case can follow the Kinesin method for making a flow cell. OK, time to get on with the protocol.
Step 1: Make strips of tape.
- Place a piece of tape on a slide parallel to the slide.
- Cut the tape into thin strips using a razor blade.
Step 2: Make tape wells.
- Using curved forceps pull strips of tape off one slide and put them on another unused slide. Again the strips should be parallel to the slide.
- If you pull straight up you will reduce curving of the tape and make it easier to adhere tape to new slide.
- Leave space between strips so that you create wells with depth of tape. You want to make 2 wells for flowing. Leave a space between the two wells to prevent leakage.
- If you are making one well, then just use two strips of tape.
Step 3: Create flow cell.
- Place coverglass over wells.
- Use the forceps to provide good seal between the tape and the slides. You can do this by pressing on the glass along the strips of tape. When you press, you can visibly see the seal. Think of it like coloring and try and stay between the lines coloring along the tape.
Step 4: Flow your sample and seal.
- Pretty self explanatory. Flow your sample down the flow cell.
- Seal your channels with nail polish to prevent evaporation.
That's it! Easy right? Enjoy your new flow cells.
