IC.Y3.AND.Gate.with.RiboJ:Wet lab Notebook
4/2/2020 Benchling introduction
- went through how to use the Benchling
- talked about creating primers - must be in pairs
- were told to look on AddGene for some of the sequences we needed
5/2/2020 Work flow Session
- started talking about what we will do in the wet lab
- discussed different protocols
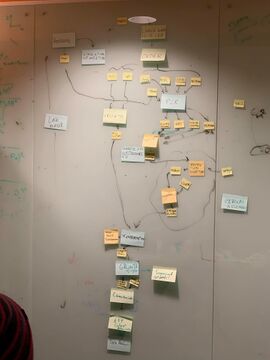
- created a work flow diagram
- large post-its represent actions, square post-its are protocols, and small post-its are inputs and outputs
- decided that we will order the complete plasmids and try to assembly them in parallel
- originally were going to use restrictive digestion technique, but discussed changing to Gibson Assembly
- gained insight on how we will structure our wet lab work and will work into dividing all the steps between group members
- will create schedule for next meeting
10/2/2020 Workflow Session 2
- Showed the updated wiki and discussed protocols
- We can use TAE instead of TBE
- Charles will help us come up with what we will slice and insert into completed plasmid
- Need to update cell culture on the wiki and finish heat transformation
- Wanted us to look into more assembly techniques
- Look into MoClo for tomorrow
- Matt is sending us a paper for RiboJ - we can use this as an insulator, it works really well
- Re-defined project
- Order three complete plasmids, extract some parts (like promoters and coding sequences) from them and operate PCR
- We will then perform electrophoresis to see if they are the correct length
- If the part is what is expected, we will send off to get sequenced and characterized
- Try inserting RiboJ into plasmids to see if AND gate operation is improved
- Told to also look into primer design for PCR
- Plan for this week is to make a mini presentation to update Kitney at group meeting on 11/2/2020 and in the labs we will work to familiarize ourselves with the assembly phase with parts the lab already has while we wait for the ones we want to be ordered
- They said only 2 people in the lab at once - we will be in pairs
10/2/2020 Lab Session 1
- Pipetting practice
- Observing Charles and Alexis preparing the LB-Agar with antibiotic and streaking them with bacterial colonies grown in a glycerol stock:
- LB-Agar mix was made by Charles and Alex beforehand, by melting some agar into LB broth
- Then, 8 petri dishes were filled with LB-agar containing Ampicillin, to grow an Ampicillin-resistant colony, and 4 petri dishes were filled with LB-agar containing Kanamycin, to grow a Kanamycin resistant colony
- The dishes were then left to dry, in order for the gel-like substance to fully solidify
- Bacteria in glycerol stock come from CIDAR MoClo kit purchased from AddGene: the contents of the kit (different plasmids in E.Coli), which comes as a 96-well plate, are found here Addgene.
- To streak the stocks on the LB-agar, Charles used an inoculating loop, and streaked the stocks in a spiral-like pattern on the LB-agar
- The cultures were labelled and left to grow
- They are stored on the lab bench, at room temperature
20/2/2020 Lab Session 2
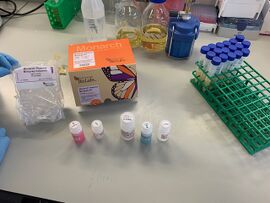
Lana went to the lab on Wednesday and after innoculation it was time for plasmid extraction - the following protocol was followed.
Monarch® Plasmid DNA Miniprep Kit Protocol (NEB #T1010)
Yield and quality of plasmid DNA is affected by plasmid copy number, plasmid size, insert toxicity, host strain, antibiotic selection, growth media and culture conditions. For standard cloning strains of E. coli, we recommend using a single colony from a freshly streaked selective plate to inoculate a standard growth media, such as LB (Luria-Bertaini) media. Cultures are typically grown at 37°C and 200–250 RPM in vessels that allow some aeration (Erlenmeyer flasks or culture tubes on a roller drum) and harvested after 12–16 hours as the culture transitions from logarithmic growth to stationary phase. This is the time at which the plasmid DNA content is highest. While cultures in LB often saturate with a final OD600 between 3–6, growth to saturation often leads to cell lysis. As a result, plasmid yields and quality are reduced and the likelihood of co-purifying unwanted host chromosomal DNA increases. Use of rich media, such as 2X YT or TB, produces higher biomass in a shorter time period. If chosen for growth, adjustments to the culture times and amount of cells used in the prep should be made to correct for these differences, and to avoid overloading the matrix and reducing DNA yield and quality.
PLASMID REPLICON COPY NUMBER CLASSIFICATION pUC and its derivatives pMB1* > 75 High copy pBR322 and its derivatives pMB1 15–20 Low copy pACYC and its derivatives p15A 10–12 Low copy pSC101 pSC101 ~5
- pUC and its derivatives lack the Rop gene and contain a point mutation in the RNAII transcript. These changes result in higher copy number during routine growth with many sources reporting levels as high as 500 copies per cell.
Antibiotics for Plasmid Selection ANTIBIOTIC CONCENTRATION OF STOCK SOLUTION STORAGE TEMP. WORKING CONCENTRATION Ampicillin 100 mg/ml (H2O) –20°C 50–200 μg/ml Carbenicillin 100 mg/ml (H2O) –20°C 20–200 μg/ml Chloramphenicol 34 mg/ml (ethanol) –20°C 25–170 μg/ml Kanamycin 10 mg/ml (H2O) –20°C 10–50 μg/ml Streptomycin 10 mg/ml (H2O) –20°C 10–50 μg/ml Tetracycline 5 mg/ml (ethanol) –20°C 10–50 μg/ml
Buffer Preparation:
Add ethanol to Monarch Plasmid Wash Buffer 2 prior to use (4 volumes of ≥ 95% ethanol per volume of Monarch Plasmid Wash Buffer 2).
For 50-prep kit add 24 ml of ethanol to 6 ml of Monarch Plasmid Wash Buffer 2 For 250-prep kit add 144 ml of ethanol to 36 ml of Monarch Plasmid Wash Buffer 2 Always keep all buffer bottles tightly closed when not actively in use.
Protocol:
- All centrifugation steps should be carried out at 16,000 x g (~13,000 RPM).
- If precipitate has formed in Lysis Buffer (B2), incubate at 30–37°C, inverting periodically to dissolve.
- Store Plasmid Neutralization Buffer (B3) at 4°C after opening, as it contains RNase A.
- Pellet 1–5 ml bacterial culture (not to exceed 15 OD units) by centrifugation for 30 seconds. Discard supernatant.
- Note: For a standard miniprep to prepare DNA for restriction digestion or PCR, we recommend 1.5 ml of culture, as this is sufficient for most applications. Ensure cultures are not overgrown (12-16 hours is ideal).
- Resuspend pellet in 200 μl Plasmid Resuspension Buffer (B1) (pink). Vortex or pipet to ensure cells are completely resuspended. There should be no visible clumps.
- Lyse cells by adding 200 μl Plasmid Lysis Buffer (B2) (blue/green). Invert tube immediately and gently 5–6 times until color changes to dark pink and the solution is clear and viscous. Do not vortex! Incubate for one minute.
- Note: Care should be taken not to handle the sample roughly and risk shearing chromosomal DNA, which will co-purify as a contaminant. Avoid incubating longer than one minute to prevent irreversible plasmid denaturation.
- Neutralize the lysate by adding 400 μl of Plasmid Neutralization Buffer (B3) (yellow). Gently invert tube until color is uniformly yellow and a precipitate forms. Do not vortex! Incubate for 2 minutes.
- Note: Be careful not to shear chromosomal DNA by vortexing or vigorous shaking. Firmly inverting the tube promotes good mixing, important for full neutralization.
- Clarify the lysate by spinning for 2–5 minutes at 16,000 x g.
- Careful handling of the tube will ensure no debris is transferred - spun for 5 minutes to ensure efficient RNA removal by RNase A.
- Also, longer spin times will result in a more compact pellet that lower the risk of clogging the column.
- Spin for two minutes only.
- Carefully transfer supernatant to the spin column and centrifuge for 1 minute. Discard flow-through.
- Spin for 30 seconds
- Re-insert column in the collection tube and add 200 μl of Plasmid Wash Buffer 1. Plasmid Wash Buffer 1 removes RNA, protein and endotoxin. (Add a 5 minute incubation step before centrifugation if the DNA will be used in transfection.) Centrifuge for 1 minute. Discarding the flow-through is optional.
- Ensure the column tip and flow-though do not make contact.
- Spin for 30 seconds,
- If using a vacuum manifold, add 200 μl of Plasmid Wash Buffer 1 and switch the vacuum on. Allow the solution to pass through the column, then switch the vacuum source off.
- Make sure to follow the manifold manufacturer's instructions to set-up the manifold and connect it properly to a vacuum source.
- Add 400 μl of Plasmid Wash Buffer 2 and centrifuge for 1 minute.
- When using a manifold add 400 μl of Plasmid Wash Buffer 2 and switch the vacuum on. Allow the solution to pass through the column, then switch the vacuum source off.
- Transfer column to a clean 1.5 ml microfuge tube. Use care to ensure that the tip of the column has not come into contact with the flow-through. If there is any doubt, re-spin the column for 1 minute before inserting it into the clean microfuge tube.
- If using a vacuum manifold: Since vacuum set-ups can vary, a 1 minute centrifugation is recommended prior to elution to ensure that no traces of salt and ethanol are carried over to the next step.
- Add ≥ 30 μl DNA Elution Buffer to the center of the matrix. Wait for 1 minute, then spin for 1 minute to elute DNA.
- Note: Nuclease-free water (pH 7–8.5) can also be used to elute the DNA. Delivery of the Monarch DNA Elution Buffer should be made directly to the center of the column to ensure the matrix is completely covered for maximal efficiency of elution. Additionally, yield may slightly increase if a larger volume of DNA Elution Buffer is used, but the DNA will be less concentrated as a result of dilution. For larger plasmids (≥ 10 kb), heating the DNA Elution Buffer to 50°C prior to eluting and extending the incubation time after buffer addition to 5 minutes can improve yield.
21/02/2020 Assembly Tutorial
- Short 1-hour tutorial by Charles about different assembly/cloning standards
- Covered Site-directed Mutagenesis, Gibson assembly and Golden Gate assembly
- For this project, Gibson assembly is the most important
- Site-directed mutagenesis and Gibson assembly both require PCR, while Golden Gate assembly does not and works with type IIs restriction enzymes
- SDM uses custom primers to insert or delete specific DNA sequences in plasmids, by first running PCR and then using P4 DNA Ligase
- SDM is not directional
- Gibson assembly requires 4 primers (2 pairs) per plasmid+insert construct
- Primer sequences all cover both the insert and the plasmids, creating tails
- After the PCR-based amplification of parts, T5 DNA Exonuclease chews back the 5' of these tails, revealing overlapping sites which enable directional assembly
- Gibson assembly allows assembly of up to 5 fragments in an isothermal, one-pot reaction
- Golden Gate assembly uses type IIs restriction enzymes which cut outside their recognition sites, providing scarless assembled sequences
- Type IIs enzymes leave 4bp overhangs, known as fusion sites, which enable directional assembly when designed properly
- [At the end of the tutorial, Charles also helped us with the in silico assembly of riboJ into our input plasmids on Benchling]
25/02/2020 Lab Session 3
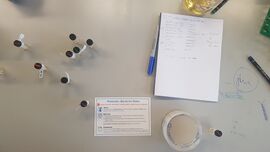
- The following plasmids, which were ordered, were available for streaking:
- pBW115lac-hrpR (Kanamycin resistant)
- pBW213ara-hrpS (Chloramphenicol resistance)
- pBW313lux-hrpR (Kanamycin resistant)
- pBW400hrpL-gfp (Ampicillin resistant)
- pBW412hrpL-cIgfp (Ampicillin resistant)
- pBW414hrpL-cIgfp (Anpicillin resistant)
- The plasmids all arrived in capsules filled with LB-agar
- They arrived in E.Coli dh5 alpha strains which formed genetically heterogeneous clusters.
- They were then streaked using an inoculating loop for single colonies on Petri dishes filled with LB-agar and their respective antibiotic
- The bacteria with plasmid pBW213ara-hrpS were not streaked since the LB-agar containing Chloramphenicol had yet to be prepared
- The capsules with the clusters were placed into the fridge at 4°C for storage
- The Petri dishes with the streaked bacteria were left on the bench for storage at room temperature
27/02/2020 Lab Session 4
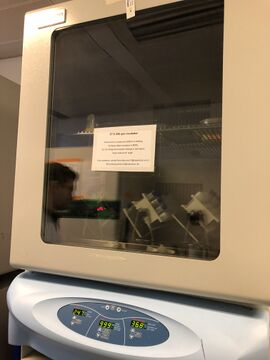
- All of the streaks were successful
- We looked at them under a blue light in the next room and oberved that those with gfp( might be a different one) were florescent
- Charles identified one single colony on each plate which would be used for culturing overnight
- We only looked at five plates, the sixth one he said wasn't for our group
- I noticed that Lorenzo and Hamza did streak six when I was uploading this session
- Started by getting 5 large tube to place the LB in.
- Measured 3 (will get units later, but I think mL) using a smoothie pipette into each tube
- This had to be done very carefully as we wanted to keep a sterile environment
- Had a burner on around the equipment used to promote a sterile environment
- Charles mentioned that it is good practice to do everything with one hand, ie remove the lid and hold it along with the flask in one hand
- Labelled each tube with the appropriate name, both on the lid and on tubes
- Charles took the antibiotic out of the freezer and explained we would have to add it if we wanted our cultures to grow successfully.
- pBW115lac-hrpR needs Kanamycin
- pBW213ara-hrpS needs chloraphenicol
- pBW400hrpL-gfp needs ampicillian
- pBW412hrpL-clgfp needs ampicillian
- pBW414hrpL-clgfp needs ampicillian
- Measured 30μL of the appropriate antibiotic into the respective tube
- Mixed slightly by flipping tubes a few times
- Scraped the single colony from the plate into the respective tube using a toothpick (it was like a toothpick with a hook - will note the name next time)
- Put it in the mixture of the tube and stir a couple times, then dispose
- Put the tubes in the incubator to grow overnight
28/02/2020 Lab Session 5
- Got the tubes out of the incubator
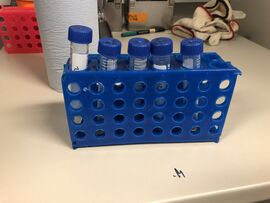
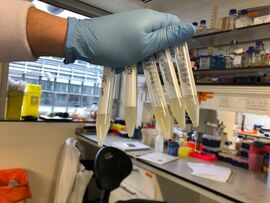
- The overnight cultures were successful - the liquid was cloudy as can be seen below.
- Performed a Mini-Prep of the cultures using the Monarch® Plasmid DNA Miniprep Kit Protocol (NEB #T1010)
- See Lab Session 2 for the protocol and procedure - same steps were followed
28/02/2020 Lab Session 6
- In this session we did PCR for the cultures
- First put dNTP in a bunch of little tubes - we only used 1
- Followed the protocol for routine PCR (explained in Protocols)
- used 1 ng of template of DNA
- Charles diluted the dry primers that were received from Addgene
- We then diluted it even more, with 90uL of water and 10uL of the stock to make the working stock
- Added all the necessary components to tiny tubes to put in PCR
- You add the biggest volumes first and make sure to add the Phusion last
- Changed the PCR settings accordingly
- pBad Plasmid
- 61 C annealing
- 210 sec extension
- pBad with RiboJ
- 64 C
- 10 sec extension
- plac Plasmid
- 58 C annealing
- 240 sec extension
- plac with RiboJ
- 64 C annealing
- 10 sec extension
- pBad Plasmid
28/02/2020 Lab Session 7
- In this session we transformed the cells using TOP10 E.Coli to try and combine all the parts together we followed the following protocol.
- One Shot® TOP10 Chemically Competent E. coli with a transformation efficiency of 1 x 10⁹ cfu/µg plasmid DNA and are ideal for high-efficiency cloning and plasmid propagation. They allow stable replication of high-copy number plasmids and are the same competent cells that come with many of our cloning kits
- Centrifuge the vial(s) containing the ligation reaction(s) briefly and place on ice.
- Thaw, on ice, one 50 μL vial of One Shot® cells for each ligation/transformation.
- Pipet 1–5 μL of each ligation reaction directly into the vial of competent cells and mix by tapping gently.
- The vials were then incubated on ice for 30 minutes.
- The vials were then incubate for exactly 30 seconds in the 42°C water bath - this was the heat shock transformation
- The vials were removed vial(s) from the 42°C bath and place them on ice.
- 250 μL of pre-warmed S.O.C medium was added to each vial (rich nutrient material)
- The vial(s) were placed in a microcentrifuge rack on its side and secure with tape to avoid loss of the vial(s). Shake the vial(s) at 37°C for exactly 1 hour at 225 rpm in a shaking incubator.
- We had 200 μL from the transformation which was then spread on labeled LB agar plates.
- The plates were then left to dry and incubated
3/3/2020 Lab Session 8
- In this session, we prepared the gel for the electrophoresis of the following PCR products:
- pBW115lac-hrpR
- riboJ for pBW115lac-hrpR
- pBW213ara-hrpS
- riboJ for pBW213ara-hrpS
- Electrophoresis is a first verification step to check that PCR of the fragments of interest has gone as expected
- Because of the great size difference between the plasmids and the riboJs, we prepared 2 gels, one to visualize the 2 riboJs (short fragments) and one to visualize the 2 plasmids (long fragments)
- The agarose gel mixture had been previously prepared, and we microwaved it for a few minutes before pouring to make sure it was not solid at all
- The mixture was poured in the tray, onto which some DNA stain had been previously pipetted
- The gel was then left to solidify at room temperature
- In the meantime, we prepared the DNA fragments:
- First, we added restriction enzyme ... to all DNA mixtures: that enzyme cuts at specific recognition sites which are only present in plasmid DNA and not in PCR products; that is useful because we don't want plasmid DNA in our assembly reaction
- The tubes were then incubated for about 20 minutes
- Then, we added 5µl purple loading dye to the 25µl DNA fragments mixture (to achieve a dye concentration of 1/6); the loading dye is useful because, due to similar viscosities, the DNA mixture and buffer that will be added on top of the electrophoresis trays mix together: the loading dye increases the viscosity of the DNA mixture, preventing such mixing from happening
3/3/2020 Lab Session 9
- We launched electrophoresis, applying a voltage of 100V for 45 minutes. We loaded each tray with 2 1kb plus ladders, for appropriate DNA size identification (1kb plus ladders cover a 100bp-10000bp migration range)
- While electrophoresis was running we performed a so-called "Clean and Concentrate" on our PCR products
- For Gibson assembly, fairly precise quantities of DNA fragments in the reaction must be known
- To obtain a precise estimate of these quantities, a machine, the NanoDrop spectrophotometre, is usually used
- A drop of a DNA-buffer solution is dropped on a metal pedestal
- The machine measures the absorbance of UV light by the whichever substance is on the pedestal as a function of wavelength
- Since DNA has a specific absorbance wavelength for UV light, there is a typical target spectrum which should appear
- The machine also gives the concentration of DNA in the drop
- PCR products have many additional detached fragments (e.g. primers and single nuocleotides) floating around in their solution
- Therefore, the spectrophotometre would show more than the actual quantity of DNA that actually matters in the assembly
- PCR products must therefore be purified --> that is "Clean and Concentrate"
- A specific kit, manufactured by NEB, is used
- Special "columns" containing a piece of paper at the bottom end are placed in tubes
- The paper binds specifically to single-stranded DNA of more than 200 bases, or double-stranded DNA of more than 50 bp, discarding all the rest
- This is an effective method of discarding primers and other unwanted oligonucleotides from the mixture
- After having thrown away the unwanted DNA by using a washing and a binding solution, the remaining amount is diluted, with water acting as the buffer
- Its quantity is then measured with the spectrophotometre
- Following the protocol, the Gibson assembly reaction was also set up
- Electrophoresis results were also examined by looking at the gel first with a normal blue light emitter and then with a UV light machine
- Unfortunately, pLac did not migrate by the desired amount, indicating a poor result for PCR
- Due to this, we will only insert the riboJ sequence inside the pBad plasmid, which on the other hand gave the desired result
- The 2 riboJs also had the desired migration characteristics
- We then set up the Gibson assembly reaction
- 4 reactions were setup
- Gibson assembly of pBad with riboJ (5x more riboJ than pBad, according to the protocol for short length inserts)
- Gibson assembly of pBad with riboJ (10x more riboJ than pBad)
- Gibson assembly of pLac with riboJ (5x more riboJ than pLac)
- Gibson assembly of pLac with riboJ (10x more riboJ than pLac)
- Charles worked out the concentrations using an online calculator
- The whole mixture containing also the assembly Master Mix was incubated for 15 minutes at 50°C for the cloning to happen
- 4 reactions were setup
3/3/2020 Lab Session 10
We used high efficiency transformation protocol* a tube of NEB 5-alpha Competent E. coli cells on ice for 10 minutes.
- We added 1-5 µl containing 1 pg-100 ng of plasmid DNA to the cell mixture. The tube should be flicked 4-5 times to mix cells and DNA. Do not vortex.
- The mixture was then placed on ice for 30 minutes.
- Heat shock at exactly 42°C for exactly 30 seconds then placed on ice for 5 minutes.
- 950 µl SOC mixture Pipette of room temperature into the mixture.
- the mixture was then placed at 37°C for 60 minutes. Shake vigorously (250 rpm) or rotate.
- selection plates were warmed to 37°C.
- the cells were mixed thoroughly by flicking the tube and inverting, then perform several 10-fold serial dilutions in SOC.
- 50-100 µl of each dilution were plated onto a selection plate and incubate overnight at 37°C.
4/3/2020 Lab Session 11
- We verified the bacteria that Charles and Lana had streaked in the previous session (DH5-alpha E. Coli containing the Gibson assemblies)
- 8 Petri dishes, 4 for pLac and 4 for pBad
- 100µl of bacterial mixture, Gibson assembly with 5x more riboJ than plasmid
- 900µl of bacterial mixture, Gibson assembly with 5x more riboJ than plasmid
- 100µl of bacterial mixture, Gibson assembly with 10x more riboJ than plasmid
- 900µl of bacterial mixture, Gibson assembly with 10x more riboJ than plasmid
- The different Petri dishes were set up to make the process of picking a single colony easier
- 8 Petri dishes, 4 for pLac and 4 for pBad
- As expected, no colonies appeared in the pLac Petri dishes
- That made sense since pLac plasmid PCR had failed
- The dishes with 10x riboJ contained many less colonies
- We then set up overnight liquid cultures based on a single colony
- We prepared a mixture containing the medium and the appropriate antibiotic (Chloramphenicol in the case of pBad), in 3 different tubes
- Using an inoculating loop, we then transferred one bacterial colony from the Petri dishes to each tube
- Tubes were then incubated and left for overnight growth
5/3/2020 Lab Session 12
- Overnight cultures of the three different colonies containing pBAD plasmids with the RiboJ sequence added were retrieved from the incubator
- We performed a miniprep on each of the three cultures to isolate the plasmid DNA using the Monarch® Plasmid DNA Miniprep Kit Protocol (NEB #T1010)
- See Lab session 2 for the exact miniprep protocol
- In order to send the DNA sequences off for sequencing at a third party company (Eurofins), we required a primer sequence that was complementary to a portion of plasmid.
- The primer also had to be within ~800 bases of the desired portion to be sequenced
- We initially planned to use a primer specific to pBAD, however, Eurofins didn't have this primer available
- Fortunately the neighbouring lab had a primer that worked with our plasmids, and was an acceptable distance upstream from the RiboJ sequence
- We added 2 microlitres of 10x diluted primer to each of the DNA samples
- We dropped off the samples at the pickup point in SAF
6/3/2020 Lab Session 13
- transforming three things
- will be using heat shock transformation (view how to do it in protocols)
- sequencing results came back! Seemed to be successful overall
- RiboJ 3 seemed to have one base pair missing so we decided to discard it
- decided to use RiboJ 1 with pBAD
- the three things we will be transforming are
- 1μL of pBW213ara-hrpS + RiboJ
- 1μL of pBW115lac-hrpR plasmid
- 5μL of pBW400hrpL-gfp plasmid (we are using more because it is a low copy plasmid
9/3/2020 Lab Session 14
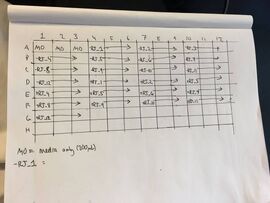
- Over the weekend Charles had prepared the buffer solutions (M9-glycerol) with the transformed TOP10 E. coli
- We prepared the the plates to be placed in the plate reader
- We first diluted the inducer concentrations by 20x
- We then added the different inducer concentrations to their assigned wells as outlined by the diagram
- We added the cultures of non-RiboJ cells and RiboJ cells to the first 36 and last 36 wells respectively (in M9-glycerol)
- Each well contained a total of 200 microlitres of fluid
- The plate was placed in the plate reader and readings were taken every 10 minutes over the course of 8 hours