Summary of Conducting PCR Reaction
Pipetting the samples for the reaction went smoothly after doing the pre-lab reading because it allowed us to familiarize ourselves with the materials and the methods in pipetting with the most accuracy and precision. Before actually conducting the lab, the tubes are labeled using the data from Lab Report 4, and the samples are thoroughly thawed in order to transfer the mixture into the labeled tube. After, the first step in conducting the lab is transferring the PCR mixture to the tube labeled G9 +. To do this, the micropipette is set to 50μL and a tip is attached to the micropipette. The plunger is then pressed to the first stop prior to placing the tip into the tube with the mixture. Pressing the plunger to the first stop allows the precise amount of volume to be ready to draw in the liquid specified on the micropipette. After, the tip is placed in the empty labeled tube and the plunger is slowly pressed to the second stop, which dispenses the liquid in the micropipette. These steps were repeated (changing the tip each time) with the specified DNA samples and controls. On one transfer, there was an air bubble in the micropipette which prevented all the liquid being dispensed into the labeled tube. In order to fix this, the liquid was drawn again and placed back into the tube in order to dispense all the liquid. After each tube is filled, it is then placed into the thermal cycler where it begins to denature and replicate as part of the PCR reaction.
Fluorimeter Procedure
Smart Phone Camera Settings
Type of Smartphone: iPhone 6
Flash: Off
ISO setting: Auto
White Balance: Auto
Exposure: N/A
Saturation: N/A
Contrast: N/A
Camera set-up
Use the provided cradle to position the phone at least 4 cm away from the fluorimeter
Place the phone in the phone stand and adjust accordingly in order to get the camera to capture a side view of the fluorimeter
Place an empty container underneath the fluorimeter in order to level the device with the camera, in this case a short plastic container is used
Make sure everything is stable in order to get the ideal image of the fluorimeter.
Distance between the smart phone cradle and drop = 4 cm
Placing Samples onto the Fluorimeter
First, place a clean side onto the fluorimeter with the smooth side down
Next, (using proper pipetting techniques) pipette 80 µL of SYBR Green I solution and release the drop on the slide between the first two circles in the center of the slide.
Then, pipette 80 µL of the sample solution, and add it to the SYBR Green I drop
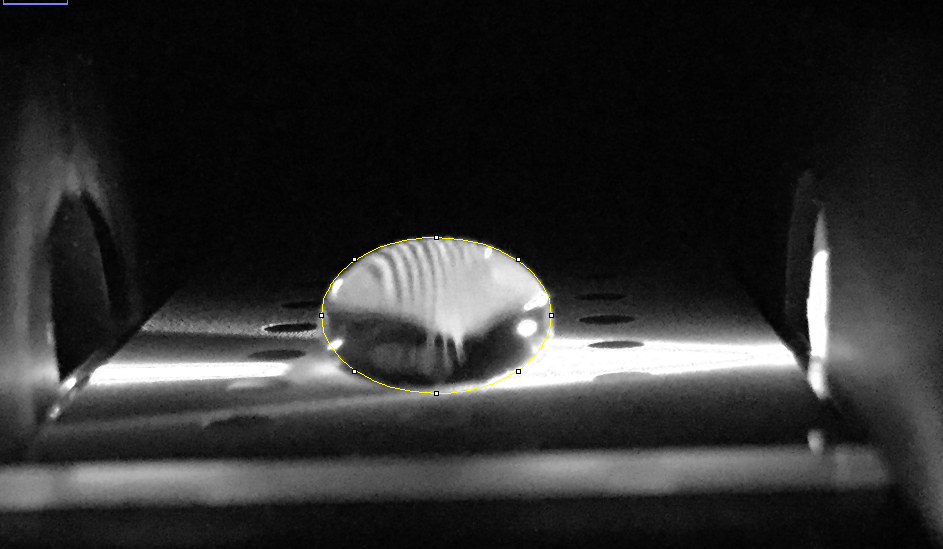
Turn on the light of the fluorimeter and adjust the light so that it is focused through the other side of the drop
Make sure the smartphone that is being used to take pictures (and the cradle it is in) is more than 4 cm away from the fluorimeter. Record this distance.
Once the smartphone is positioned correctly, cover the phone and the fluorimeter entirely with the lightbox and take a picture
The drop is then removed from the slide via the micropipette and is disposed of in the proper container
The steps 1-6 is repeated every sample, moving by two circles for each one
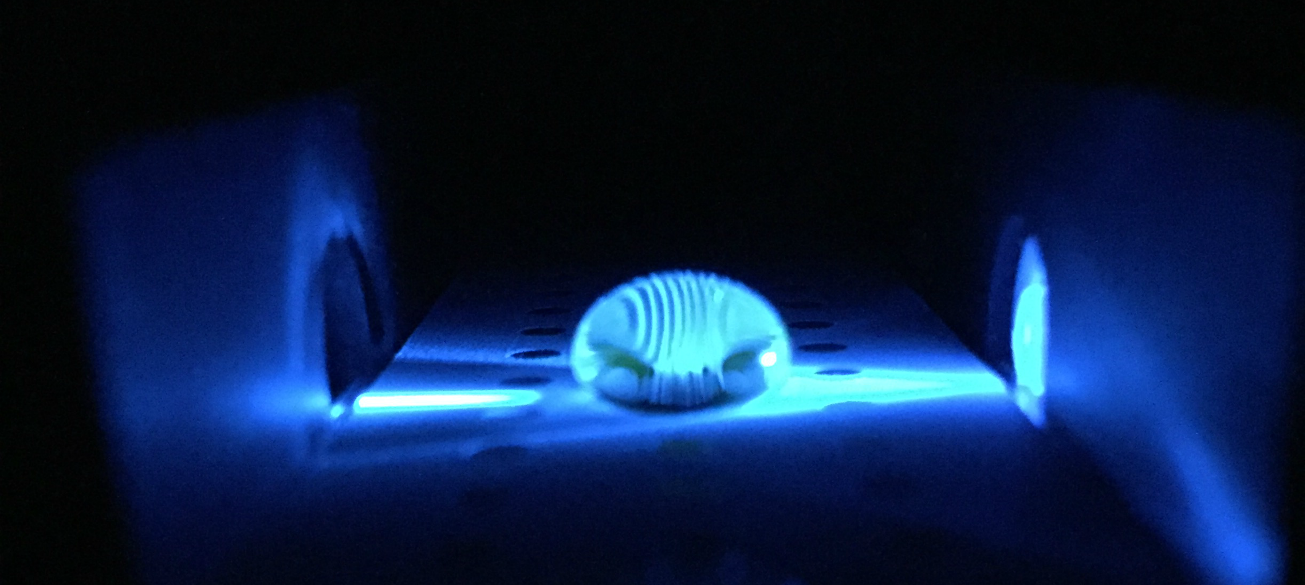
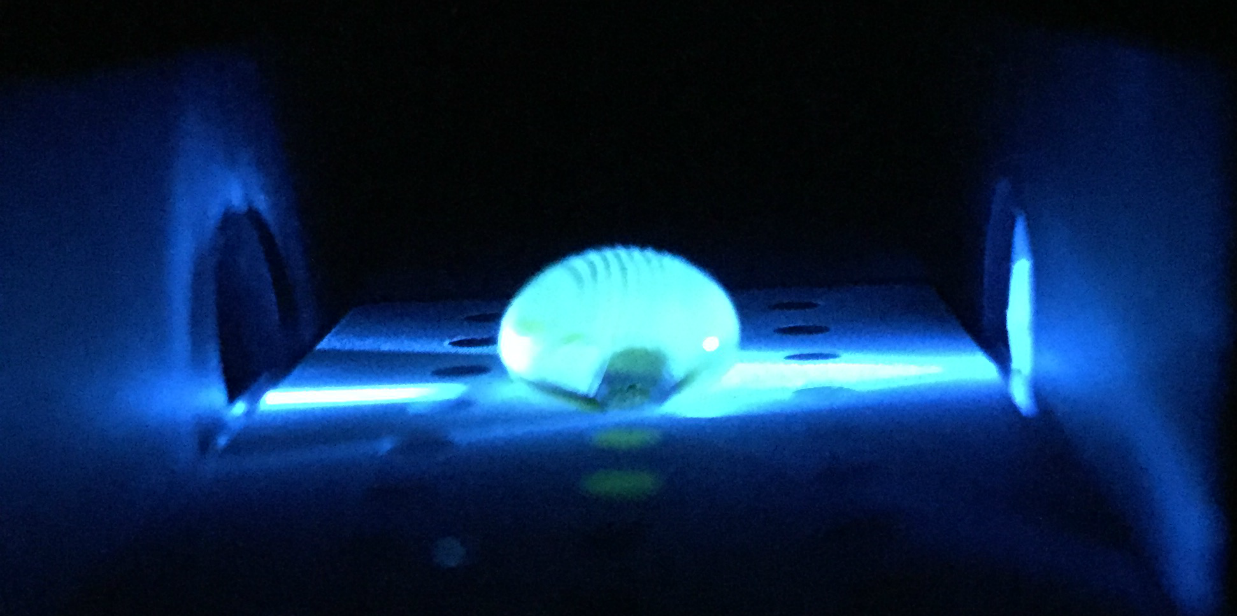
Patient 14176: When tested through the flurometer, slight pigments of green were relevant in the image taken.
Patient 91779: When tested through the flurometer, more concentration of green pigment is relevant.
Conclusions
Patient 14176 : Due to the green pigment in the sample, the patient is inflicted with the disease. The patient is more or less on the positive end of the control and will express the single nucleotide polymorphism.
Patient 91779 : Due to the green pigment in the sample, the patient is inflicted with the disease. The patient is more or less on the positive end of the control and will express the single nucleotide polymorphism.


