20.109(F11): Mod 3 Day 2 Phage nanowires
Phage:SWNTs:TiO2 nanocomposite
Introduction
Eventually, we'll build a solar cell where the photoanode is made from the material that we're synthesizing today. By templating the assembly of the nanotubes-TiO2 nanocrystal with the M13 phage, the electronic properties of the photoanode are improved.
"Improved" here means a few things. Engineers trying to optimize photovoltaic devices want lots of high mobility electrons inside their devices since these can more efficiently convert the photo-energy input to electrical power output. Single-walled nanotubes made from carbon are one kind of material that ranks pretty high for this property. Engineers would also like to optimize the "sink" for these mobile electrons since the very best photovoltaic devices will also efficiently collect them where they're needed. In our experiment, we are relying on M13 to facilitate electron paths by arranging the SWNTs into a higher-order architecture, thereby improving their properties. Not only can M13 bundle the SWNTS so they don't clump together(see how the p8 proteins allow the SWNTs to associate in parallel to the phage in the photo), but the viruses also position parts of the SWNTs to the surrounding solution, allowing for a more complete coating with TiO2. The TiO2 nanocrystal shell (like its more expensive silicon cousin) is needed to pass the electrons from the photo-excited dye...which we'll be adding later.
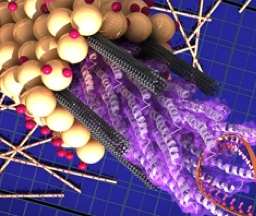
Note, however, that SWNTs aren't the perfect material, even when arranged by M13. The SWNTs aren't homogeneous and the metallic contaminants can short circuit the electron's paths. For this reason, you are testing different ratios of SWNTs to phage and building solar cells from these variants. You will identify the most useful ratio at the end of the module when you measure the photon-to-current conversion efficiency (IPCE) for the 1:1, 2.5:1 and 5:1 ratio (SWNTs:phage), and we compare across groups.
Today in lab you will react your SWNT:phage with titanium isopropoxide, harvest a small aliquot to visualize with TEM next time, then wash the remainder of the nanowires several times, first with ethanol, then with water. You will have time during these steps to work on the research proposal idea you've got started with your lab partner.
Protocols
Part 1: React SWNTs:phage with Ti(I-pro)4
Today's lab has some safety hazards and you must work extremely carefully. Lab coats, gloves and goggles are a must when you're at the chemical hood. The reaction of the SWNT:phage with the titanium will take place in the hood at supercooled temperatures (a NaCl/ice bath at ~ -20°C). One the titanium has been deposited on the surface of the phage, the solution is less hazardous, though you should still treat the materials with care since no reactions run to completion.
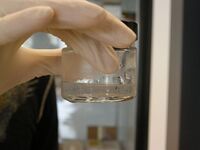
- Retrieve your dialyzed samples.
- Carefully transfer the contents of the dialysis bag to a 15 ml falcon tube. This is best done by carefully holding the dialysis bag vertically while you remove one of the alligator clips, cover the open end of the tubing with the falcon tube, then invert the tubing and the falcon tube so the SWNT:phage solution can be collected.
- If there are any nanowires remaining in the dialysis tube after you have emptied the contents, rinse the nanowires out using 1 ml of the NaCl dialysis buffer and add the volume to the 15 ml falcon tube.
- Use the markings on the tube to estimate the volume of the nanowires.
- Vortex the nanowires if they look clumpy.
- Chill your SWNT:phage on ice on your bench until you are ready to react it with the titanium.
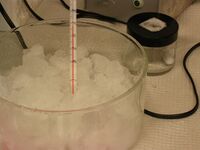
- Prepare a supercooled ice bath by mixing ~400g ice (measured with the top loading balance) with ~133 g NaCl (so ~1 g salt for every 3 g ice). The ice and salt should be placed in an evaporation dish, mixed with a gloved hand the way you might mix chocolate chips into cookie batter. The salt and ice mixture should almost fill the evaporation dish. You can measure the temperature of this mixture. It should measure ~ negative 20°C.
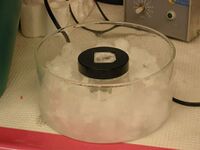
- Wedge a small distillation jar into the center of the ice bath and add a stir bar to the jar.
- Add 7 ml of 100% EtOH to the jar with the stirbar.
- Place the dish and the jar with the EtOH in the fume hood on a stir plate. Pre-cool the EtOH, stirring, at least 5 minutes.
- Put on lab coat, gloves, and safety glasses for this next step. For every 100 ug of SWNTs that you used last time, add 50 ul Ti(I-pro)4 to the supercooled EtOH. Adjust the volume of Ti(I-pro)4 as needed to maintain this ratio. Stir at least 5 minutes.
- Add 3 ml of your SWNT:phage solution to the EtOH:titanium and stir vigorously for 10-15 minutes.
Part 2: Prepare a grid for TEM
Each group should prepare a TEM grid (so there might be 3 grids for each reaction of phage:SWNTs:TiO2). This will allow for some duplicates to be visualized in case the grid is damaged or different kinds of EM are being performed.
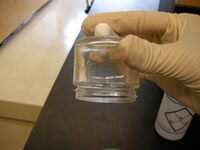
- Transfer the reaction to a 50 ml falcon tube. You can harvest the last few drops but not the stir bar using a larger magnet held to the bottom of the inverted jar (see image)
- Vortex the nanowires for 1 minute and immediately remove 5 ul of the nanowire suspension to place on the TEM grid that you have balanced in the specialized tweezers. HINT 1: The grid is "sided" and you want the shiny edge side up. If you are uncertain as to which side has the shiny edge, try looking under the dissecting microscope (12X magnification) to find the numeral "1" on the correct side. HINT 2: Treat the grid with care and use the tweezers only on the edge to minimize damaging the delicate mesh.
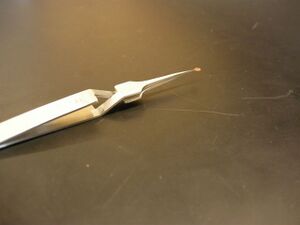
TEM grid balanced in tweezers - Allow the nanowires to settle onto the grid undisturbed for 5'. The EtOH will evaporate during this time. You can wick away any residual EtOH by touching the very edge of the grid with a Kimwipe.
- Wash the grid by adding 5 uL of 100% EtOH onto the grid. After 30 seconds you can wick away the EtOH.
- Wash the grid by adding 5 uL of sterile H2O onto the grid. After 30 seconds you can wick away the water and transfer the grid to a holder to visualize next time.
Part 3: Wash your phage:SWNTs:TiO2 nanocomposites
- Spin the remaining volume of nanocomposites in the clinical centrifuge at room temperature, 3000 rpm 10 minutes. At the end of this spin you should see dark material collected at the bottom of the tube. This is the material that will serve as the photoanode in our photovolatic device!
- Decant the supernatant into a chemical waste bottle in the chemical hood. Resuspend the nanocomposite material in 20 ml dH2O. Spin as before.
- Decant the supernatant into the sink.
- Hand the pellet of phage:SWNTs:TiO2 to the teaching faculty who will begin to prepare the paste needed to build them into the solar cell.
Part 3: Research proposal
Writing a research proposal requires that you identify an interesting topic, spend lots of time learning about it, and then design some clever experiments to advance the field. It also requires that you articulate your ideas so any reader is convinced of your expertise, your creativity and the significance of your findings, should you have the opportunity to carry out the experiments you’ve proposed. To begin you must identify your research question. This may be the hardest part and the most fun. Fortunately you started by finding a handful of topics to share with your lab partner. Today you should discuss and evaluate the topics you’ve gathered. Consider them based on:
- your interest in the topic
- the availability of good background information
- your likelihood of successfully advancing current understanding
- the possibility of advancing foundational technologies or finding practical applications
- if your proposal could be carried out in a reasonable amount of time and with non-infinite resources
It might be that not one of the topics you’ve identified is really suitable, in which case you should find some new ideas. It’s also possible that through discussion with your lab partner, you’ve found something new to consider. Both of these outcomes are fine but by the end of today’s lab you should have settled on a general topic or two so you can begin the next step in your proposal writing, namely background reading and critical thinking about the topic.
A few ground rules that are 20.109 specific:
- you should not propose any research question that has been the subject of your UROP or research experience outside of 20.109. This proposal must be original.
- you should keep in mind that this proposal will be presented to the class, so try to limit your scope to an idea that can be convincingly presented in a ten minute oral presentation.
Once you and your partner have decided on a suitable research problem, it’s time to become an expert on the topic. This will mean searching the literature, talking with people, generating some ideas and critically evaluating them. To keep track of your efforts, you should start a wiki catalog on your OpenWetWare user page. How you format the page is up to you but check out the “yeast rebuild” or the “T7.2” wiki pages on OpenWetWare for examples of research ideas in process. As part of your “for next time assignment” you will have to print out your wiki page specifying your topic, your research goal and at least five helpful references that you’ve read and summarized.
DONE!
For next time
Define your research proposal or exhibit ideas by making a wiki page to collect your thoughts and resources (you can do this on one page with your partner or split the effort and each turn in an individual page). Please start your wiki page name with "20.109(F11): your names and/or topic here"
Keep in mind that your presentation to the class will need:
- a brief project overview
- sufficient background information for everyone to understand your proposal
- a statement of the research problem and goals
- project details and methods
- predicted outcomes if everything goes according to plan and if nothing does
- needed resources to complete the work
You can organize your wiki page along these lines or however you feel is most helpful. Print your user page(s) for next time, making sure it defines your topic, your idea and some references you've collected and summarized.
Reagents list
- 100% EtOH
- Ti(I-pro)4 msds
