IGEM Outreach:Gel Electrophoresis Machine
<html lang="en"> <head> <link rel="stylesheet" type="text/css" href="http://www.openwetware.org/index.php?title=IGEM_Outreach/css&action=raw&ctype=text/css" /> <script type="text/javascript" src="http://ajax.googleapis.com/ajax/libs/jquery/1.3.2/jquery.min.js"></script> </head>
<body>
<a href="?action=edit">Edit this page</a>
<a href="/wiki/iGEM Outreach"><img src="http://openwetware.org/images/5/5d/OutreachbannerGreen_2.jpg" width="750px"></img></a>
-
<a href="/wiki/iGEM Outreach">Home</a>
<a href="/wiki/iGEM Outreach:About">About</a>
<a href="/wiki/iGEM Outreach:Activities">Activities</a>
<a href="/wiki/iGEM Outreach:Lesson Plans">Lesson Plans</a>
<a href="/wiki/iGEM Outreach:Multimedia">Multimedia</a>
<a href="/wiki/iGEM Outreach:FAQ">FAQ</a>
<a href="/wiki/iGEM Outreach:Contact">Contact</a>
<a href="/wiki/iGEM Outreach:Links">Links</a>
Gel Electrophoresis Machine
- Brown-Stanford iGEM 2011
- Adapted from protocol developed by University of Science and Technology Beijing (USTB) graduate students
- Suitable for: high school students
Purpose
To construct a functional gel electrophoresis demo kit for under $25. Can run and visualize gels at the same time (DNA staining not included).
Note: the electrical engineering part is a little tricky to do on-spot, so a suggestion would be to configure the machine in the lab and then just take it as a ready-made prop for presentations. This machine-making activity can also serve as a DIY project for high school students with iGEM team supervision.
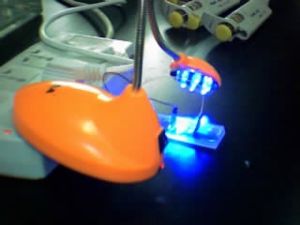
 Figure 1: Gel electrophoresis machine with blue light bulbs
Materials
- Rechargeable LED lamp
 Figure 2: Mini Rechargeable LED Table Lamp with Overcharge Protection and Adjustable Brightness
- Four insulated copper wires--two long and two short
- Operating equipment (clippers)
- Two small copper plates
==> These will be your electrodes to stick into your gel, so their size is determined on how big of a gel you want to cast. For example, if you use microscope slides to cast your gel, use plates about 2.5 cm wide and 1 mm thick
- Screwdriver
- Pliers
- A hole-punching instrument
- Solder and hot iron
- 12 blue LED light bulbs (these will come to be pretty useful later on)
Protocols
- Acquire the lamp. This might involve either ordering a $5 dollar lamp from China or a walk down to RadioShack.
- Are you ready to void your warranty? Open up the lamp by removing screws and sticking the screwdriver (you did get a minus screwdriver, right?) into various crevices. Typically, the electronics are housed in the base of the lamp.
- Color two of of your copper wires red (+) and two black (-). If they are both black already, use tape.
- Once open, take a look at the circuit board. Using a voltmeter, follow the lines of the circuit to the on/off switch button. Identify which of the wires connecting to the switch is positive, and negative (can read about how to do that here: http://www.pdn.cam.ac.uk/teaching/part1a/intro_to_circuits/measuring.html- the black is usually reference)
- Using your sharp instrument, punch two holes on the side of the lamp base. For example, you can heat a screwdriver, which can easily push a hole through.
- Solder the two short wires to the connections on the switch, and then extend them out through the holes. Congratulations, now you have an external power loop in parallel to the internal circuit!
- Connect your longer wires to the shorter wires protruding from the base of the lamp. Remember to check the positive and negative.
- Fasten the small copper plates to the protruding wires using electrical tape. To test if the connections are good, use the voltmeter.
Now for the visualization component. The neat thing about using a LED lamp for the power source is that you can also power other things with it. Certain DNA stains (such as SYBR® Gold, SYBR® Green I & II, SYPRO® Ruby, SYPRO® Orange, and Coomassie Fluor™ Orange stains, from Life Sciences) fluoresce quite visibly under blue (475 nm) light, and you can use this to your advantage instead of using UV. It's safer for eyes and easily accessible.
- Open up the LED bulb portion of the lamp, where the bulbs are connected. They should be embedded inside a board. Using pliers, try to detach the normal white light bulbs. In their place, solder on blue LED light bulbs. Replace the cover, and now you should have a lamp with blue lights, with access to its electricity coming off the sides.
- To cast a microscope slide gel, use masking tape to make a wall around the slide. Mix DNA stains into hot agarose, wait till bearable to the touch, pour into mold. Depending on how high the tape walls are, you can get a decent gel using 2 mL of agarose.
Voila! You now have your own portable miniature gel electrophoresis machine. Because of its low voltage, it's very safe to handle. Be sure to keep the electrodes from touching each other so you don't short circuit it.
Figure 4: Completely modified lamp. As you would notice, the lamp in this picture is a different color. That's because we built three of them, the process being so easy... xP
==> NEVER touch the wires directly when the LED lamp is charging! This is probably the only real risk hazard. We suggest removing the external extensions when the LED lamp is plugged in and charging.
If you bring a sample of DNA, you can run dry electrophoresis on spot as a demo for students. And if you turn off all the lights, the blue bulbs are strong enough to see glowing bands (w/ higher concentrations of DNA and staining agent).
Figure 5: Real-time image of DNA running in agarose gel using DIY electrophoresis machine. Sample stained with SYBR Green I.


